Hello all. In this post, I will be discussing my design process through various experimental sessions and workshops that I took part in alongside my main project. I will showcase all the different techniques I learnt as well as all of the various experiments I did in regards to combining materials and creating new things.
Material Experimentation – Drawing with Bubbles
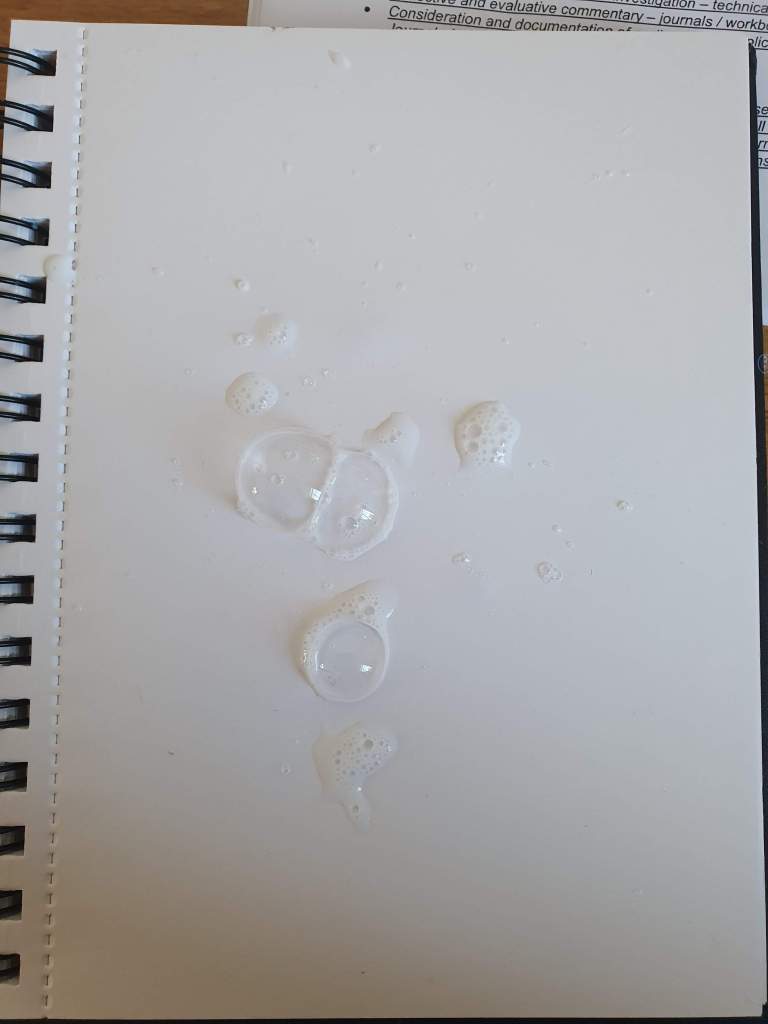
In my first A.C.E session, I was tasked to experiment with materials that were under the rubric of Transparent, Edible and Sticky. With the transparent material, I chose a bubble mixture and wondered if it were possible to draw with bubbles. I made a 2:1 mixture of PVA and bubble mix in hopes that the bubbles would stick to the page. A clear oversight in this creation was that bubbles pop and that adding glue wouldn’t stop the popping from happening. Sadly using this mixture on its own didn’t make too much of an impression but if I were to attempt this again, I would try to incorporate colour so that the technique can be more prominent in its mark-making.

Material Experimentation – Drawing with Macaroni
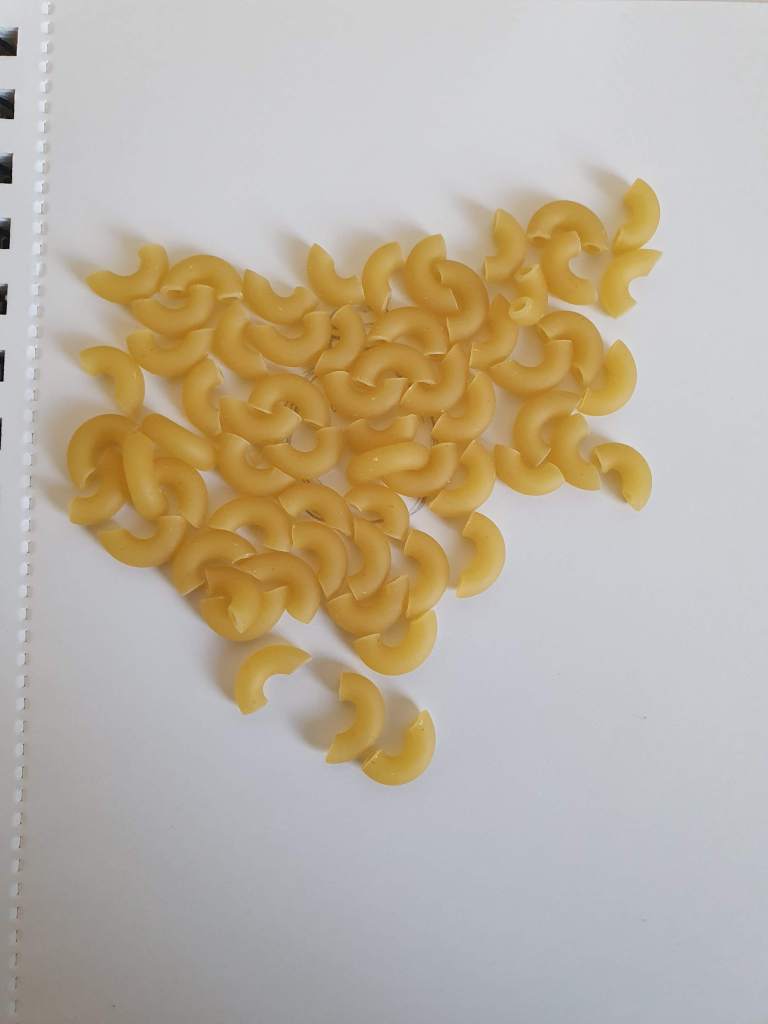
When working with the edible material, I decided to work with macaroni to see what kind of patterns I could make with it, After fiddling around with handfuls and seeing what I could do, I noticed that the shapes made by the mounds were quite interesting. That is when I decided to take one handful of macaroni at a time and close my eyes when placing it onto the page so I wouldn’t know what kind of shape it would make. I would then trace around the shape the best I could and repeat the process over and over, layering the shapes on top of each other to see what kind of form came out. I really enjoyed this drawing technique and definitely will attempt it again in the future when trying to experiment with shapes.


Material Experimentation – Playing with Adhesive
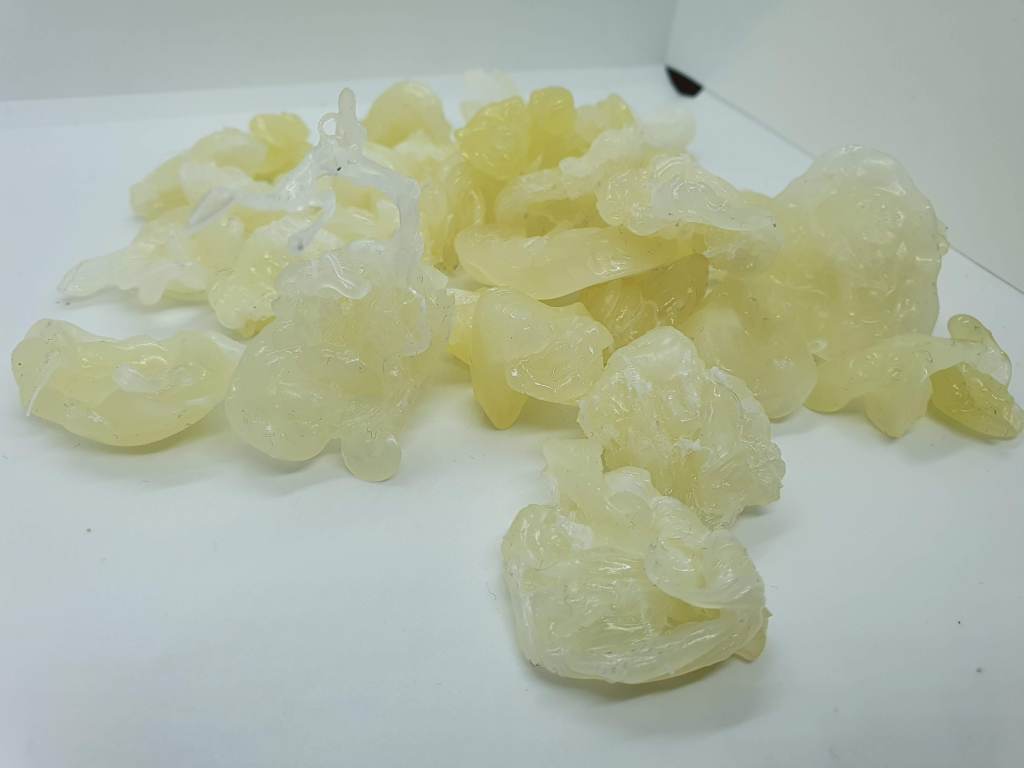
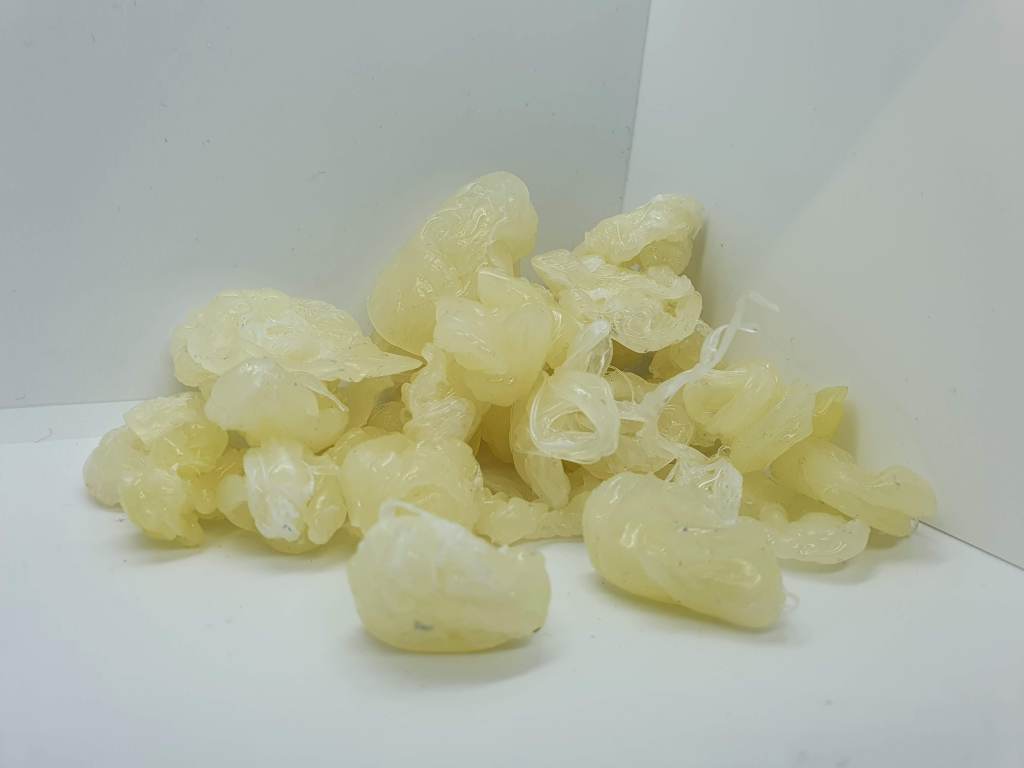
When working with the sticky material, I wanted to see what would happen if you were to combine a hot and cold adhesive together. To create this, I mixed a 2:1 PVA Glue and Cold Water solution and proceeded to add glumps of hot glue into the solution. Once the hot glue was added, I mixed the two things together with a toothpick until a shape was fully formed. I kind of got a bit obsessed with this process and spent the whole day just mixing the two adhesives and ended up with a collection of different clumped forms. I loved this technique and found a strange jewel quality in the forms I made. I hope to explore this technique in the future and see what kind of things I can make with these objects.
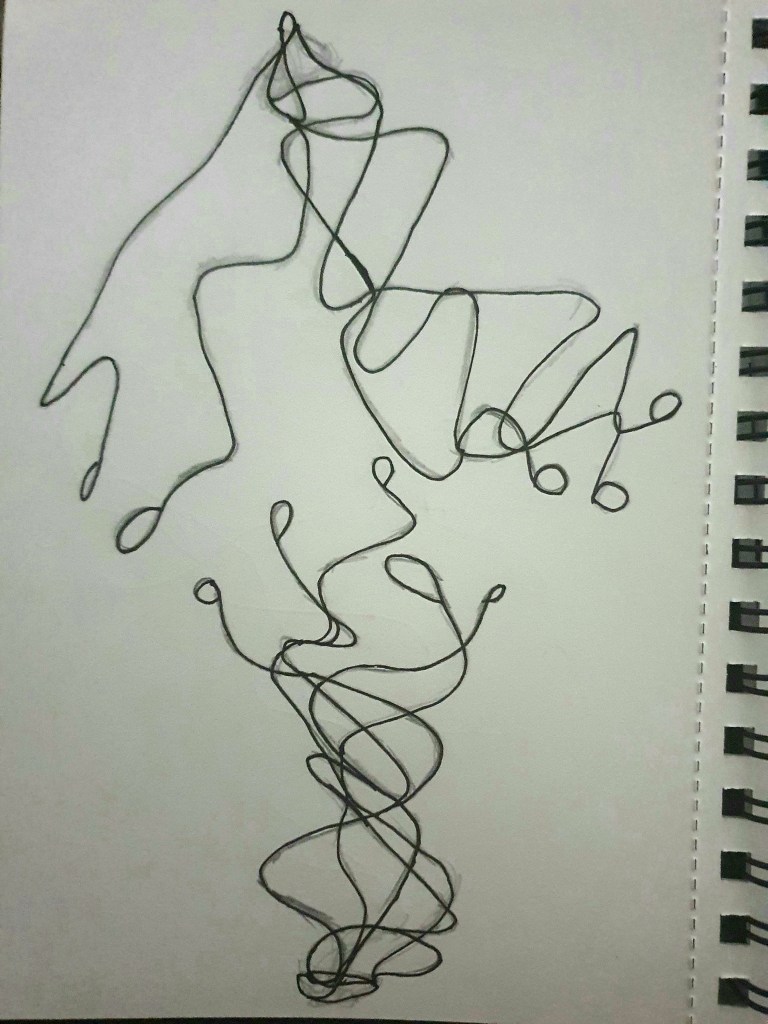
Drawing Exercises – Experimenting with Mark-Making
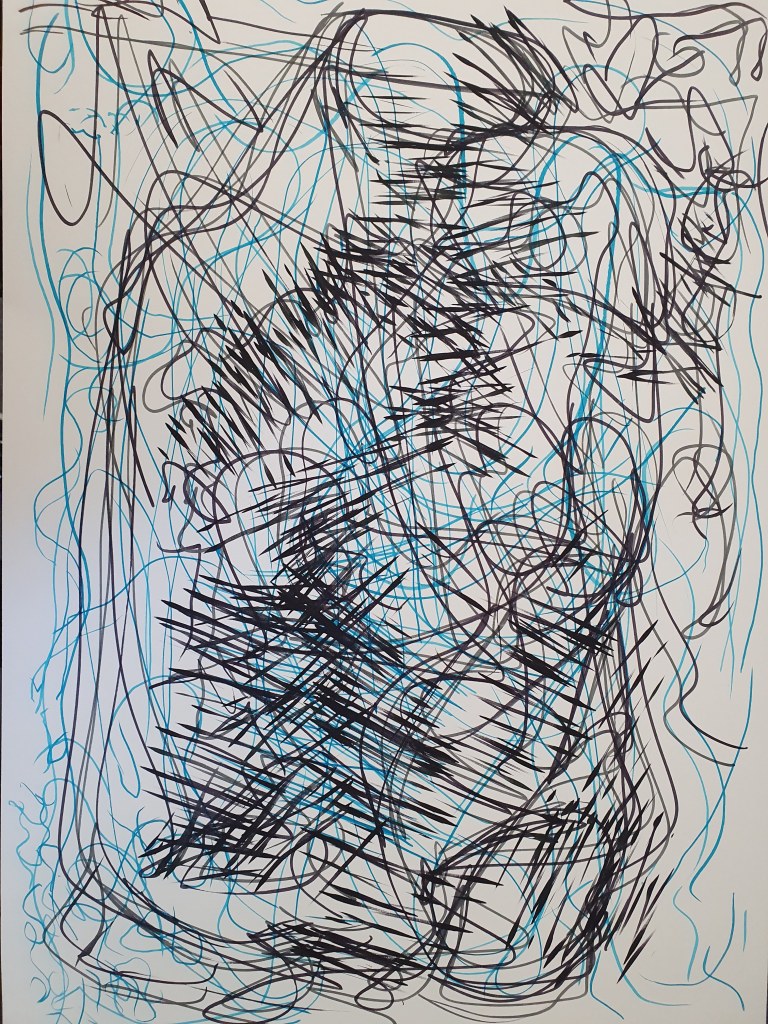
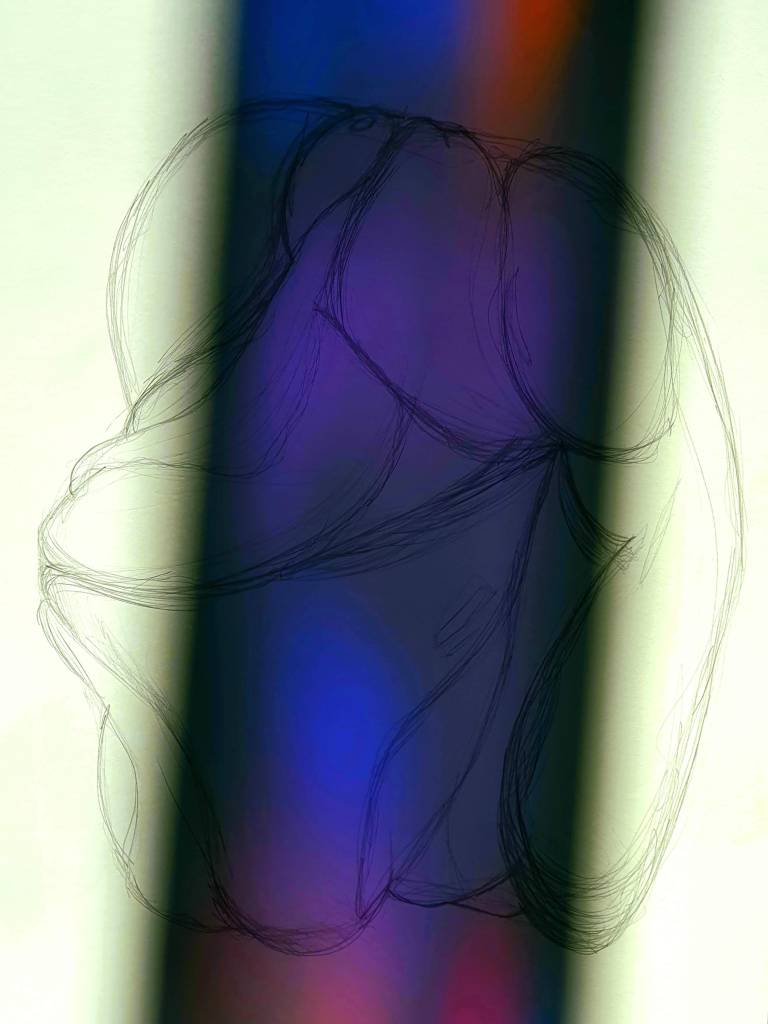
As a drawing exercise, I was tasked to experiment with mark-making and scale. Rather than working on the small scale that I am so used to, I decided to expand my horizons and go large in scale for this exercise. I first used a black pen and made bold sharp marks and to contrast this I then used a blue pen to make more fluid marks on top of the black. In my opinion, I wasn’t sure what I was meant to be drawing in this exercise and seemed like a massive waste of ink at the time. However, I like the piece that I made in the end and drawing exercises like these are always a fun way to spend a day.
Drawing Exercises – Playing with Shadow
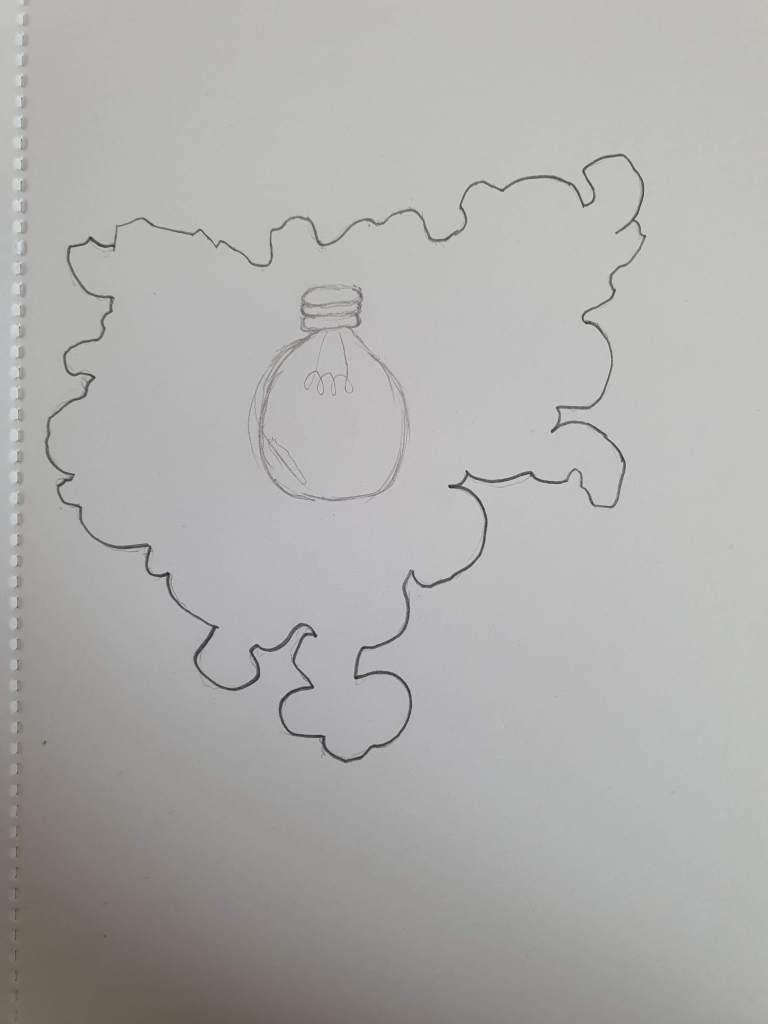
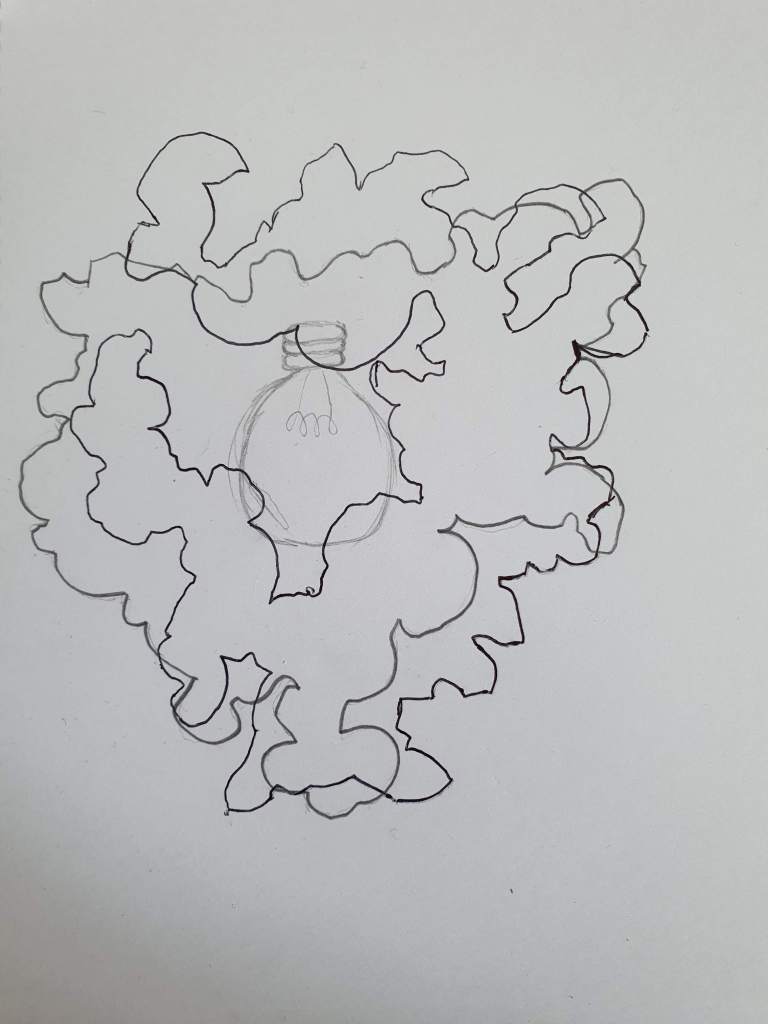
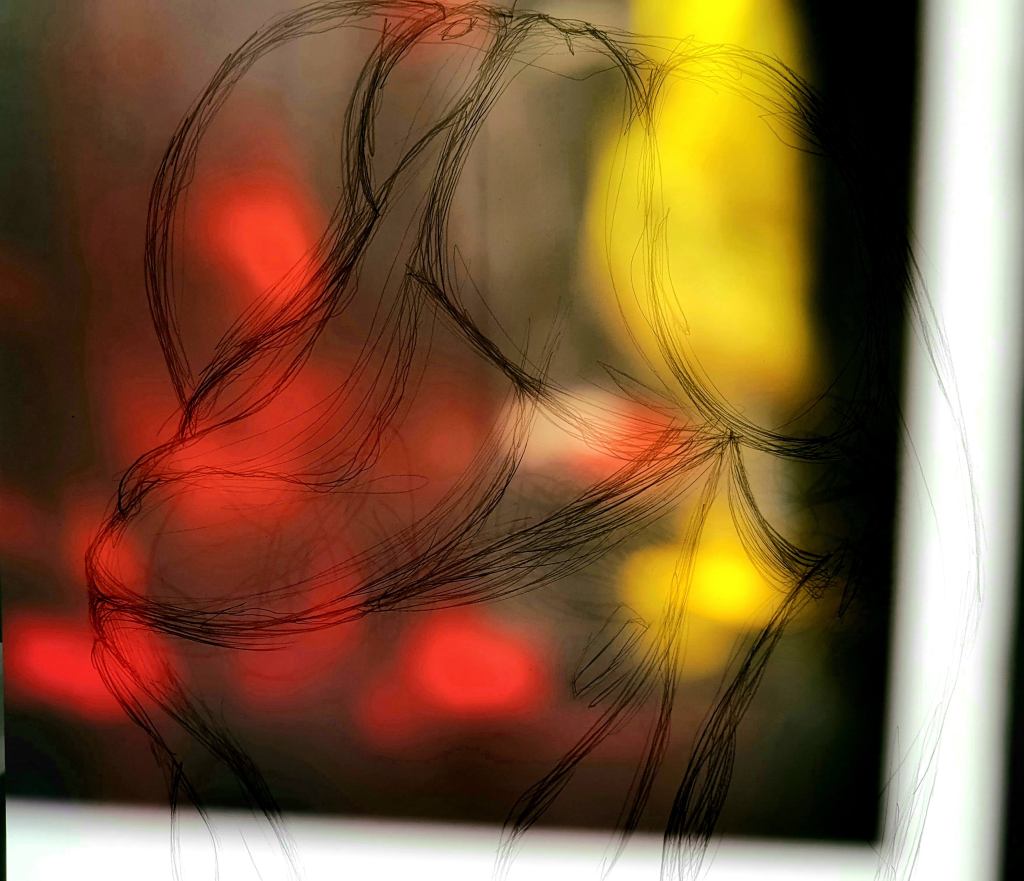
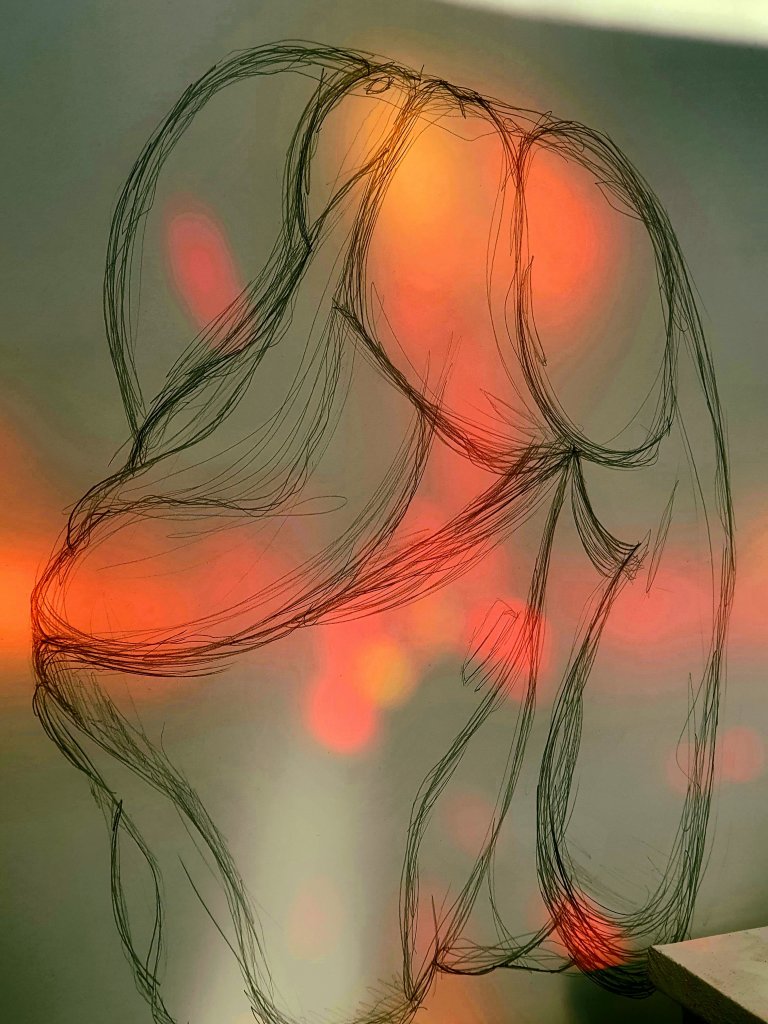
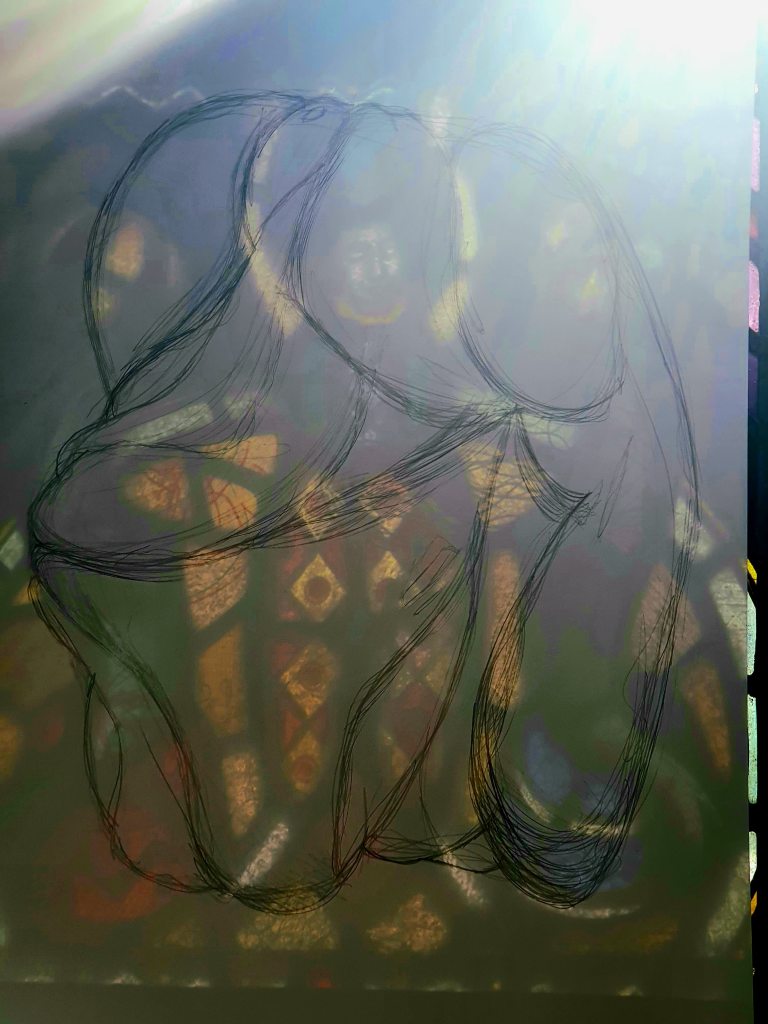
When using scale in the drawing exercise, I chose to take something small and draw it on a bigger scale. I decided to take one of the adhesive clumps I made in the previous session and draw it up on a large piece of paper. However, on this particular day, the sun was shining in such a way that the hallway full of stained glass was casting these beautiful shadows that I wanted to layer onto my drawing and see what kind of looks I could create.
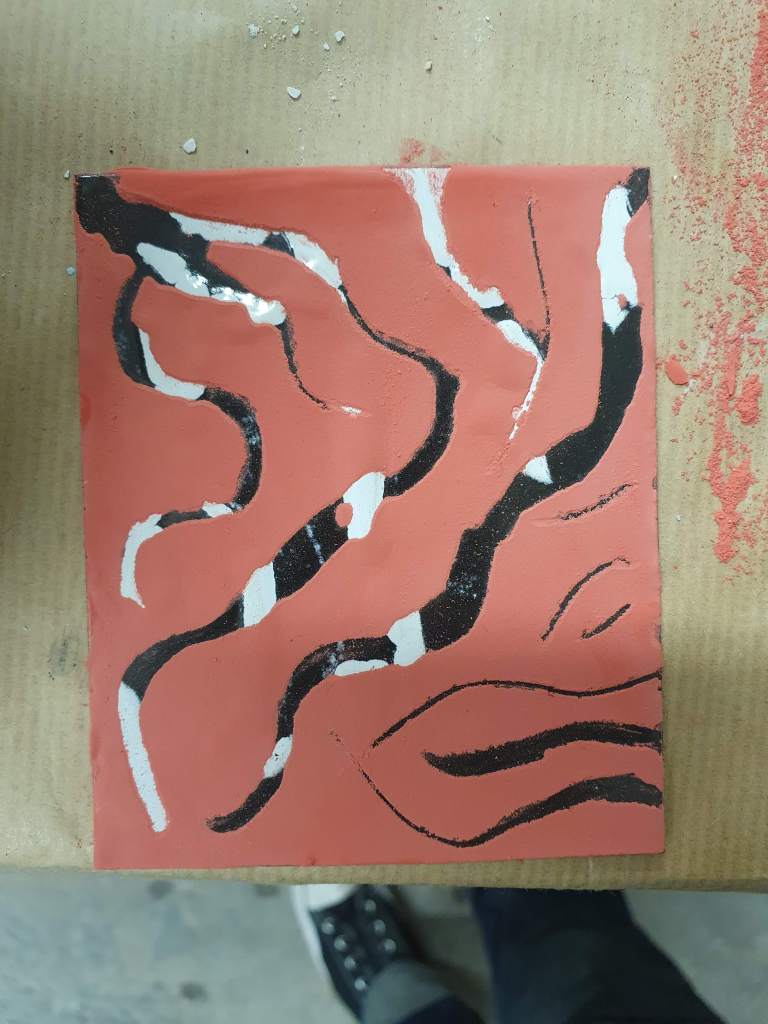
Metal Enamelling Workshop – One Layer
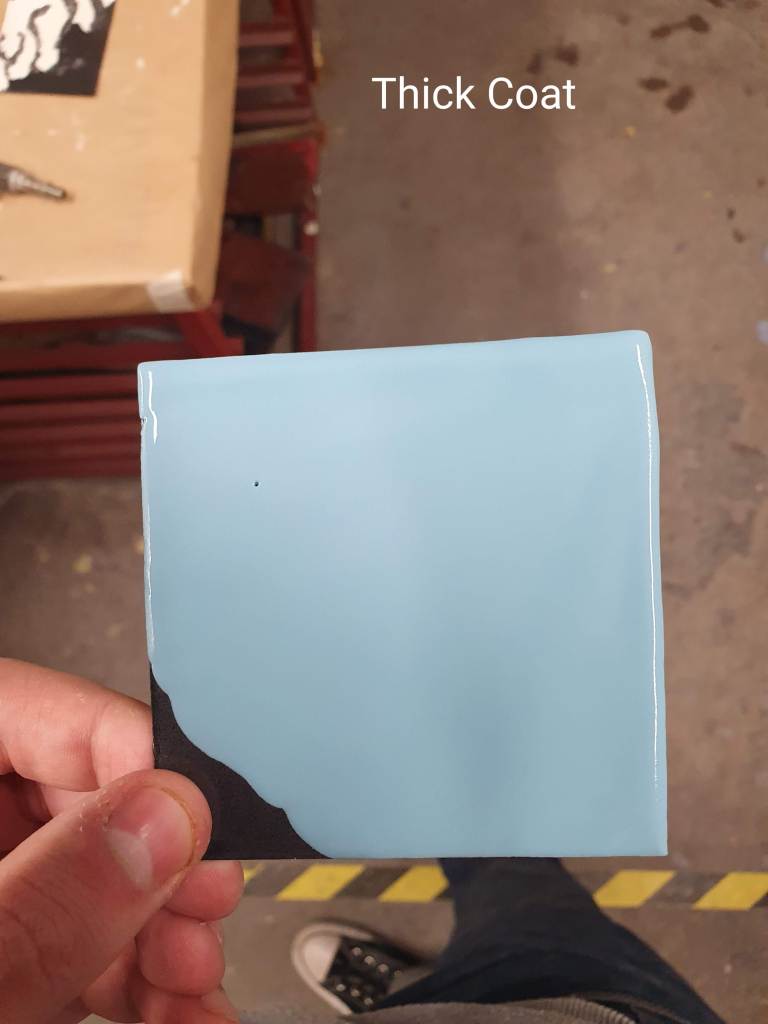
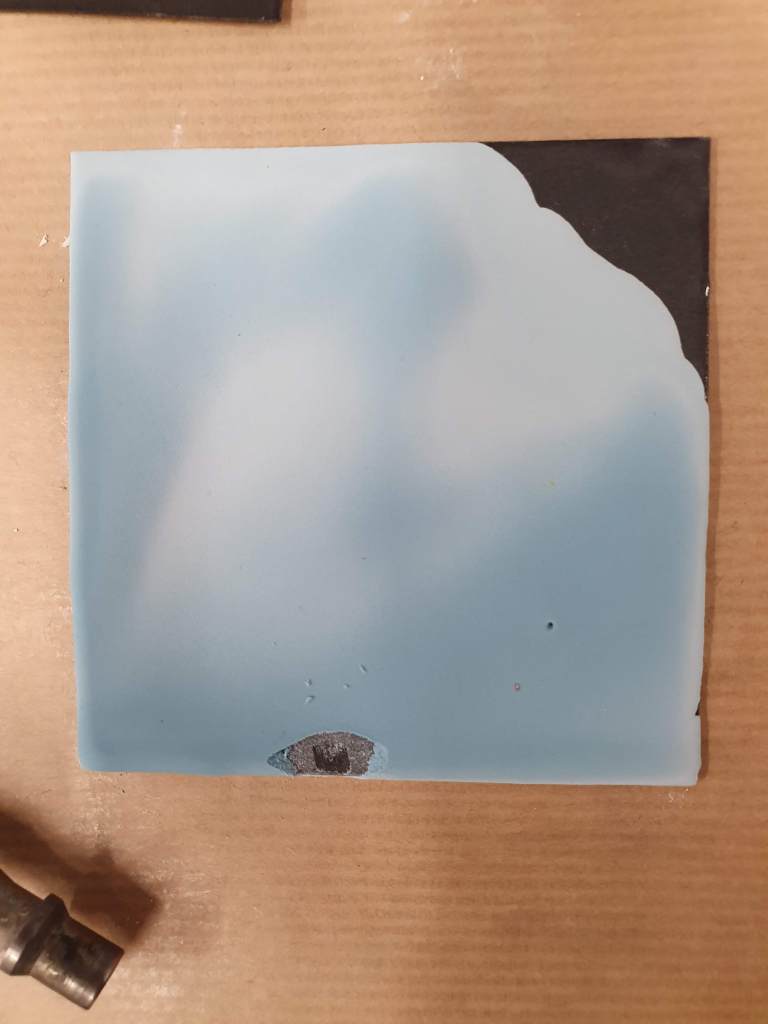
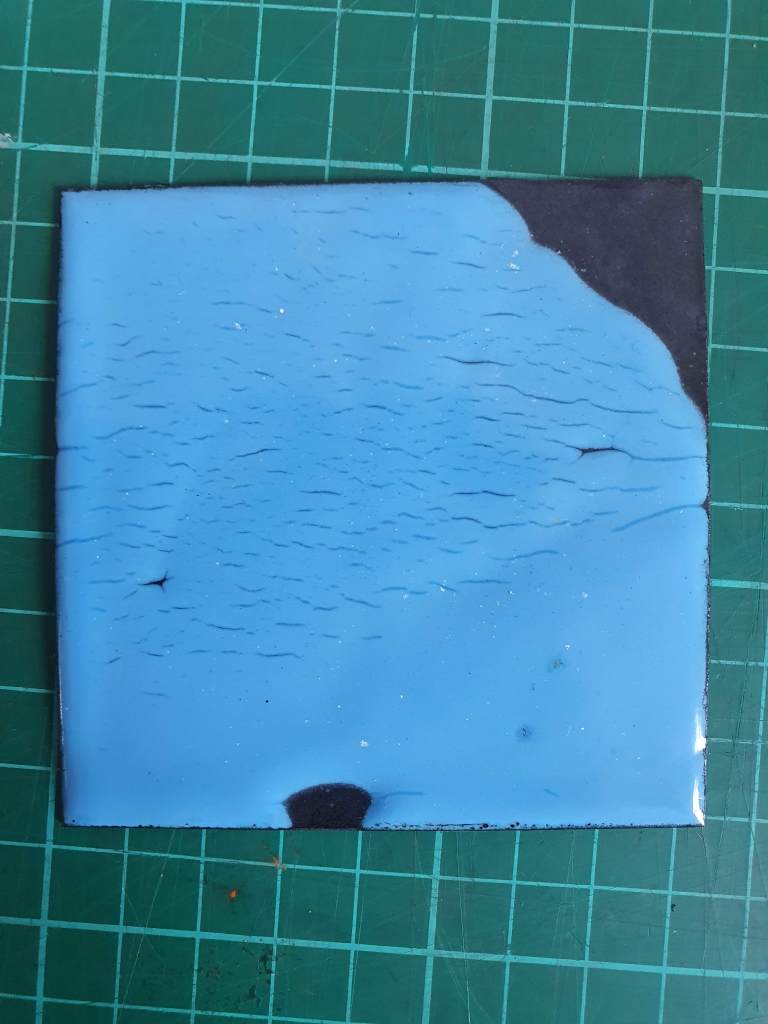
When working with metal enamelling, I knew that it would be a technique that I wouldn’t get into due to the use of loud machinery being a key component when preparing the metal to have a grip for the enamel. However, I still wanted to utilise my workshop time and see what kind of uses enamelling can have. I started this by preparing an enamel mixture by combining liquid enamel with water. I have been told there is no ratio with this mixture as it is a gut feeling to know what consistency the mix needs to be (Described as gone off yoghurt consistency). I wanted to experiment with layering and see what kind of things I could do so to start I used one layer of dripped enamel. When drying the mixture with a hair dryer, I chose to overly dry it in certain places rather than evenly drying the whole thing to give it more of an icy look (As seen in the middle picture). After it fired in the kiln, the piece unfortunately lost its icy look that it originally had but gained a lot of cracks which in my opinion benefitted the look of the piece due to it looking like a large flock of birds flying through a cloudless sky.
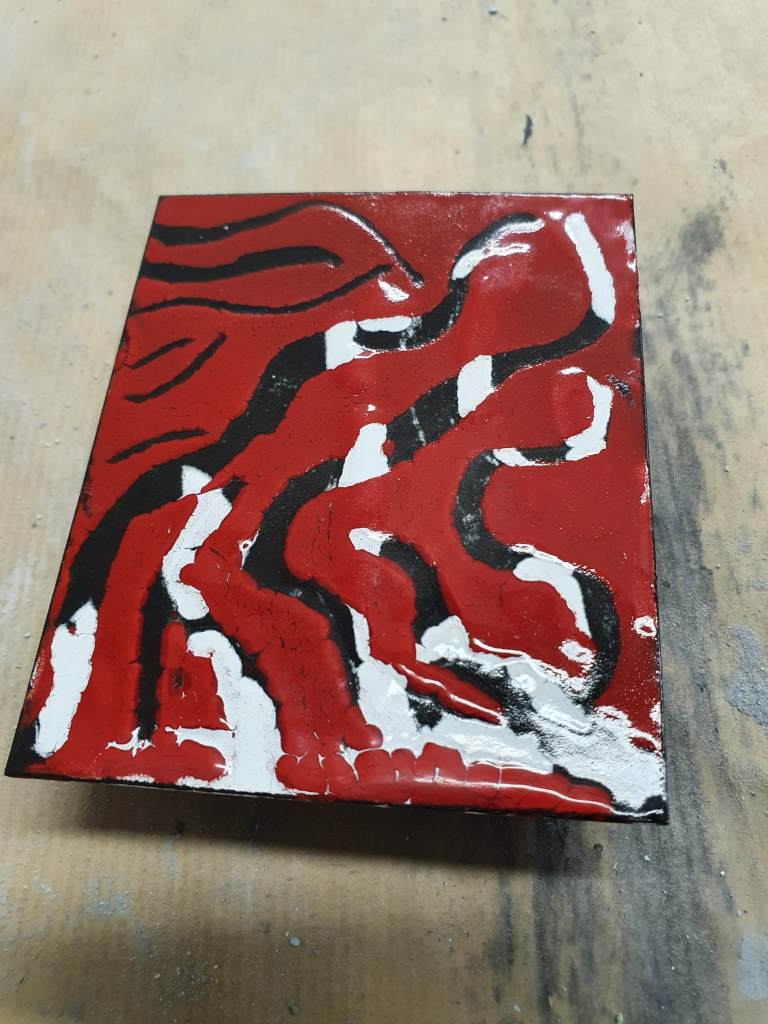
Metal Enamelling Workshop – Multiple Layers
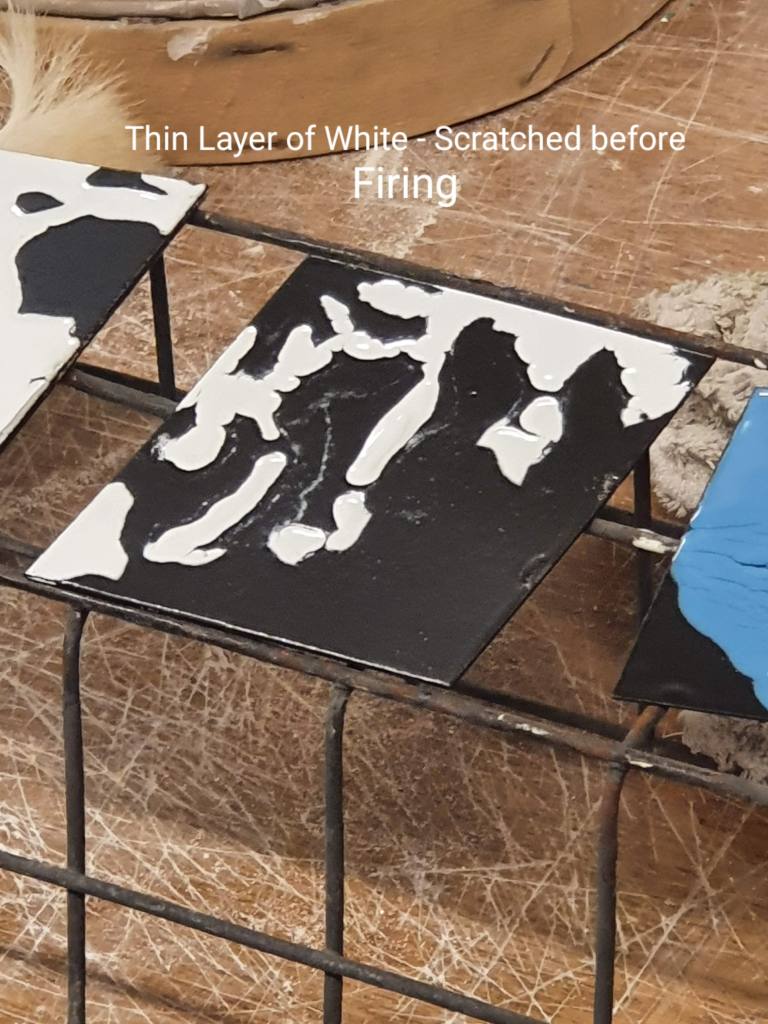
With my second attempt at enamelling, I wanted to see what multiple layers looked like on a piece. To showcase this, I first applied a thin layer of white enamel and scratched away parts of it after drying the enamel with a hair dryer. After I let that first layer fire, I then applied a secondary layer of red enamel and proceeded to scratch away a similar pattern that I did on the first layer. Once that secondary layer was fired, I was able to see what kind of look multiple layers can have on a piece and was pleased with the result.
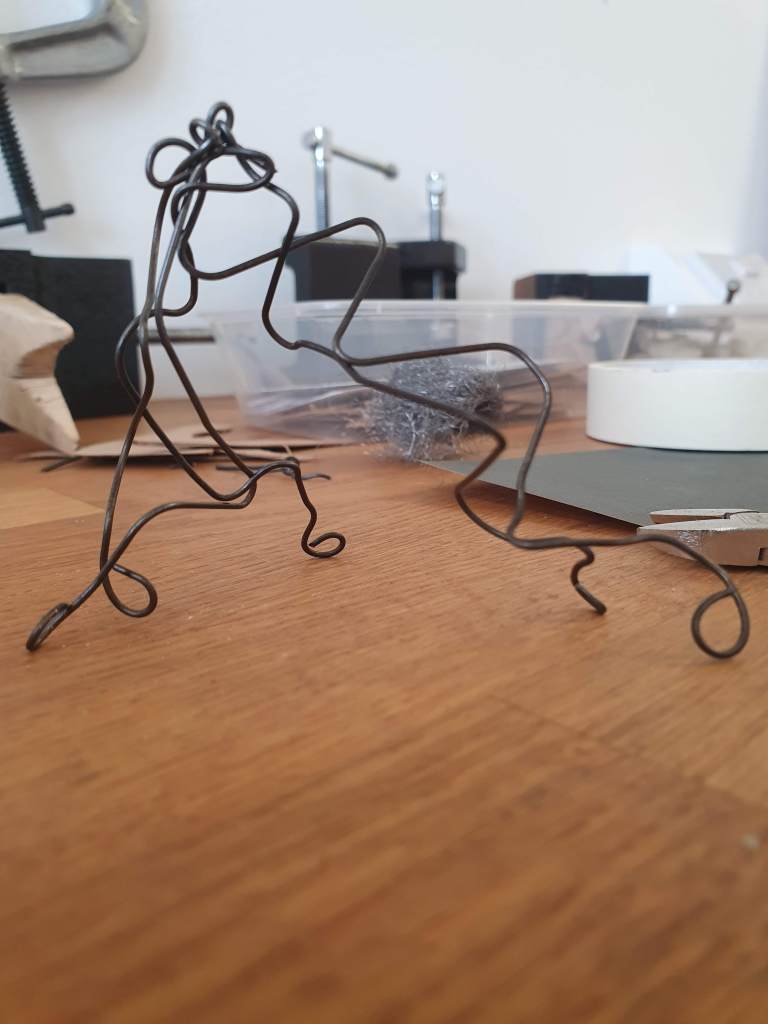
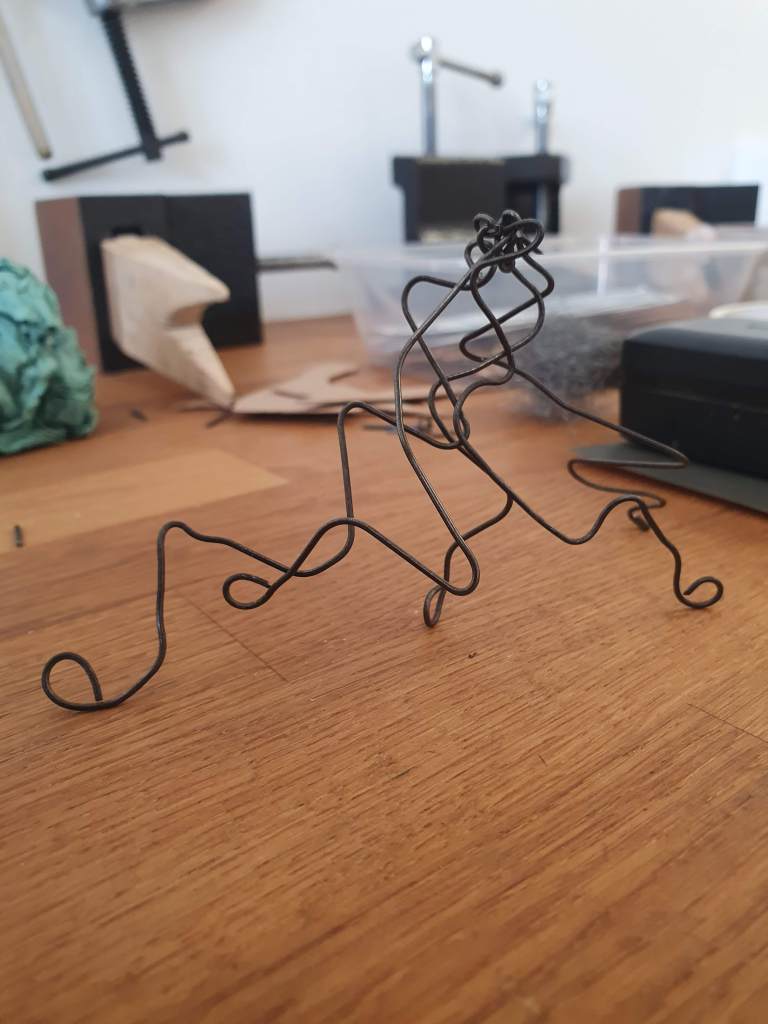
Spot Welding Workshop – Creating “Spindles”
When introduced to the technique of spot welding, I wanted to work in multiples and see what kind of thing I could make when combining multiple elements together. After making various tendril-like shapes, I joined them all together to create a spindle-type form that can be repositioned to make many different shapes.
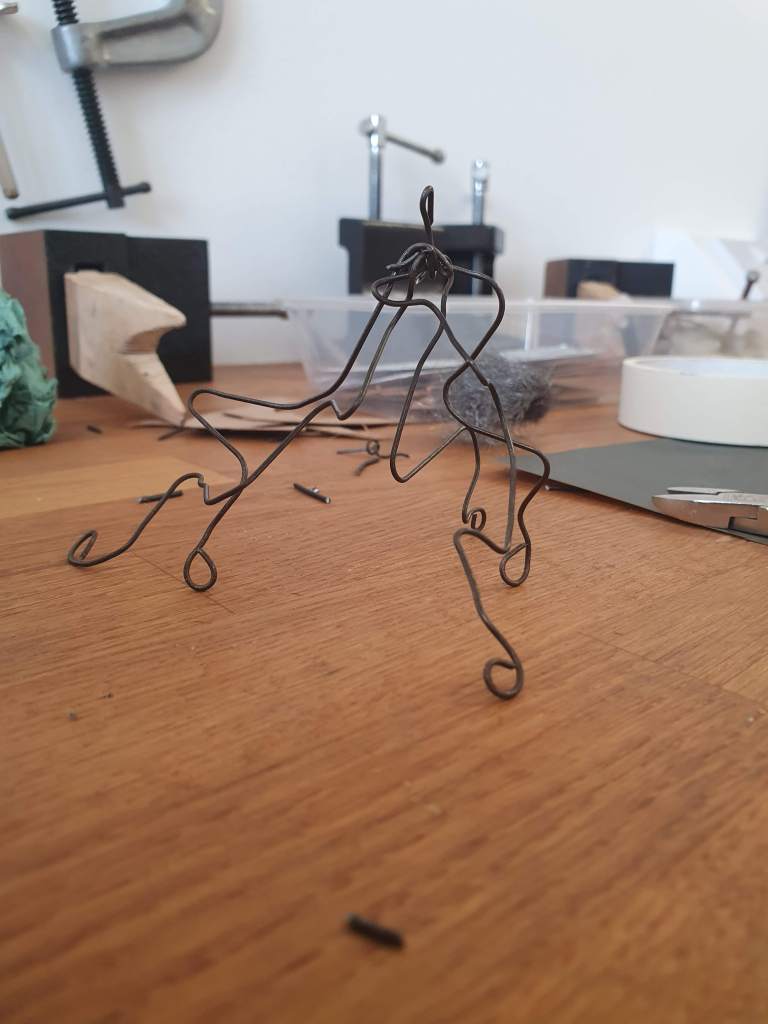
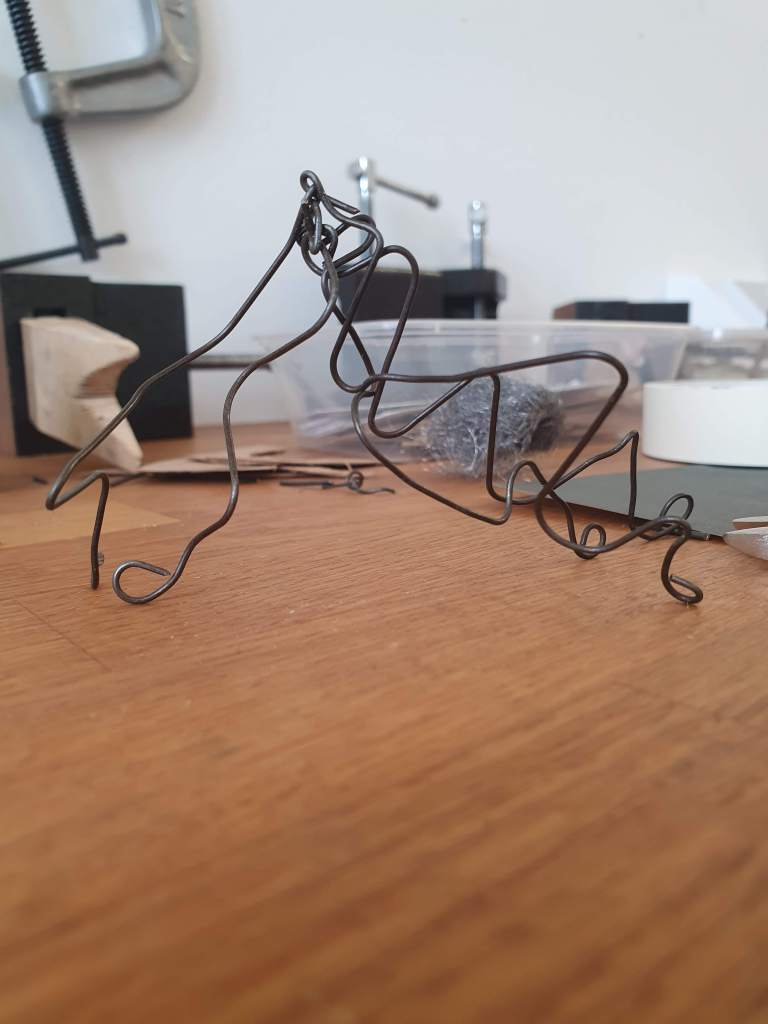


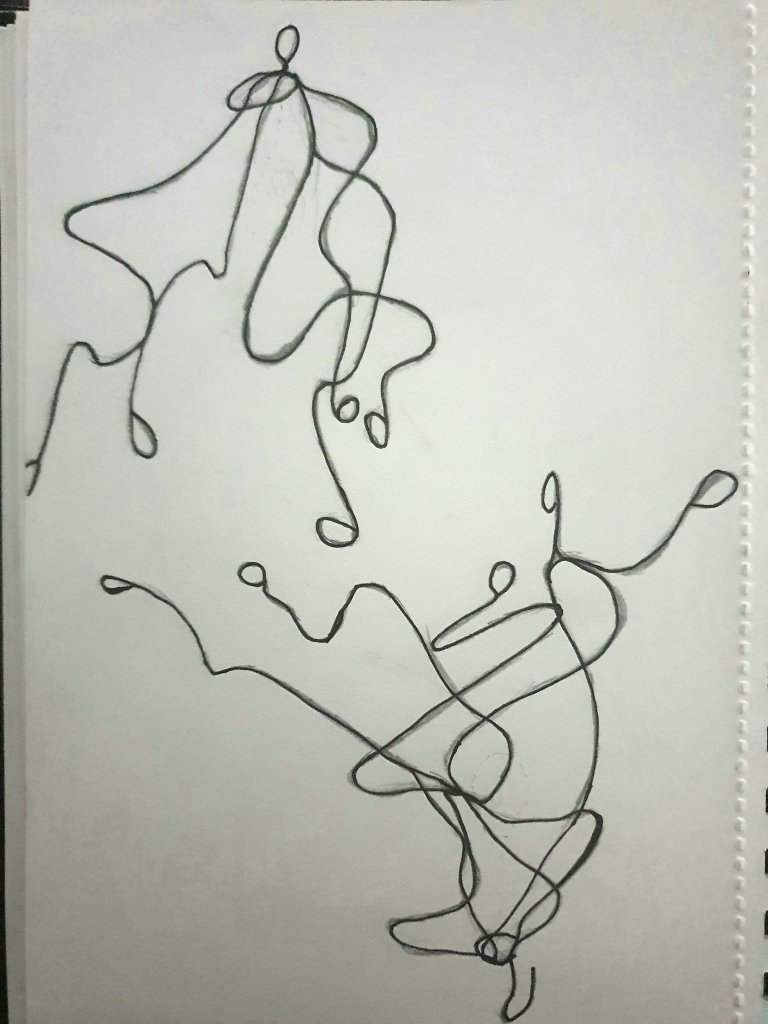
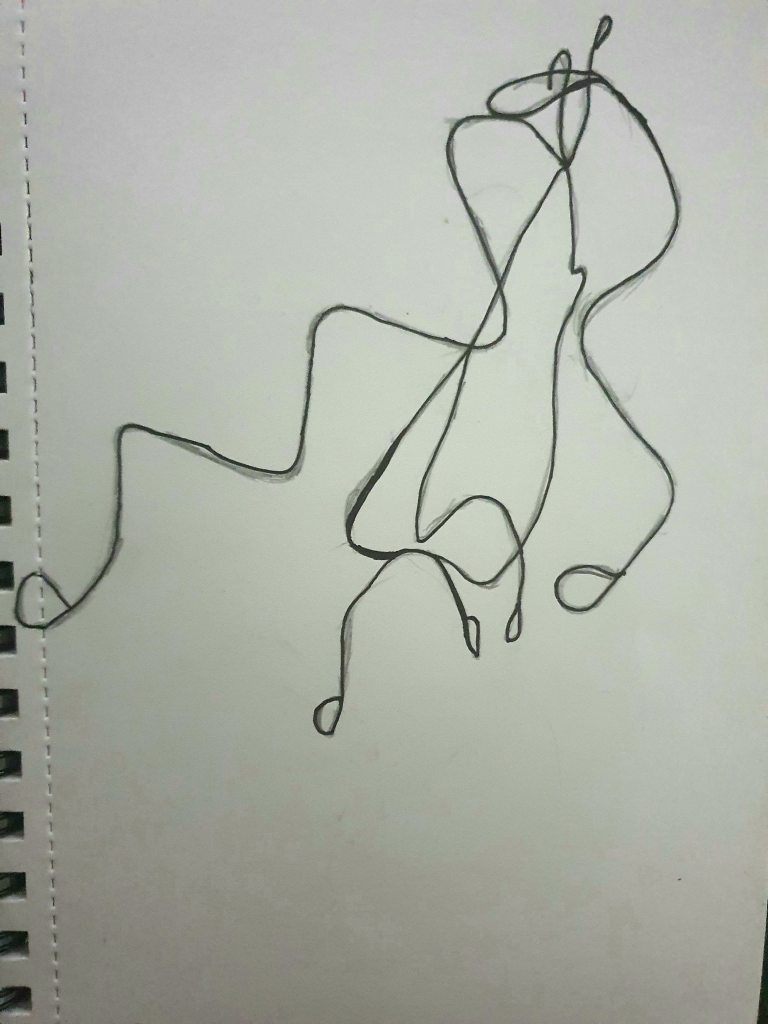
Spot Welding Workshop – Spindle Sketches
After creating my spindle form, I took sketches of some of their various positions to see what kind of shapes I could make. A lot of the shapes I found interesting inspired my thoughts on how they could be transformed into light fixtures. I figured the spindle forms could be used as wireframes for lampshades to create a more chaotic lamp as well as create more strange shadow forms
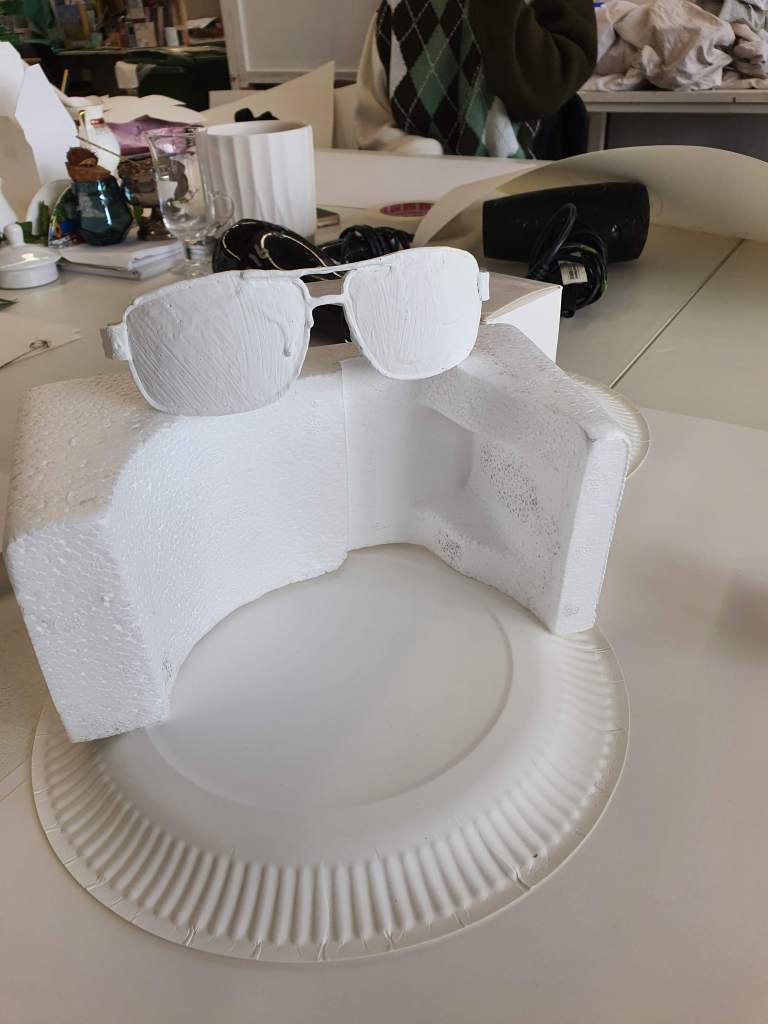
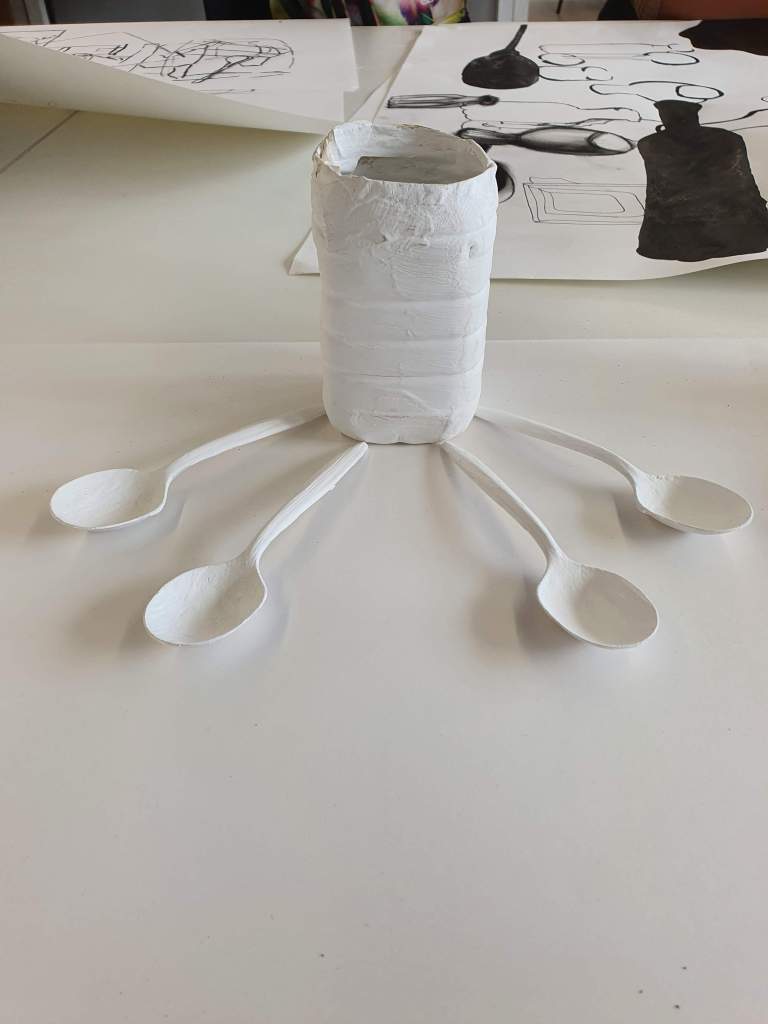
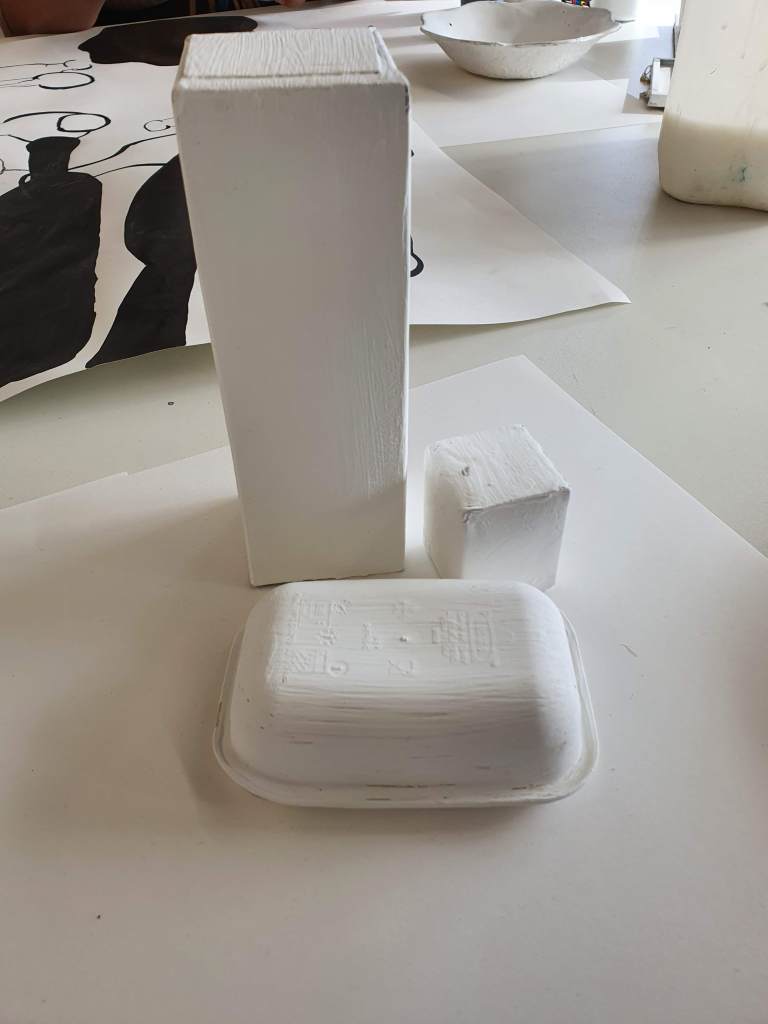
Combined Tasks with Surface Pattern – Experimenting with White Objects
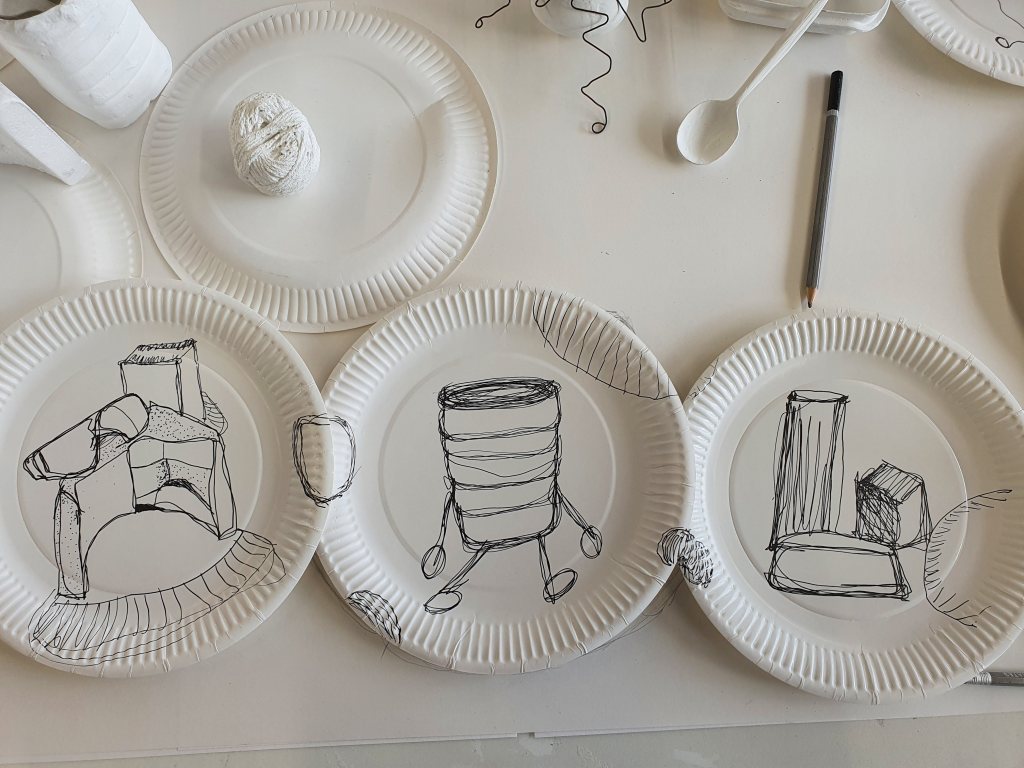
When working with the Surface Pattern class in joint tasks, our first session was set around being tasked to bring in emulsion white objects to draw from and potentially onto. Thankfully I already had emulsified objects from a previous project so I was able to bring in some strange items to draw from along with a large quantity of paper plates. With those items, I set them up and composed a varied still life that took place in 3 core sections.
Combined Tasks with Surface Pattern – Drawing on Plates
From this still life, I wanted to make a drawing response more full of depth when drawing from the still life. That is why rather than using the large sheet of paper assigned to me, I drew on the paper plates that I brought with me. This allowed me to have a collection of drawings outside of my sketchbook but also small enough to be able to easily showcase and carry.
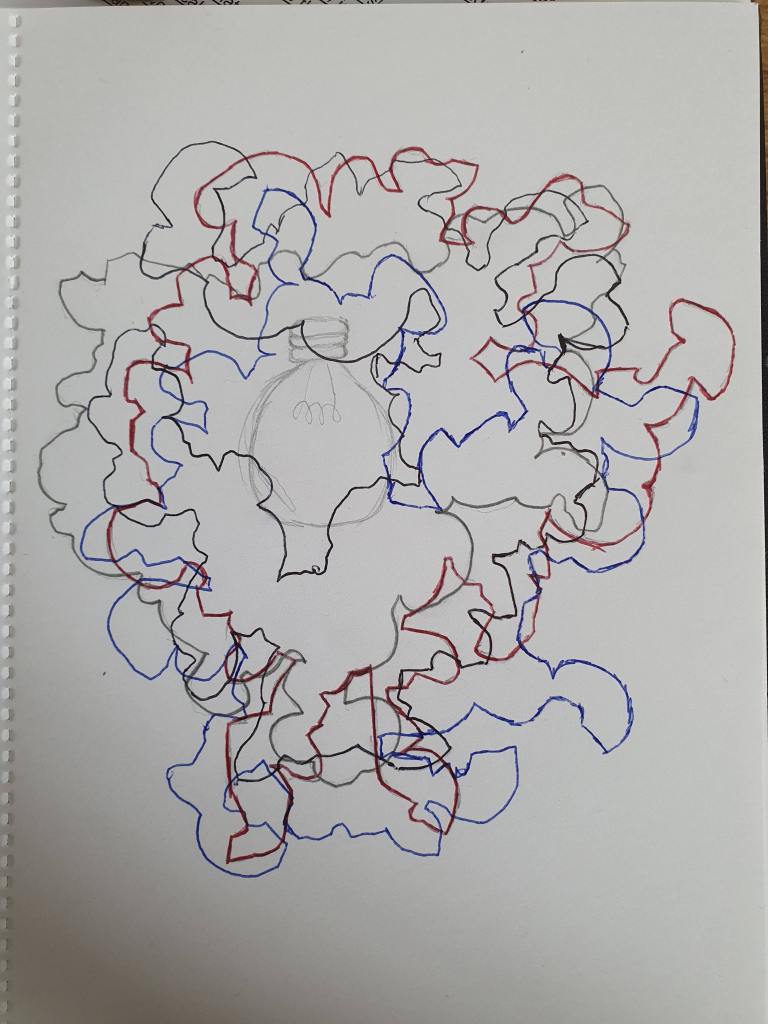
Combined Tasks with Surface Pattern – Still Life Interpretation
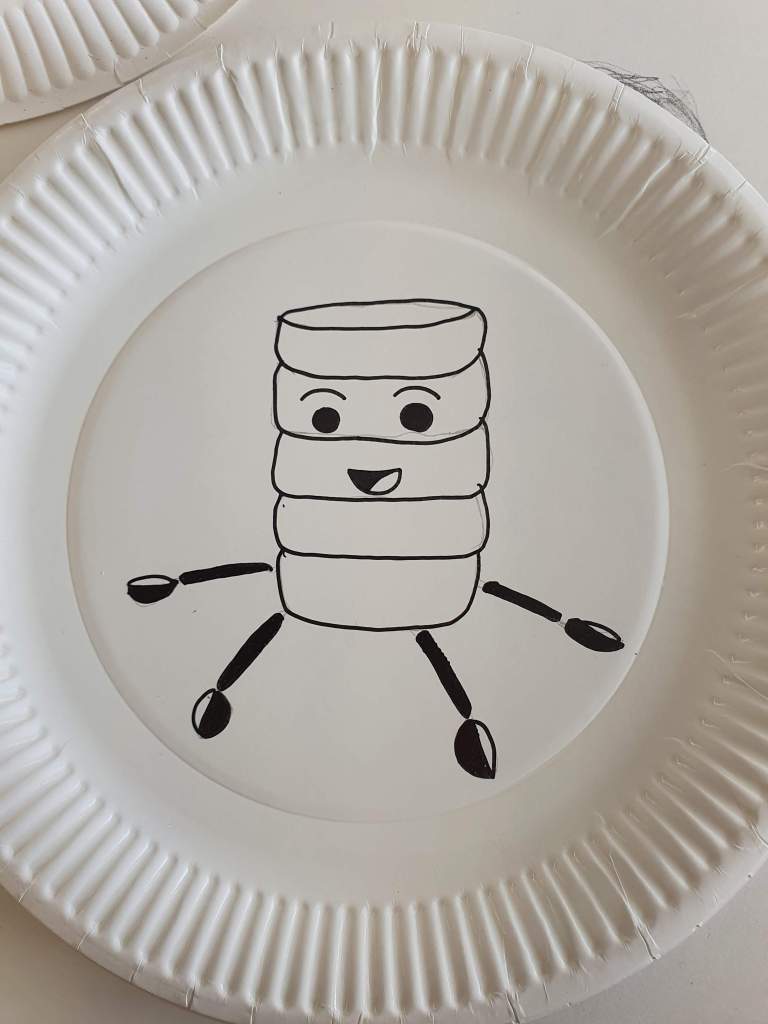
When looking at the still life, my mind kept envisioning the objects in certain ways and couldn’t help but draw them. On the left, I saw the spoons as a potential light fixture that held bulbs coming out from a wall pendant. On the right, I created a character known as Bib who is full of life and is always happy to help others.

Combined Tasks with Surface Pattern – Cutting Paper Forms
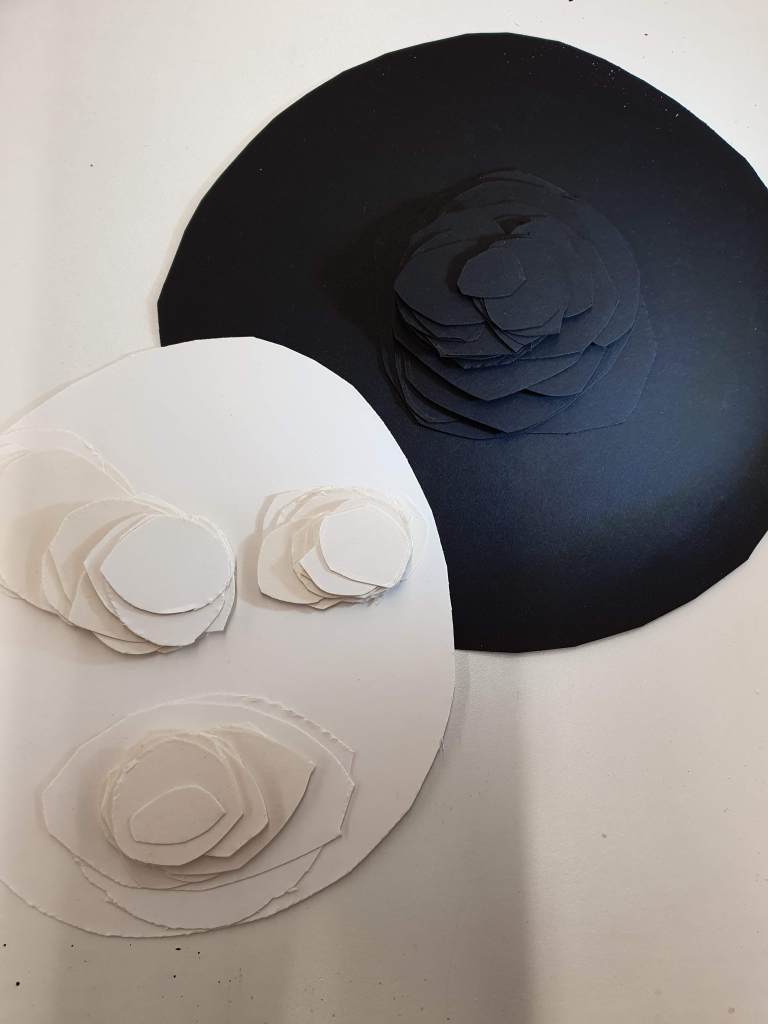
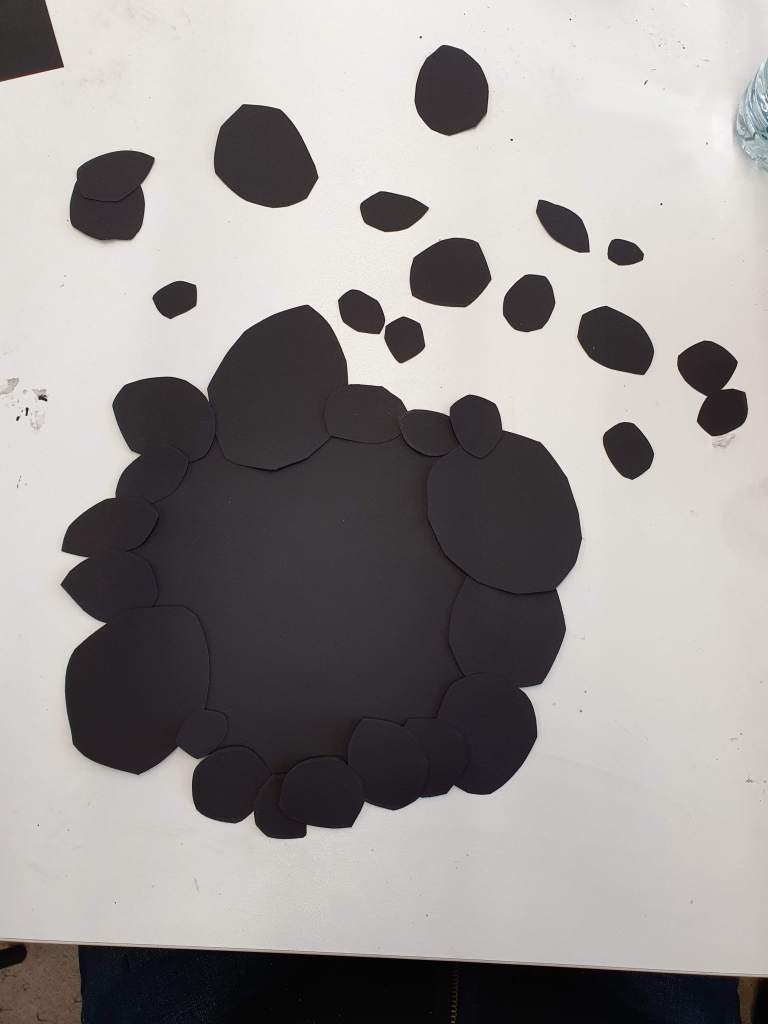
In our second session with surface pattern, we were tasked to draw with silhouette and shadow so rather than just working with white objects we would be implementing darkness into our creations. However, on that particular day, I thought it would be best to work in repetition and cut out a ton of oval shapes to use in future collage pieces.
Combined Tasks with Surface Pattern – Paper Collage
With the paper cuttings I took from the final surface pattern session, I assembled them to go alongside the early designs I had for a celestial being-themed light fixture where a tendril holding a ball of light would come out from a wall pendant that has the facade of a spacescape. I recreated the design by layering pieces of paper on top of each other to create a base for the pendant and inserted a clay-fired piece I made when working with ceramics to complete the collage.

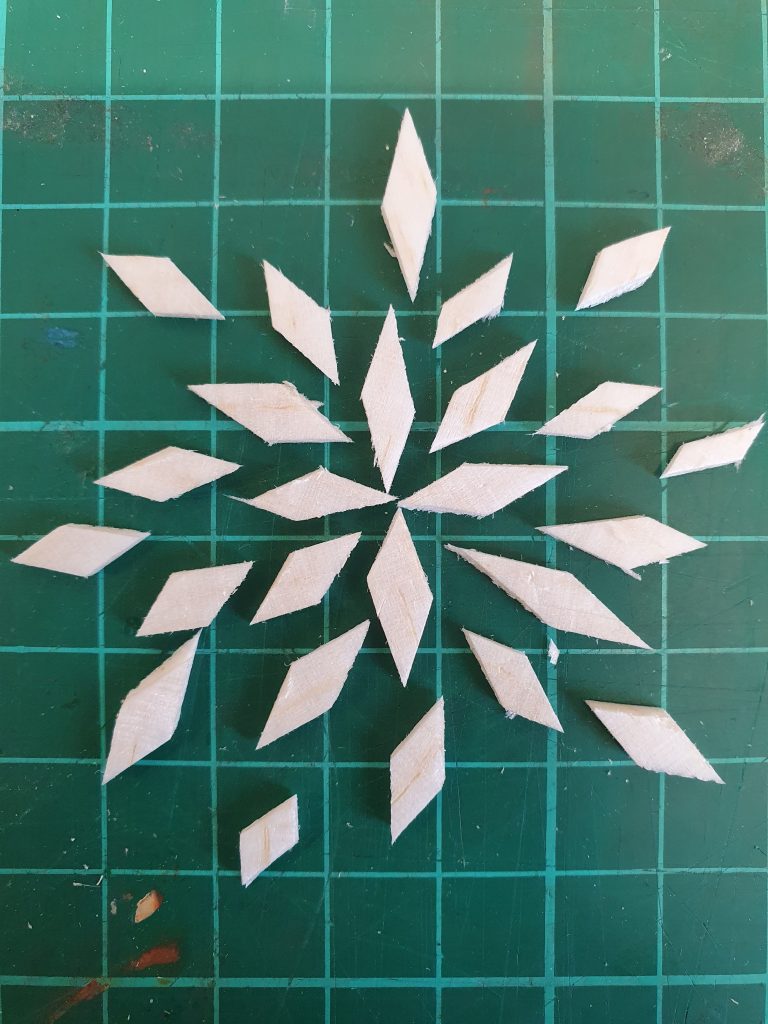
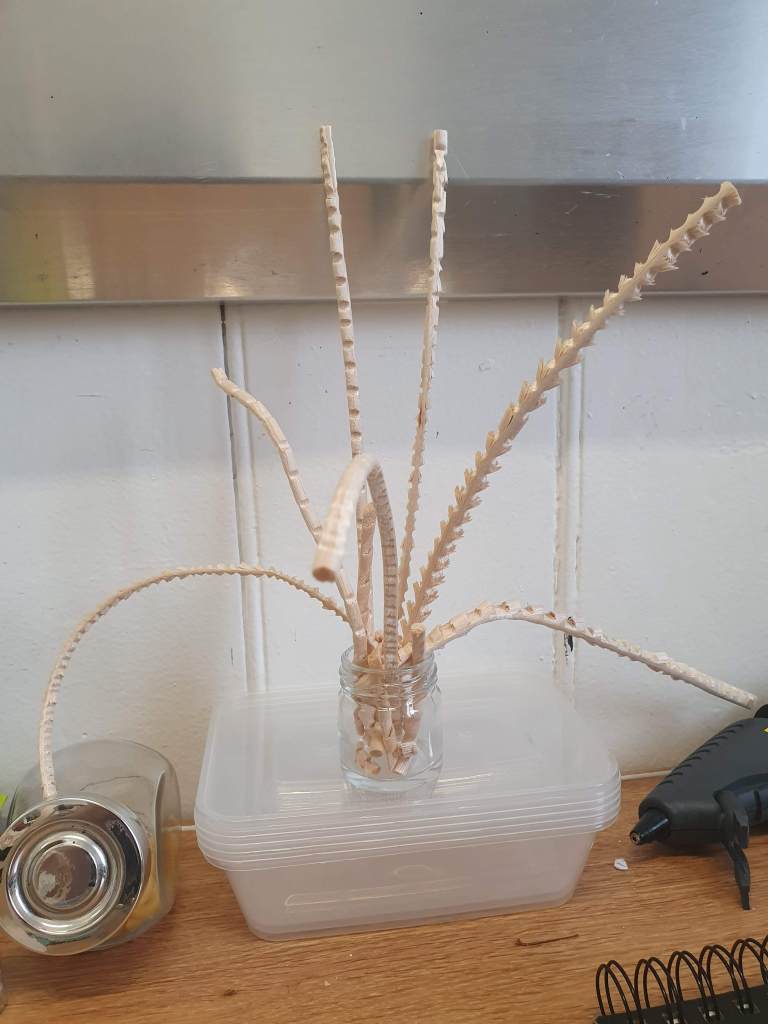
Working with Balsa Wood
When working with balsa wood, I didn’t really want to combine the sticks to make forms as it didn’t really sit well with me and I wasn’t really sure what kind of forms to make. Essentially I spent this ACE session chopping the pieces of wood into various shapes and collaging the pieces into different forms. I also tested out mark-making by imprinting the wood with all the tools I had at my desk which ended up becoming a fun strange skeletal tree that sits on my desk.

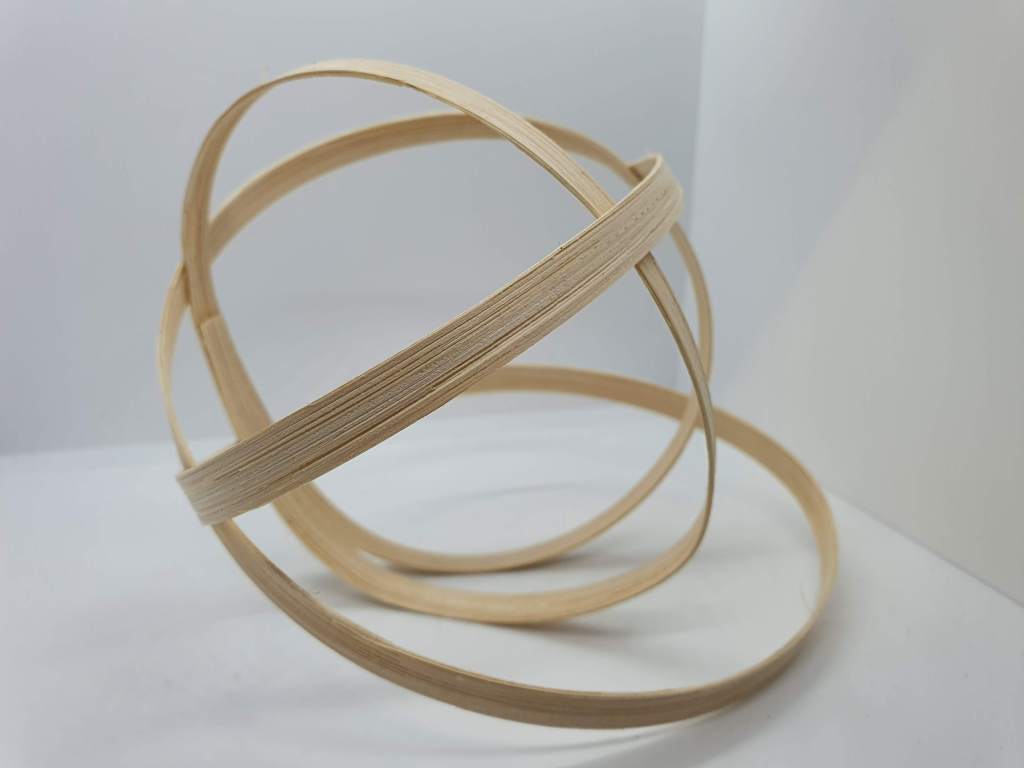
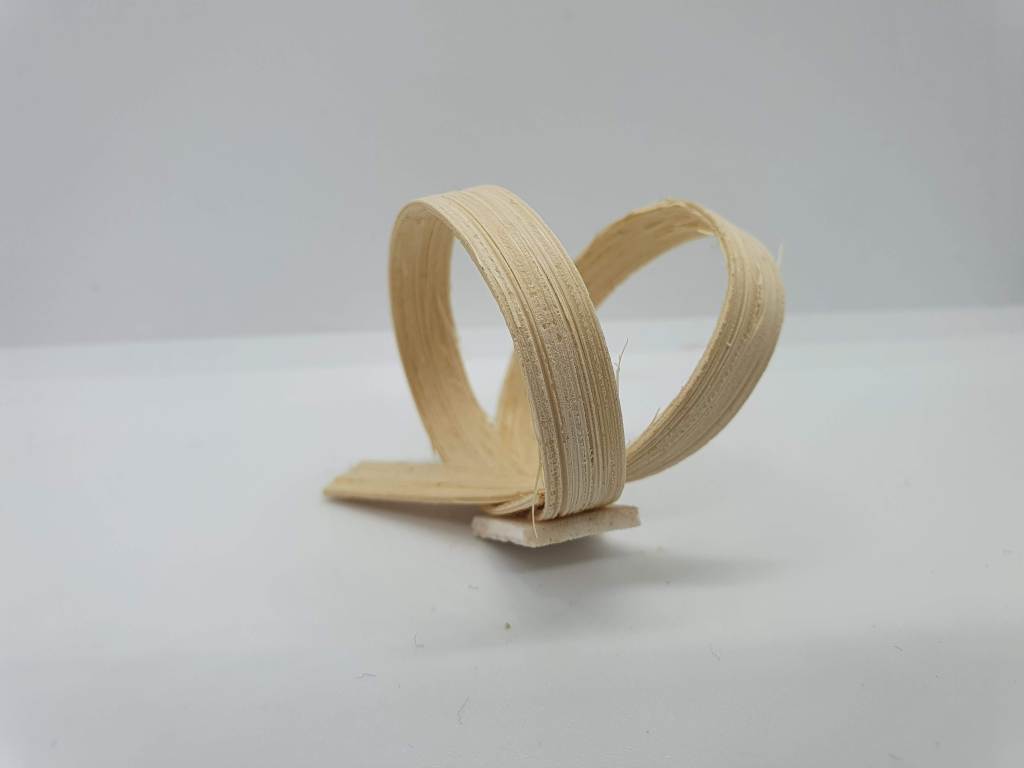
Working with Ratan
When working with Ratan I had an easier time figuring out what kind of shapes I could form when compared to how my thinking was when working with Balsa. I decided to work with loops and attempted to make neverending pieces. I started by taking water-soaked ratan and curving it over and over into a spherical form, glueing down the places where the ratan intersected and securing the points with pegs for the glue to dry over a few days.
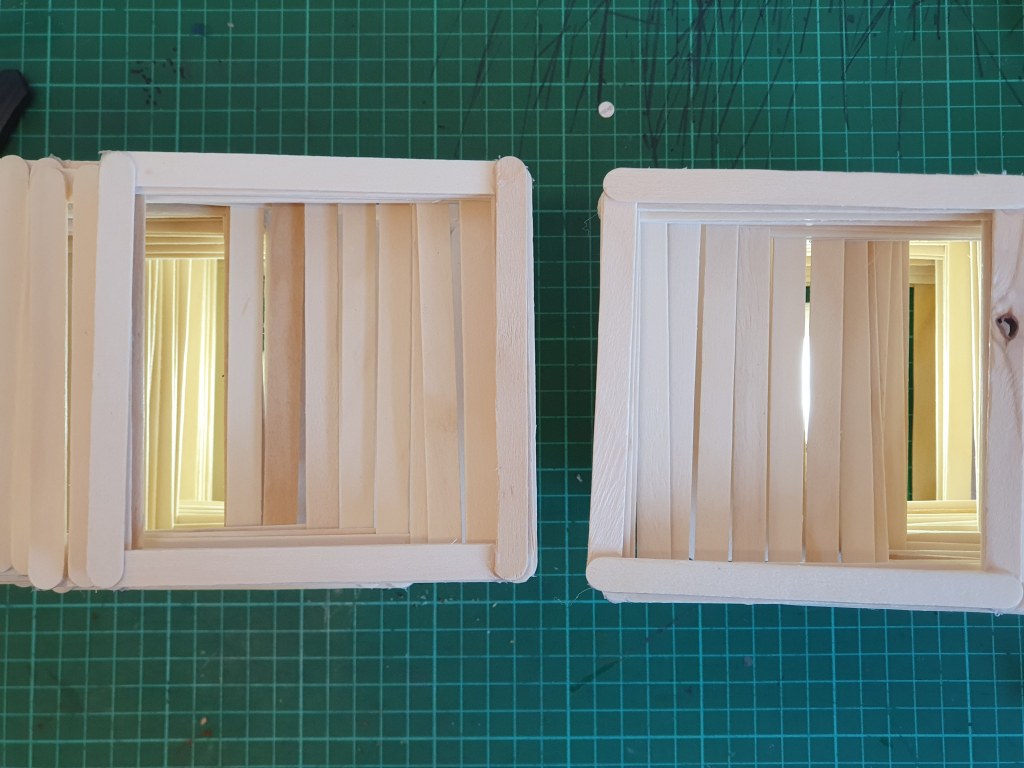
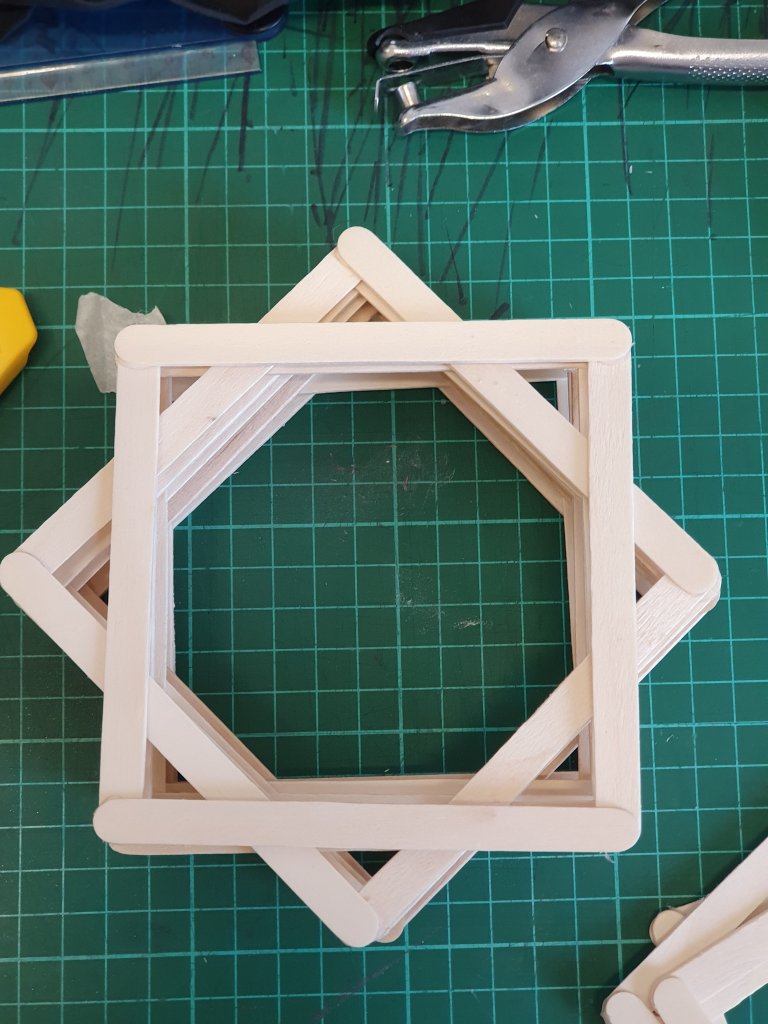
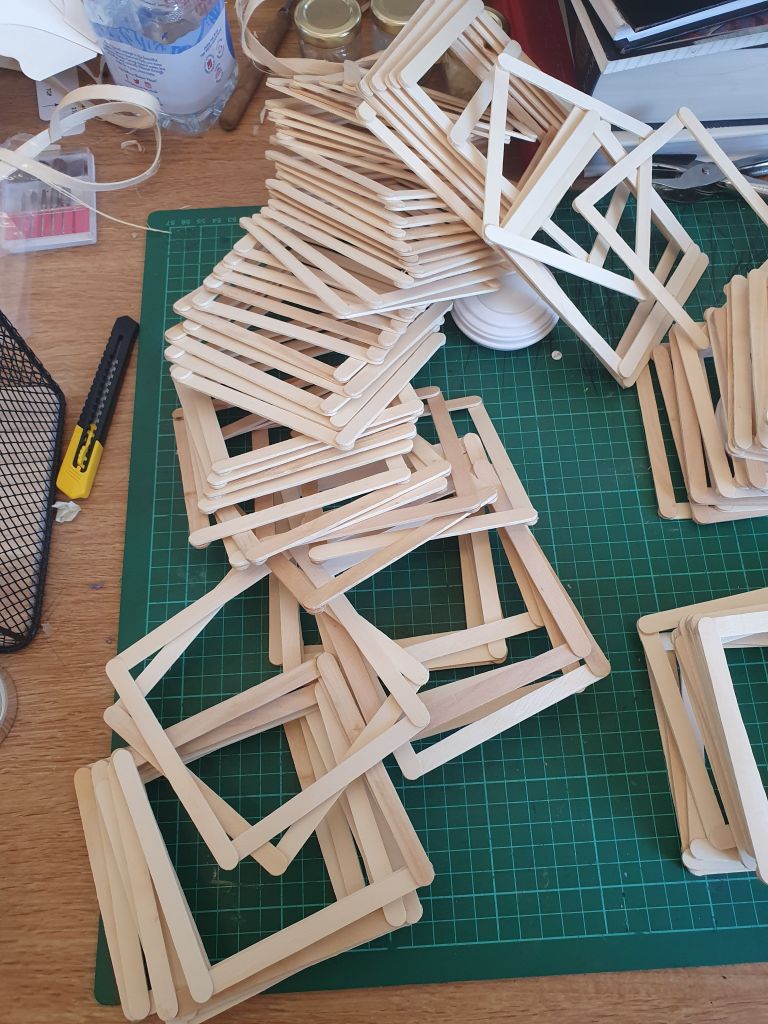
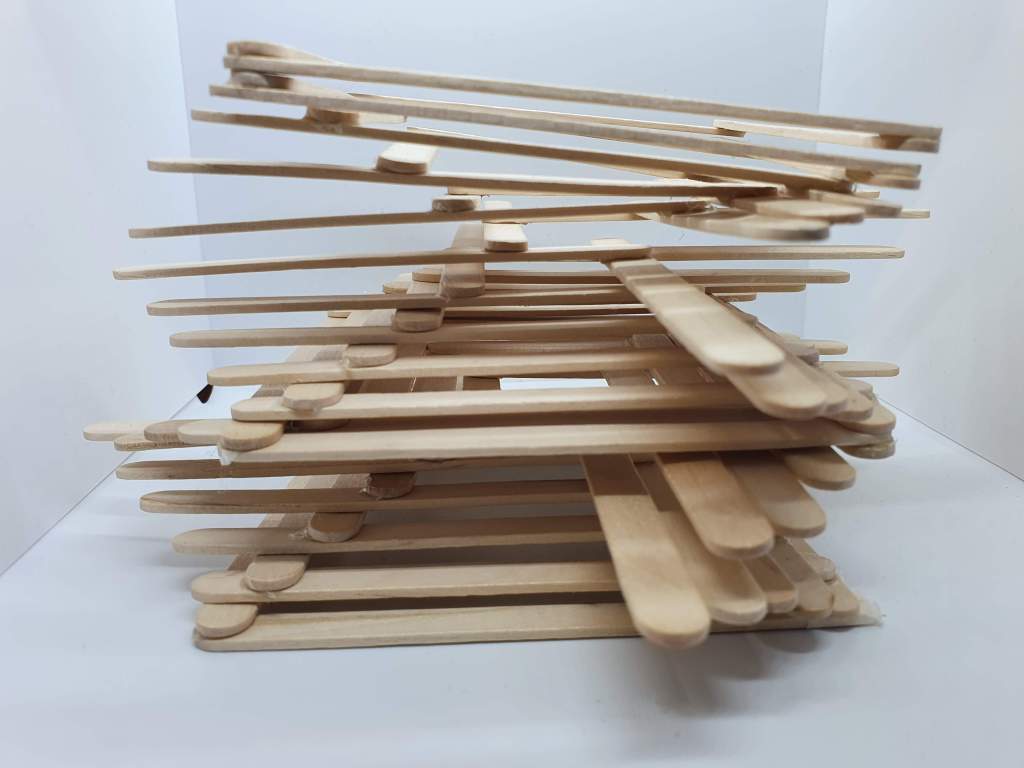
Light-tastic Day – Experimentation with Form
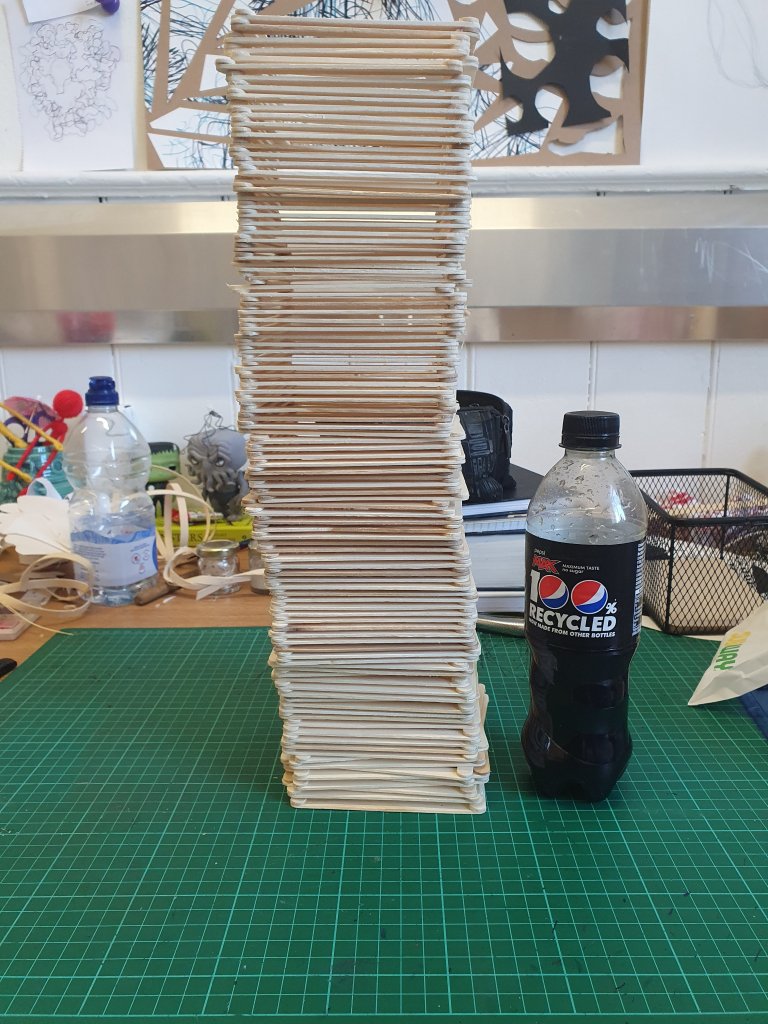
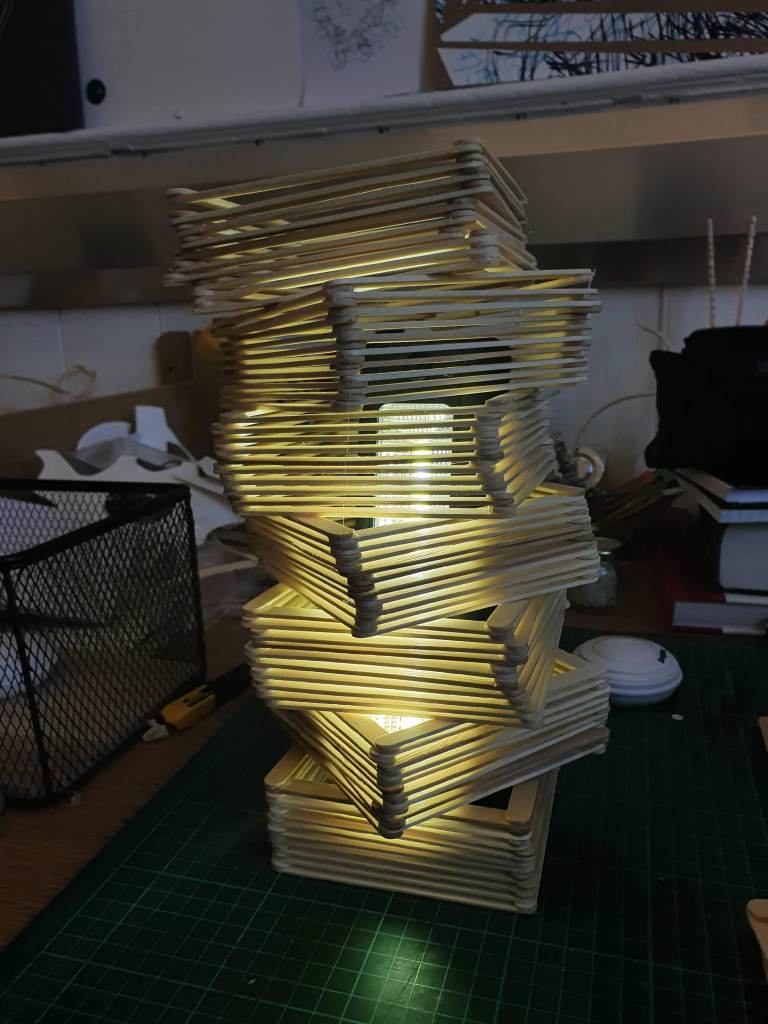
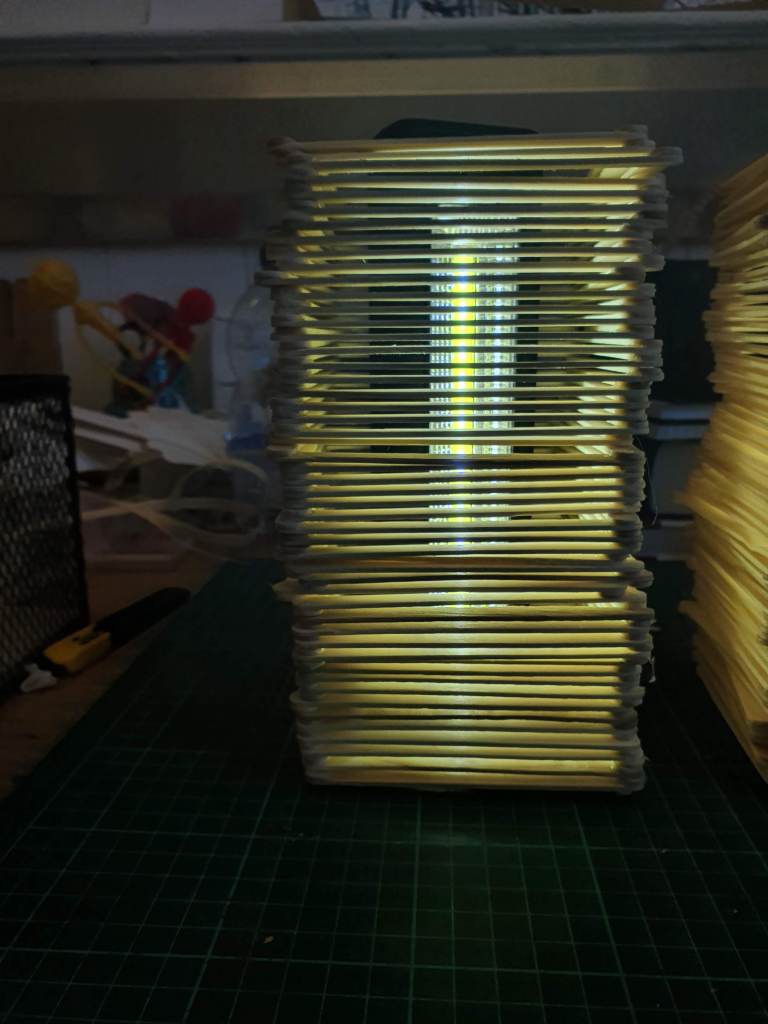
At this point, I was in the middle of my lighting project and found a process that I was invested in. I went a little mad and already made around 200 – 300 wooden squares and wanted to experiment with different ways I could stack them to see what kind of shapes I could take. I started with a singular tower where every ten layers I turned the squares 45°, then went on to create two towers that shifted in and out to create a curved form. I finally ended by stacking the pieces on top of one another to see how tall they could get without collapsing.
Light-tastic Day – Light Experimentation
On this light-tastic day, I found myself using various kinds of lights to figure out what kind of shadows I could create and how much light could be shown through my forms. I found that floodlights gave a strong impression but wouldn’t work in a fluid light shape and stacking orb lights on top of each other was impractical. I think that when I create a completed piece I would need to design a stand where a light would be fixated so that the light can be cast through the whole form.

Light-tastic Day – Points of Collapse
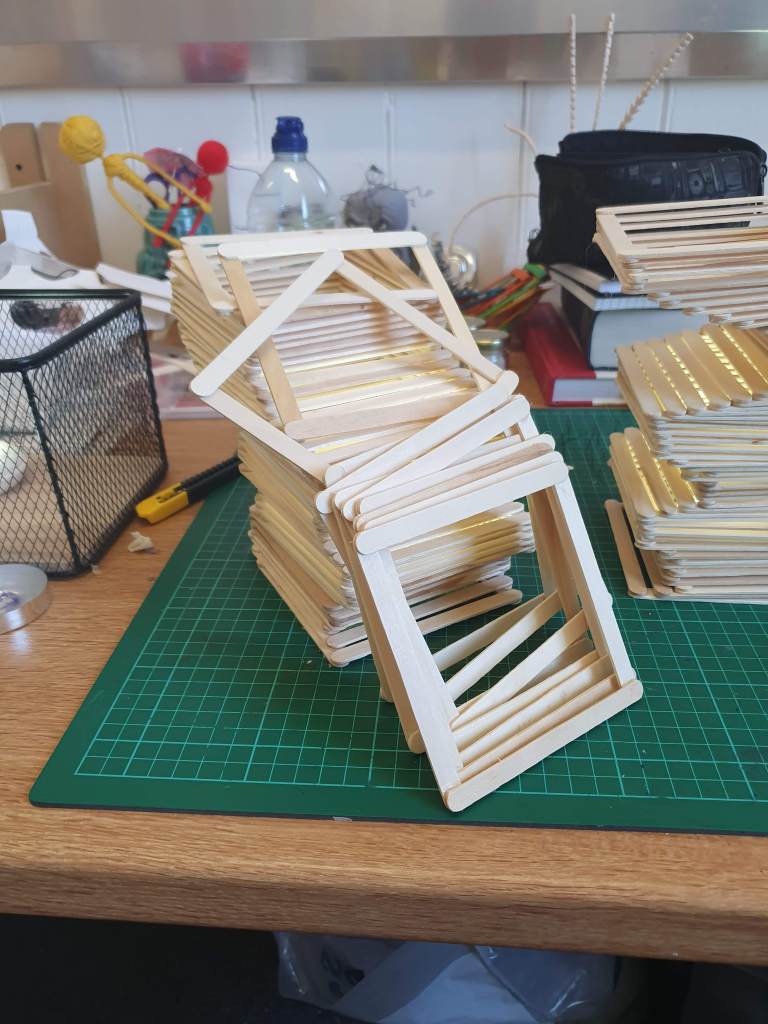
When it came to stacking the wooden frames, there was nothing to join them to create solid shapes so at a certain point they would collapse in on themselves. After finding out how easy these frames were to collapse on each other, it allowed me to discover that to create forms I would need to add some form of an adhesive to allow for a full shape to be completed.
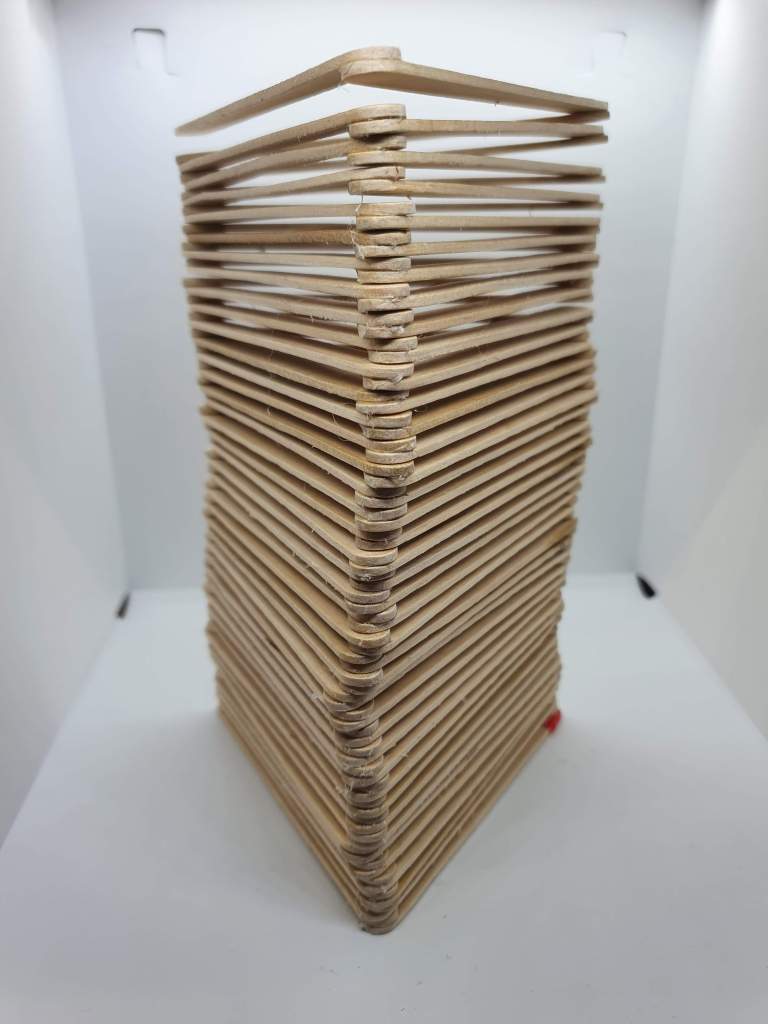
Experimenting with Wooden Forms – Stretched Forms
After finding out that when applying an adhesive to one end of a stick and working from there, I could create a wooden spring which would act more chaotically the more layers that they had. I thought that after this discovery, I would experiment with these wooden forms and figure out how I could augment them. I started by stretching the forms out and tying the ends together to create an infinite form shape. I find that this form would be great around a bulb as it would create an interesting shape.

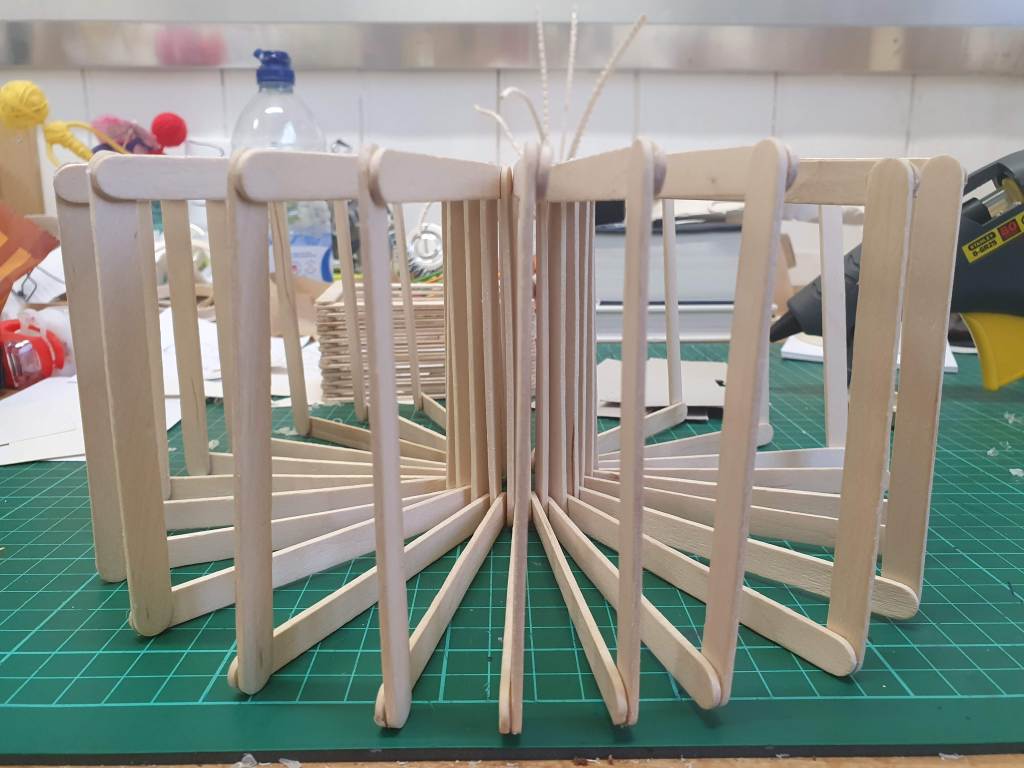
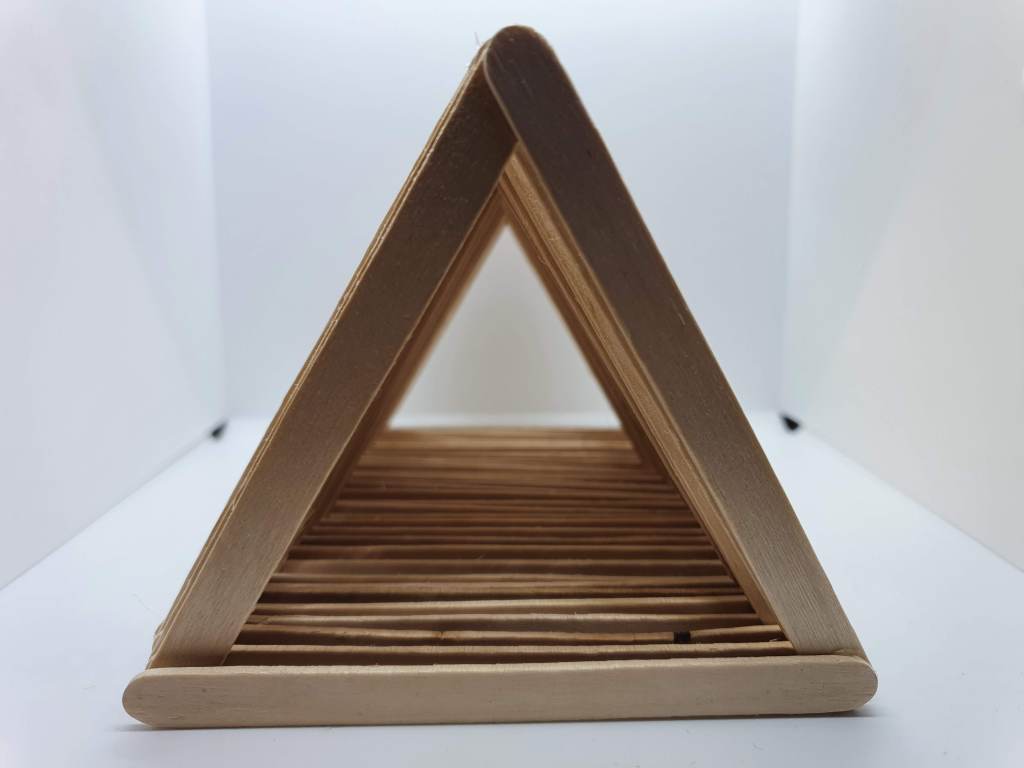
Experimenting with Wooden Forms – Shape
After being stuck with just a sprung square form, I went on to experiment with differently shaped sprung forms to see what kind of things I could come up with. The two varying shapes I created were a triangular formed spring as well as a form that would go in on itself and back outwards, creating an infinite collapsing shape.
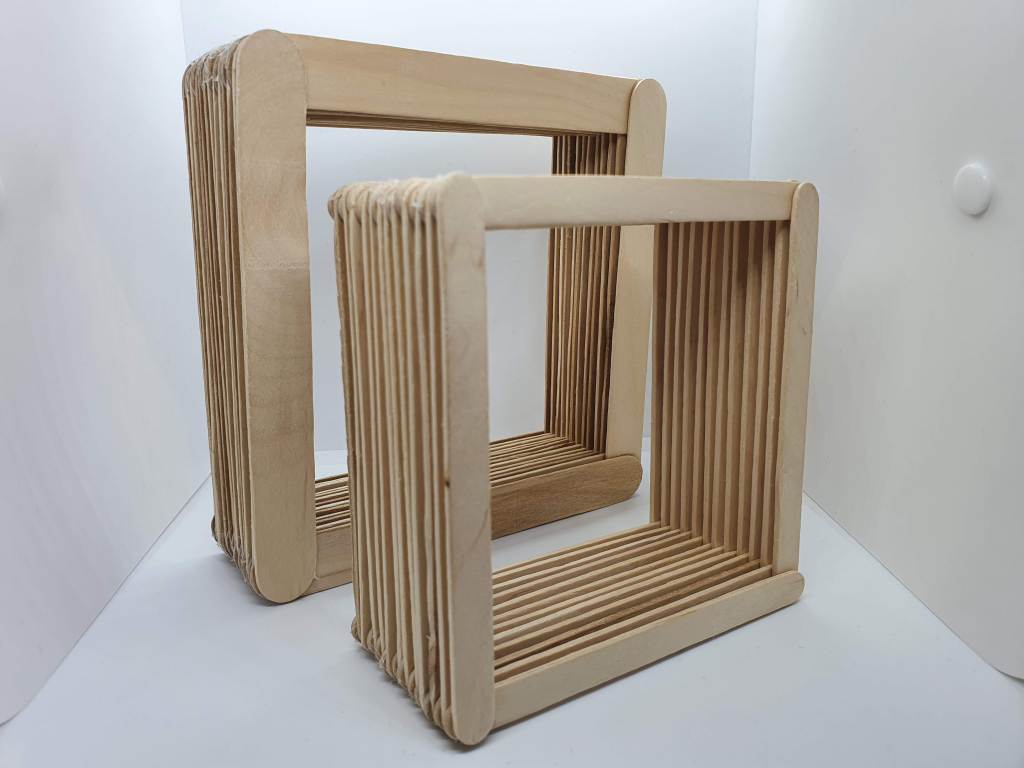
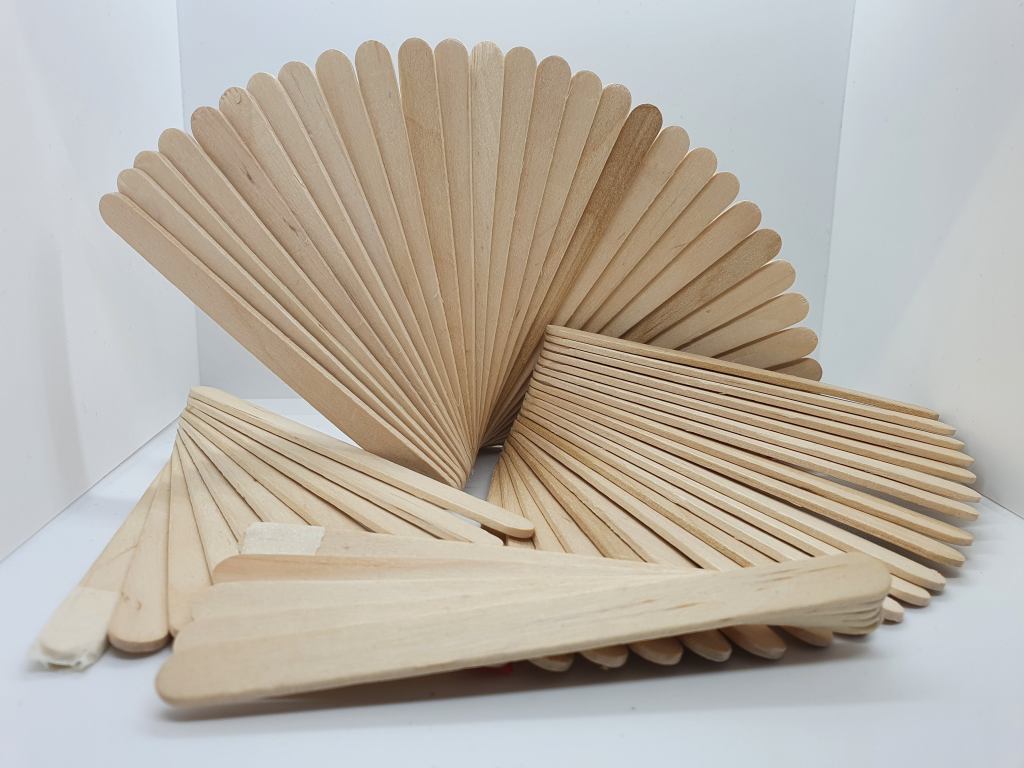
Experimenting with Wooden Forms – Scale
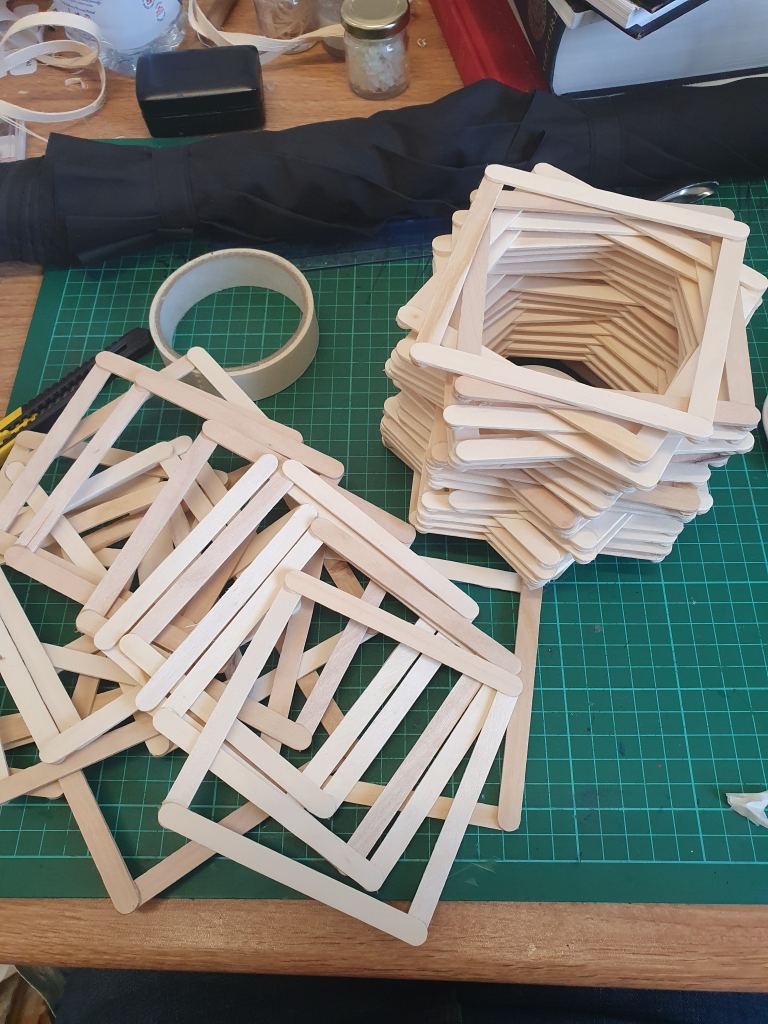
Since the use of the square was key to the piece I was constructing for my main project, I experimented with the size and scale of the wood sticks used to figure out the ideal shaping. I used both standard and jumbo-sized sticks and found the standard to be more durable mainly due to jumbo-sized sticks being thinner and more flimsy. Using the standard sticks, I built up several models of a spring fixture that went up in intervals of 50 layers at a time. I found that any layers between 150 – 250 sticks are the ideal form for this kind of structure as when I attempted a 300-stick shape, It became very chaotic to hold and unstable due to it folding into itself with ease.
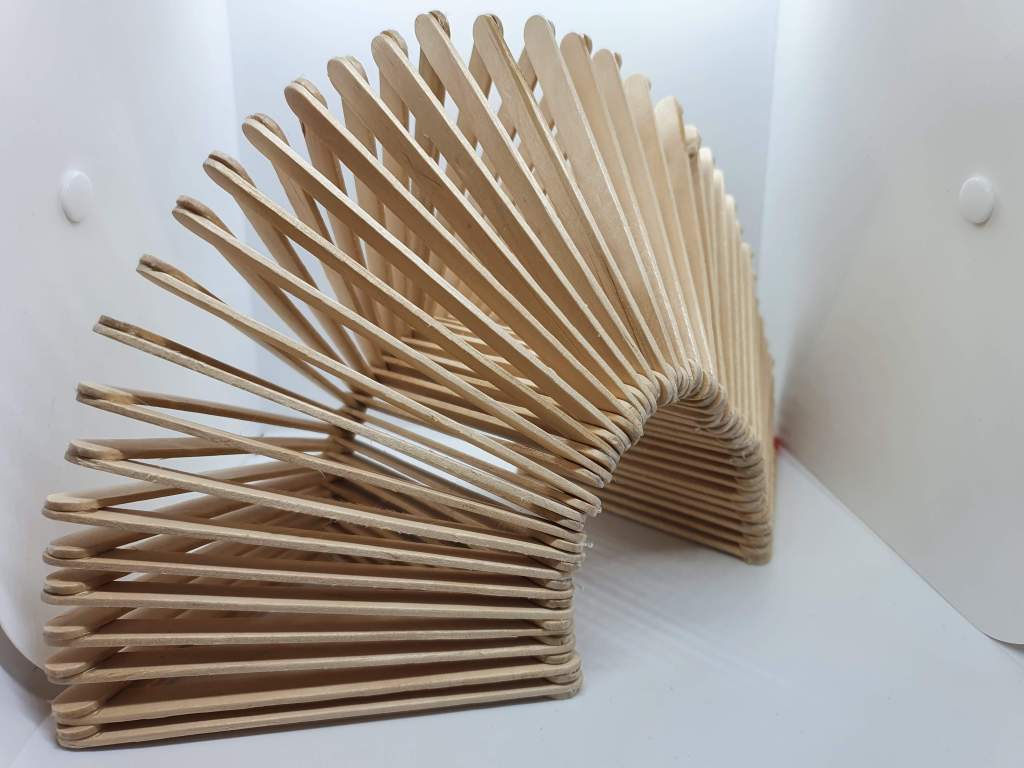
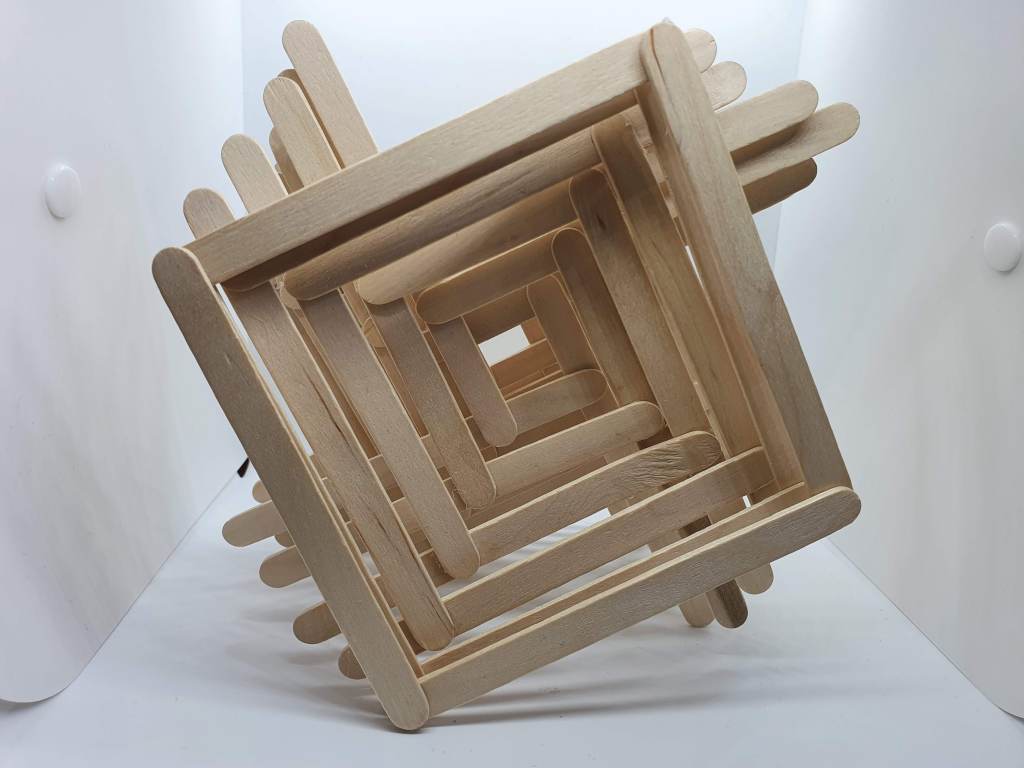
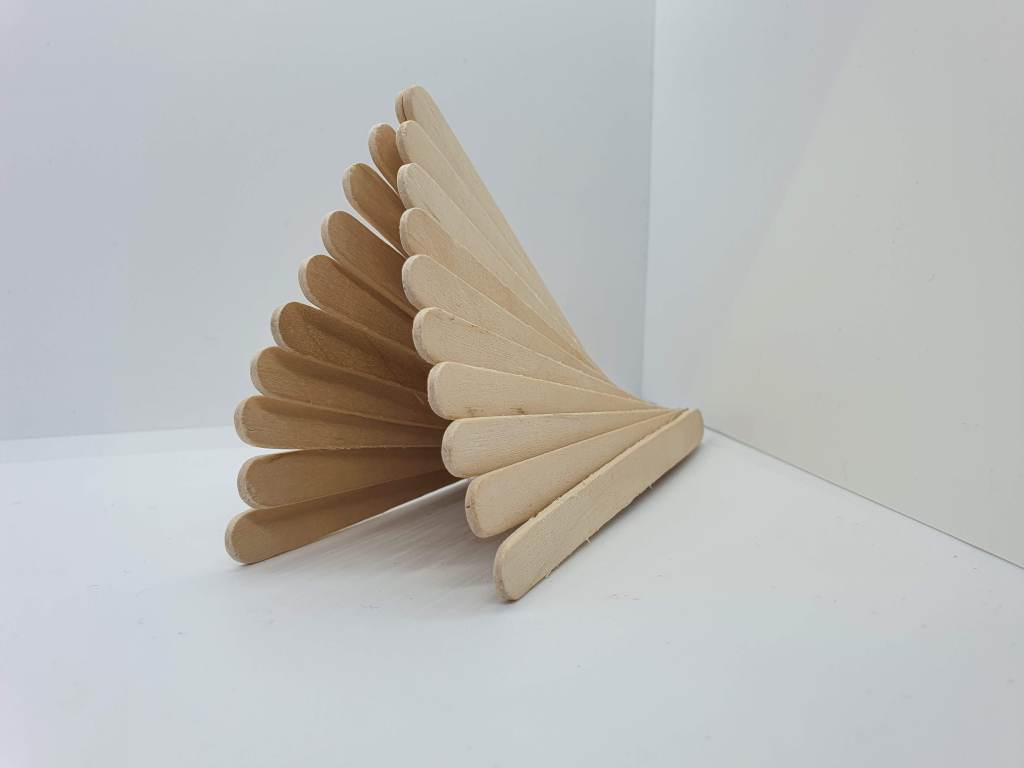
Experimenting with Wooden Forms – Spirals
Rather than sticking to whole shapes, I wanted to see what would happen if I angled the sticks so they would be positioned next to each other rather than perpendicular to each other. This resulted in the creation of strange spiral forms that felt perfect to hold in the hand. I loved working with these forms as it was a fun thing to discover when mindlessly making shapes and would love to use this method of production further in a future project as I believe these kinds of shapes have real decorative potential.
Working with Ceramics
During my time before I found my preferred multiple of stick stacking, I wanted to create a light fixture centred around celestial horror and collections of tendrils that would hold the light in a sinister unknown way. I thought working with ceramics and extrusion would allow me to find out what kind of shapes I could make and how I could cluster them together. While working with ceramics, I found that I wanted to use all the types of extrusions that were at my disposal so I kept a record of all the types of extrusion I used and what kind of shape each extrusion made.
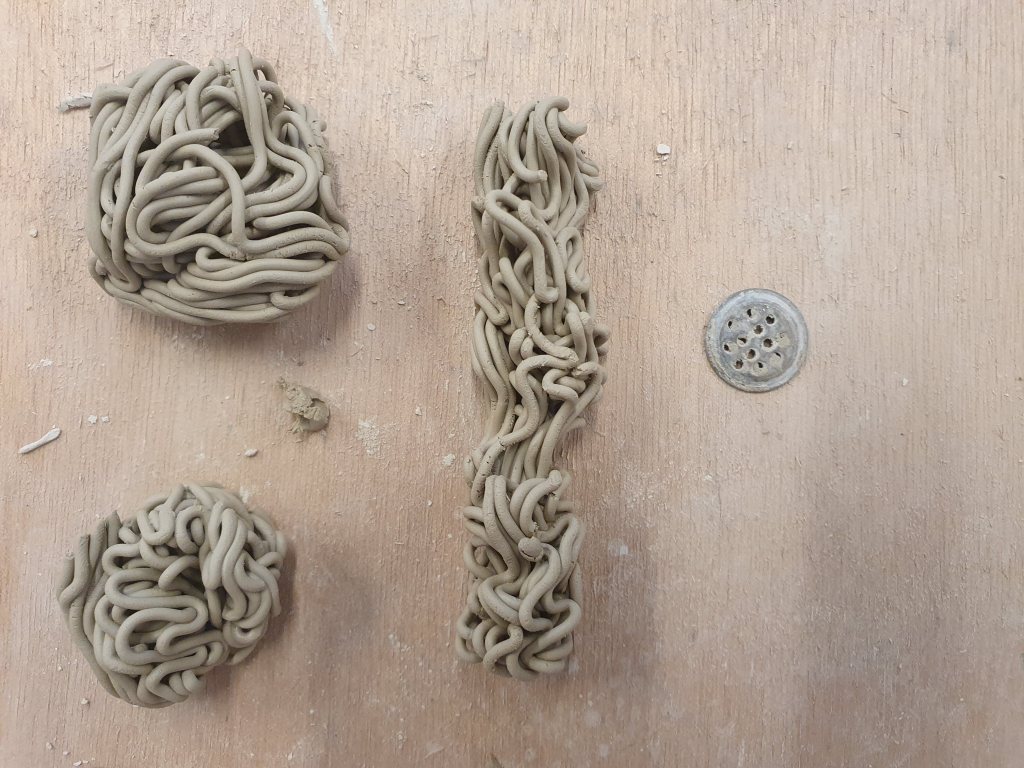
Working with Ceramics – Extruder Examples (Circles)
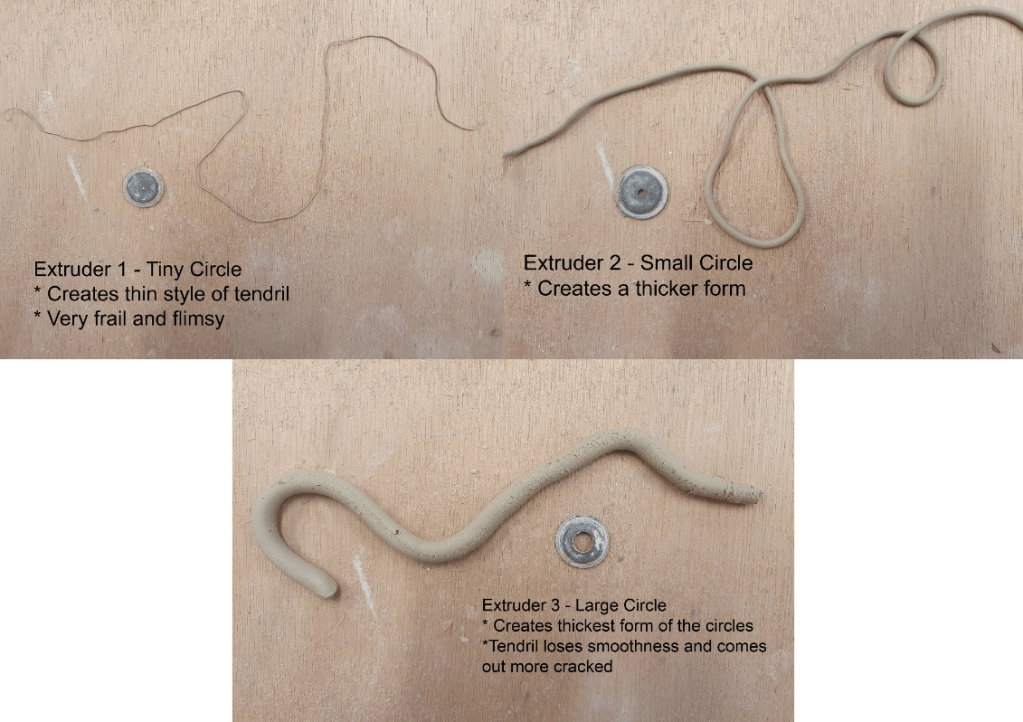
The first type of extrusion I used was single circular shapes which made a variety of noodle-like forms that grew in scale and thickness as I went on. I consider circles to be the base level for any kind of extrusion and they were a fun way to start my journey.
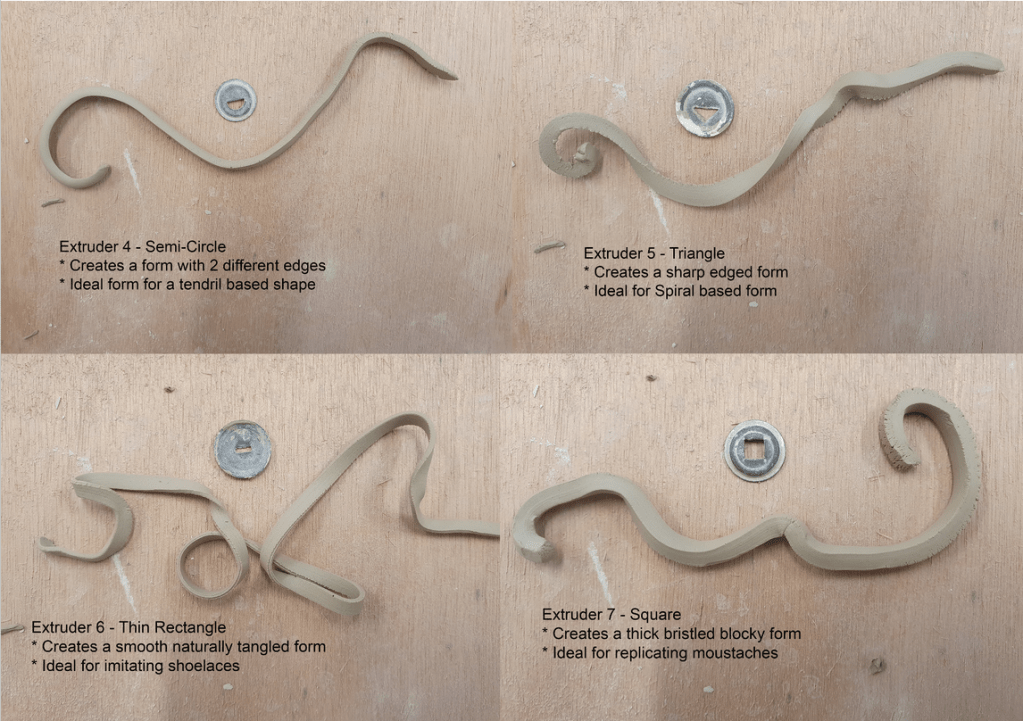
Working with Ceramics – Extruder Examples (Shapes)
When working with the shaped extruders, I was amazed by how different all the kinds of shapes I could create and what forms they would suit the best. I feel that if I went into a narrative project with ceramics as the focused medium, shaped extruders would be ideal to use due to their dynamic range of form.
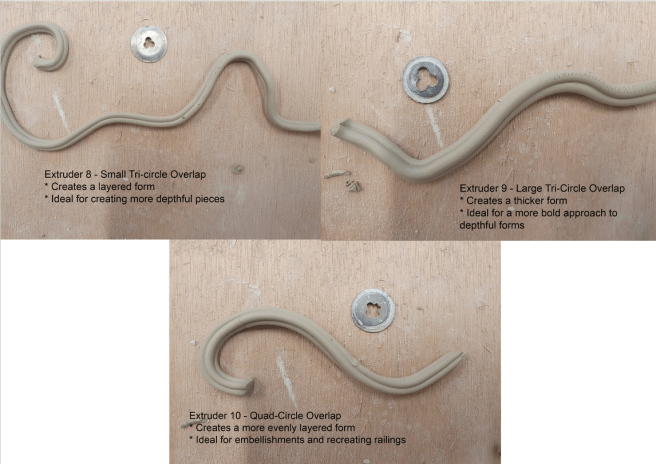
Working with Ceramics – Extruder Examples (Overlapping Circles)
Using the overlapping circle extruders allowed for a more developed form of the circle extrusion as they brought more 3D texture and form to the shapes they would create. These types of forms would be perfect to use as fancy embellishments on pieces along with adding more depth to a piece if the original plan was to just use circular extrusions.
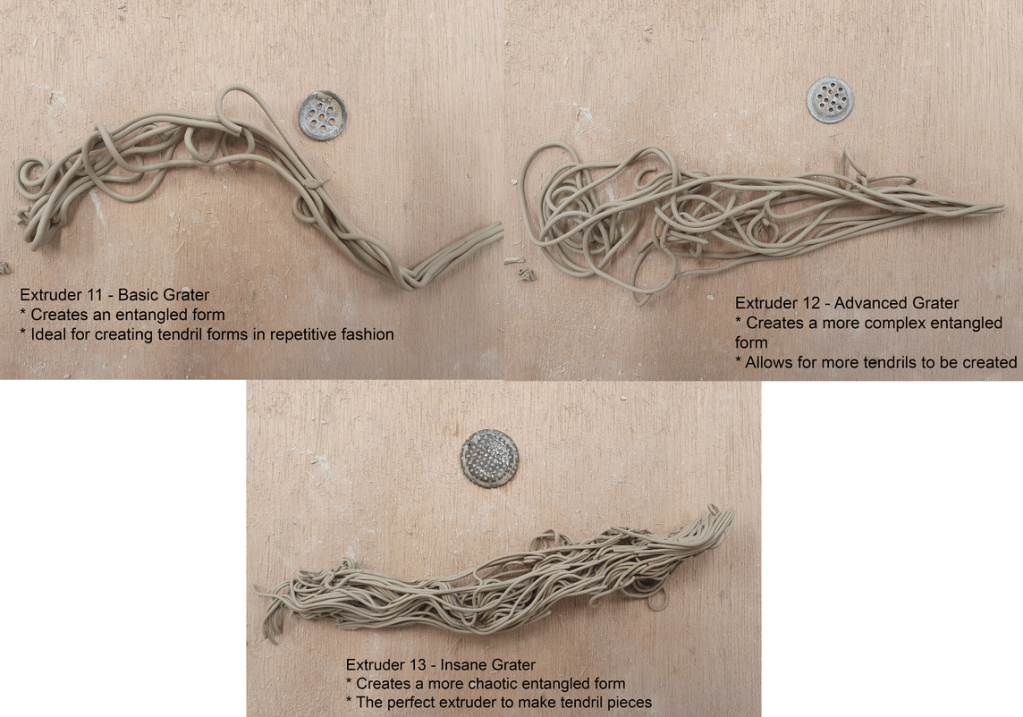
Working with Ceramics – Extruder Examples (Graters)
Working with a grater-style extrusion was an absolute delight! This was the perfect way to create mass tendril-like forms most naturally and they were pleasant to mould and work with. If I had gone down the ceramic route with this project, this would be the ideal type of extrusion I would have used.
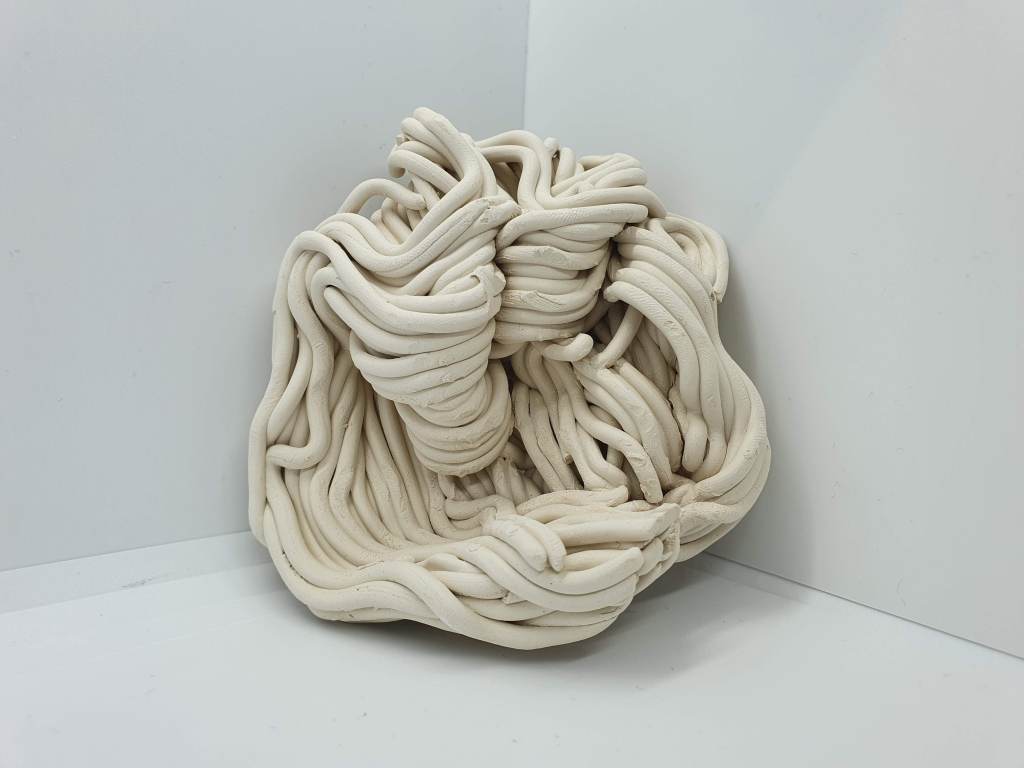
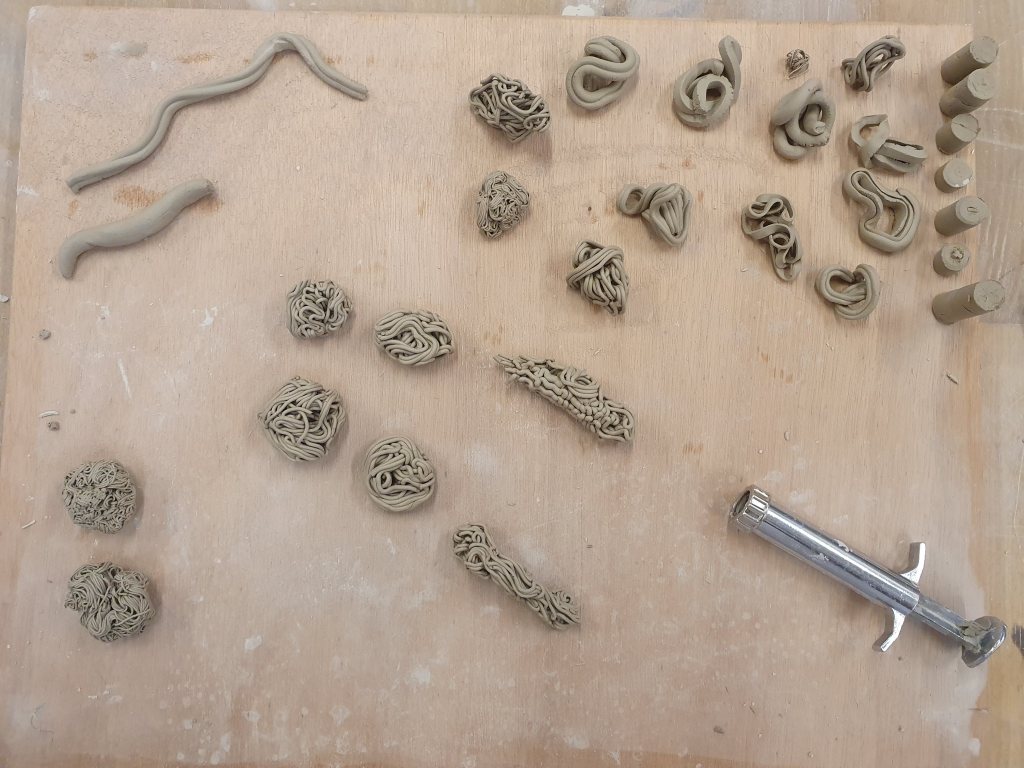
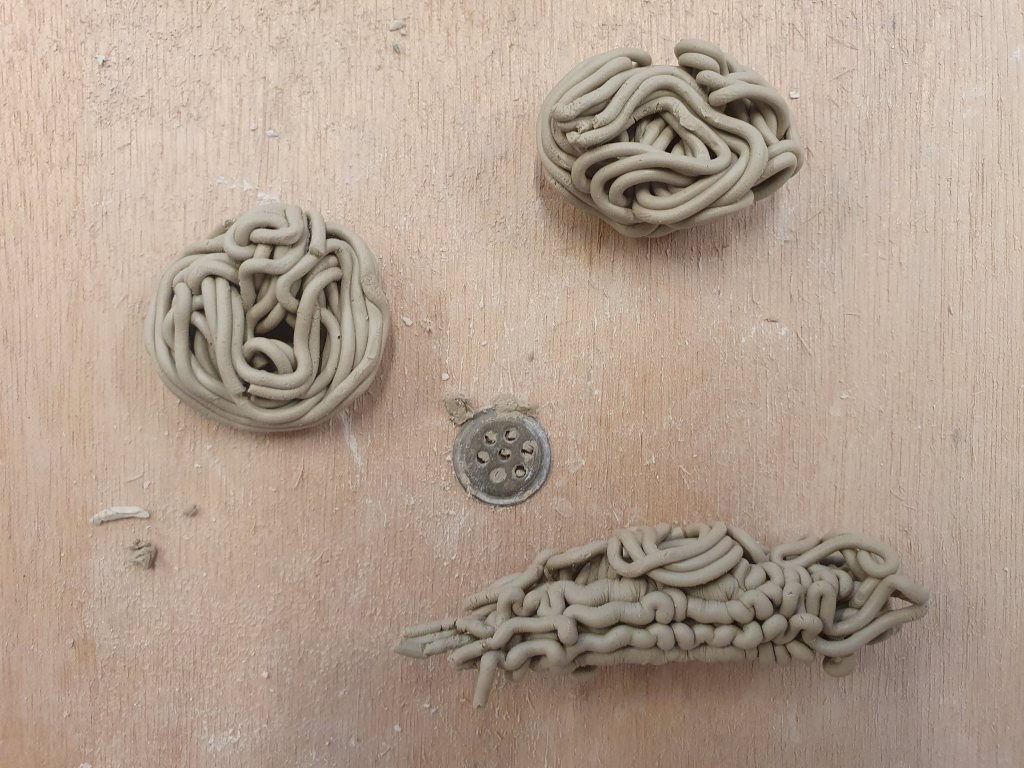
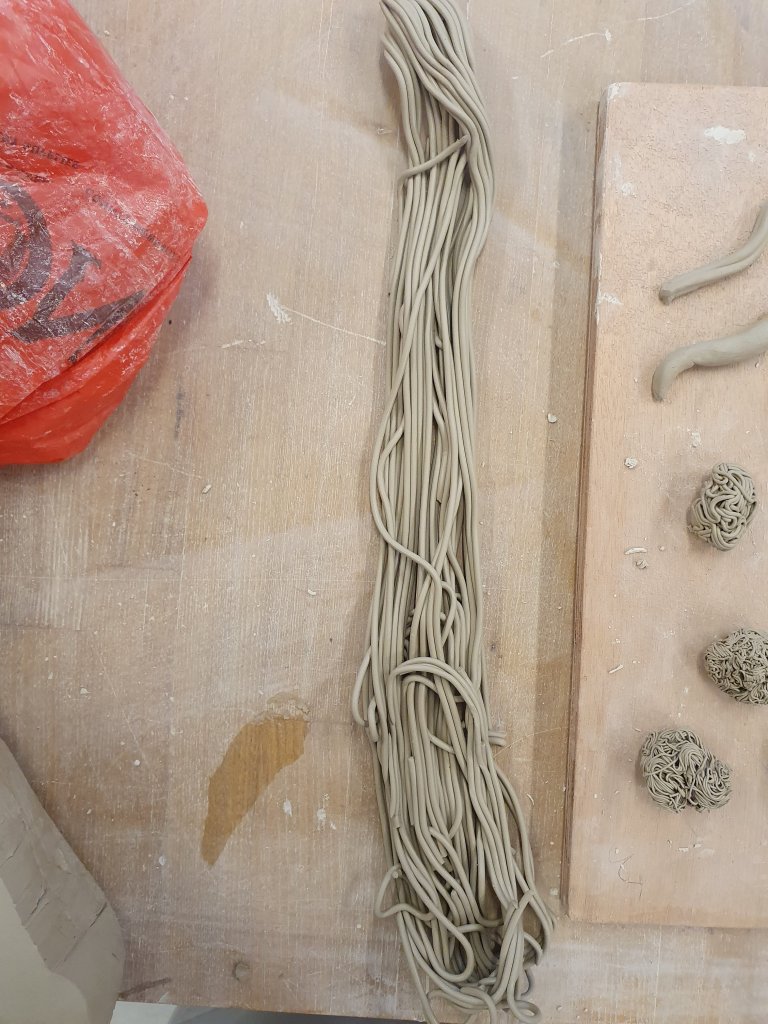
Working with Ceramics – Collection of Tendrils
After working with the grater extruders, I quickly found myself balling up the forms that they would make and ended up gathering this strange collection of tendril-based forms. It was a new multiple practice that if I were to spend more time doing ceramics, I feel like I would end up with around 100 to 1000 of these things.
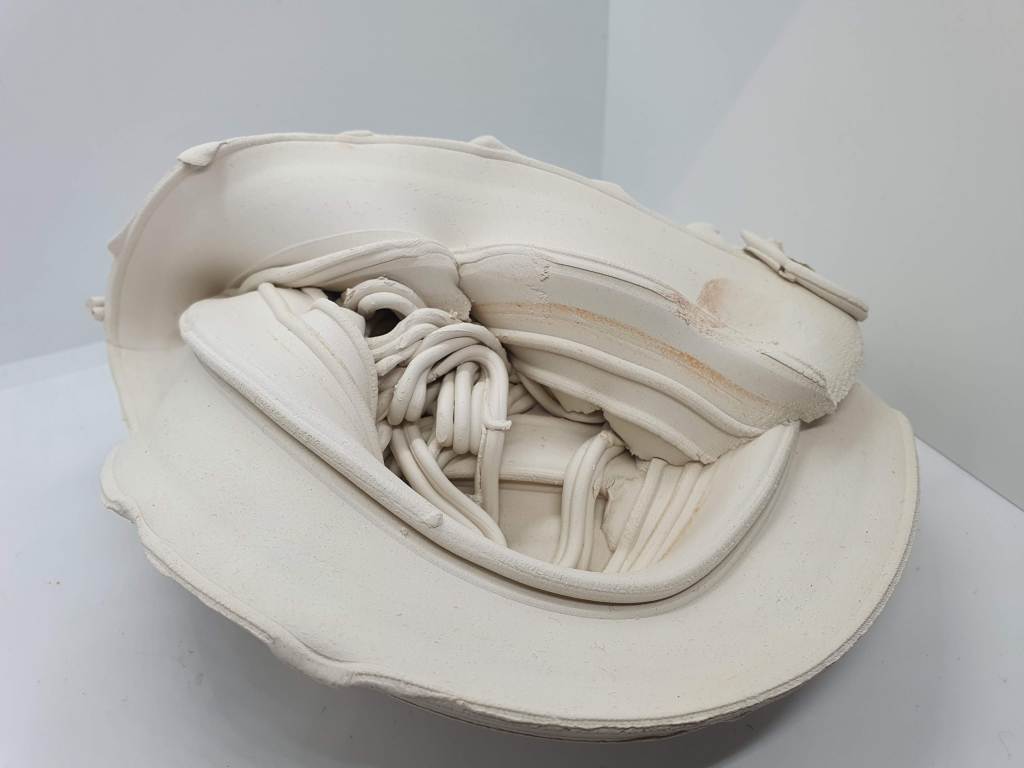
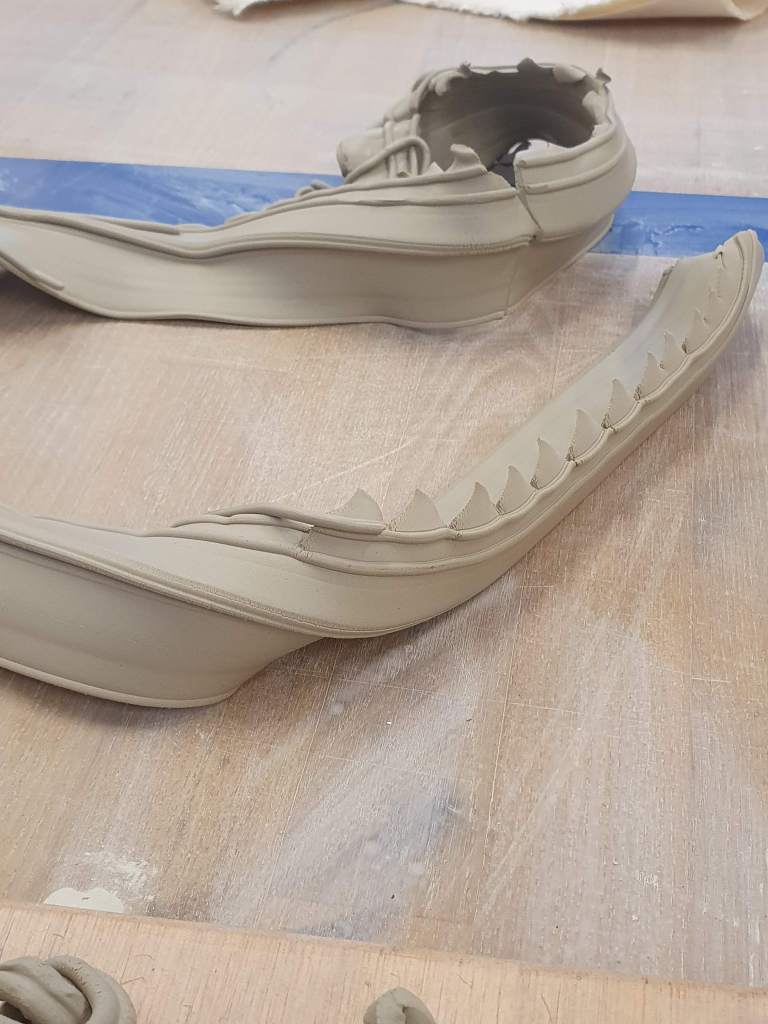
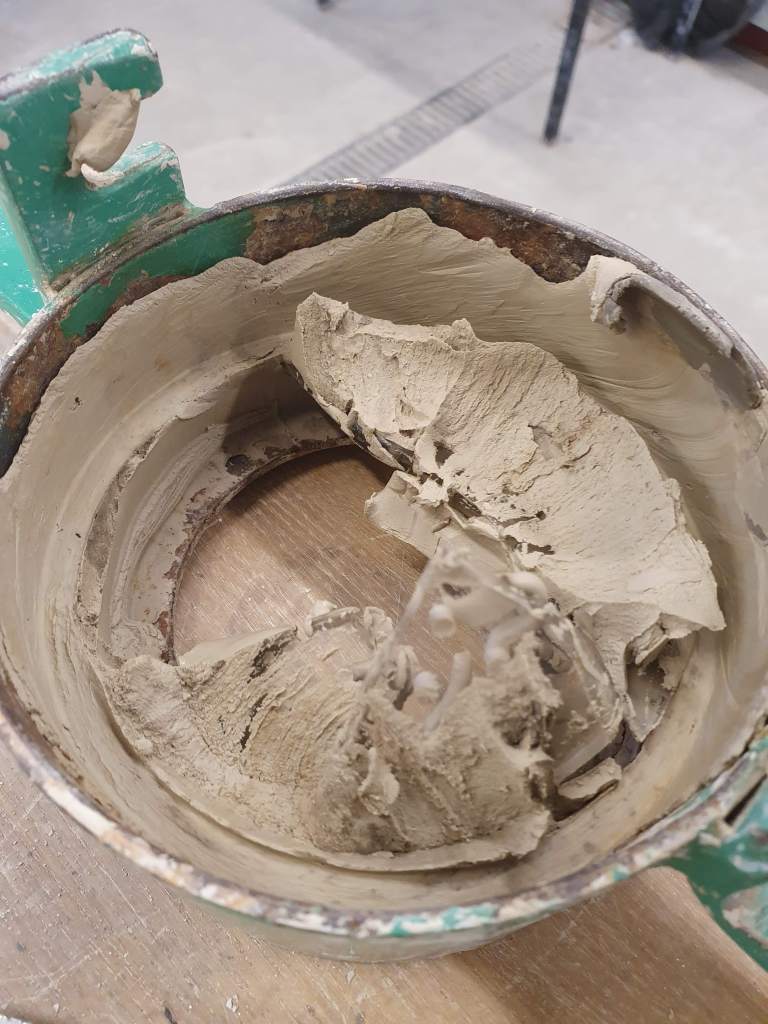
Working with Ceramics – Experimenting with Large Scale Extrusion
Rather than sticking to the small handheld extruder, I wanted to experiment with a large scale extruder and see how the scale of a piece would differ. However the extruder examples that were there didn’t seem like ones I wanted to get a sample from so Lyndon the technician kindly made a grater style extruder for me out of acrylic. The trouble with acrylic is that once it has exceeded a certain amount of pressure, it will begin to crack and implode on itself in the extruder. This lead to me having thick tendril pieces with sharp pointed edges halfway through the extrusion, leading to fascinating new forms I didn’t get with the smaller extruder. (Far right image is what was left of the acrylic in the extruder).
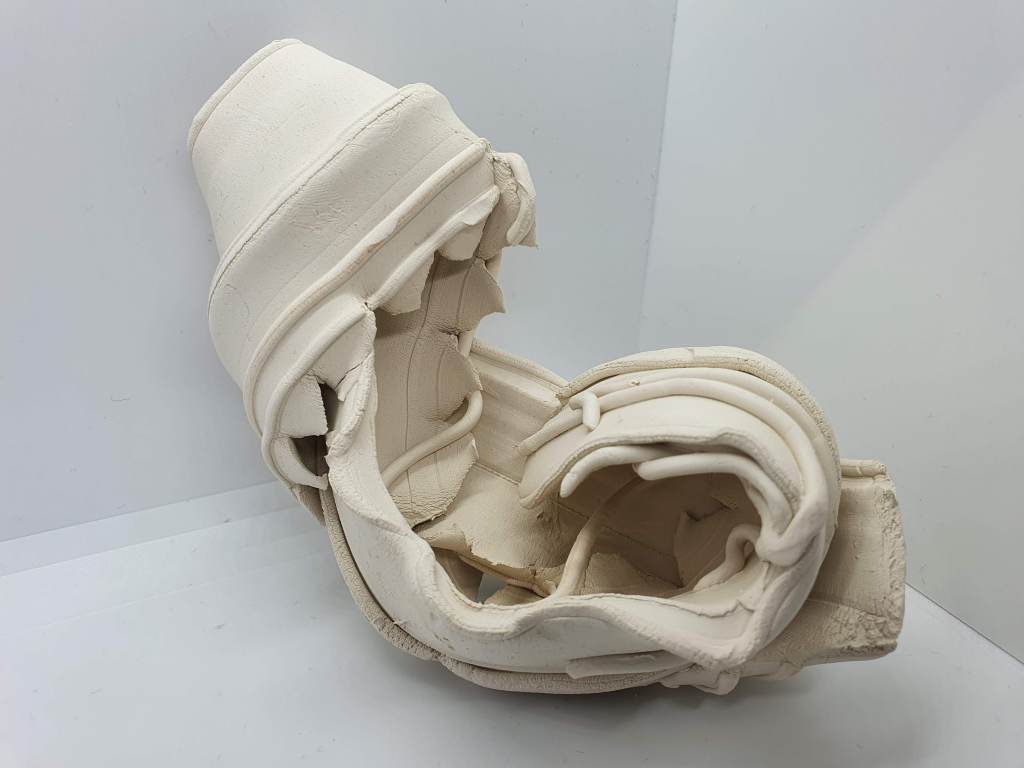
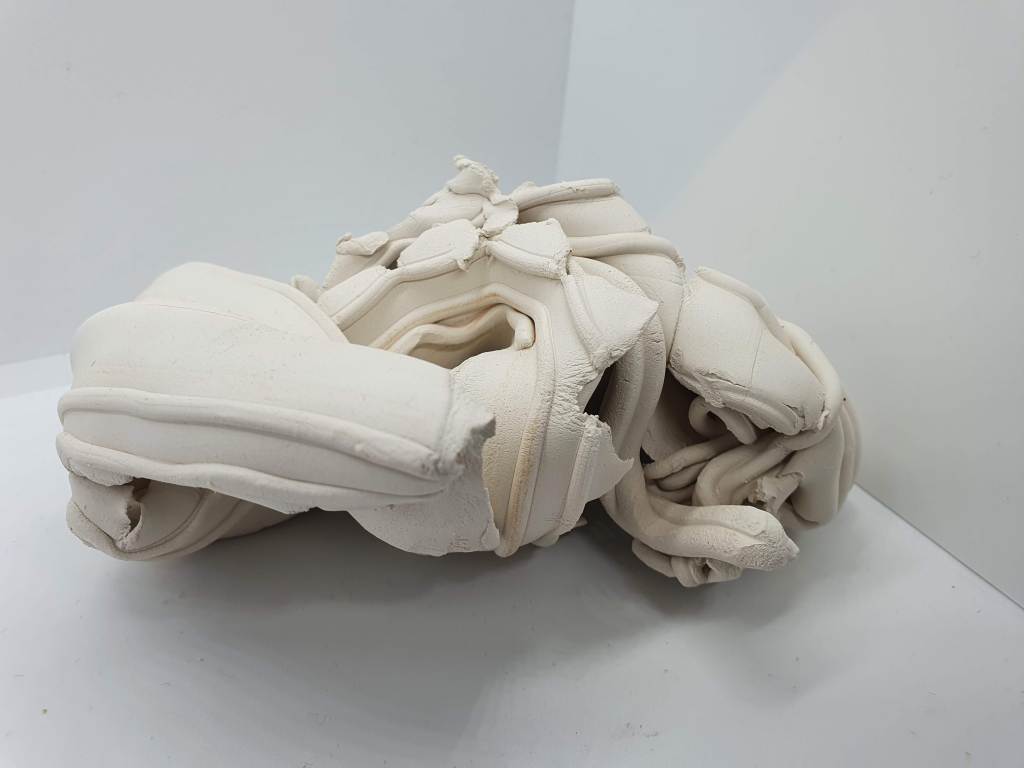
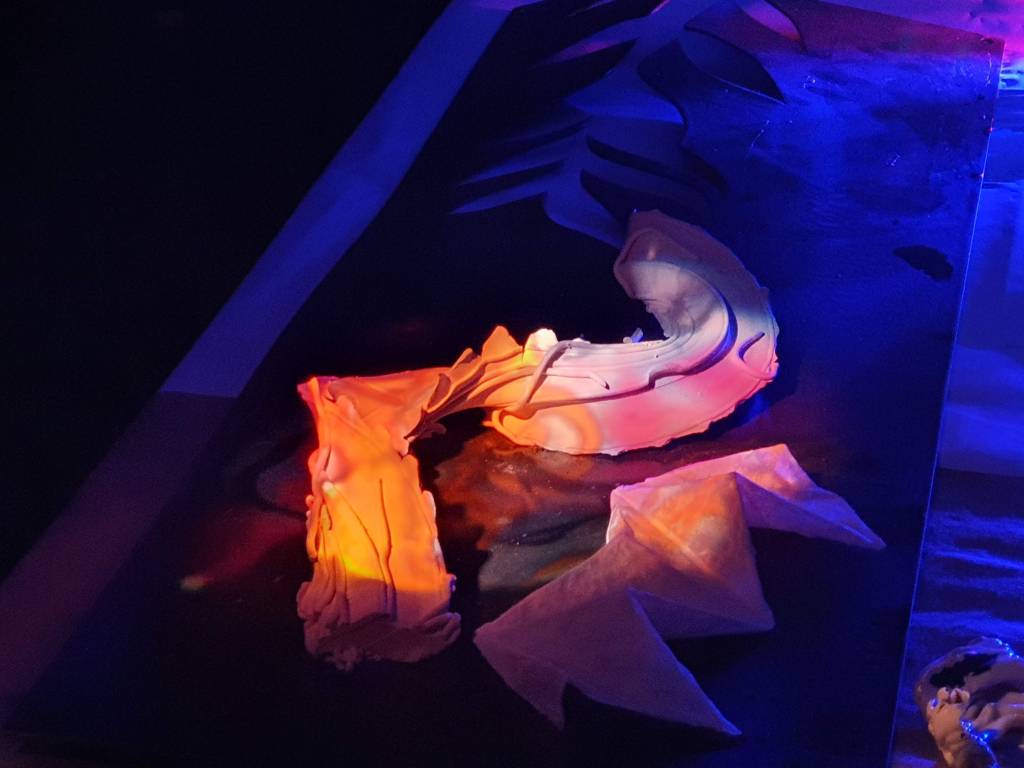
Working with Ceramics – Fired Pieces
These are the fired pieces of the large scale extrusion. They turned out wonderfully and are a marvel to look at. If I were to change anything about them, I would love to experiment with glaze and see how black I could make them appear or if I could be able to make a multicoloured glaze that looks like a night sky scattered in stars.