Hello all. In this post, I will be going through my process for the Rebel/Gift live brief showcasing the step-by-step process of how my project evolved and taking you through all the practical experimentation I conducted.
What is Rebel/Gift?
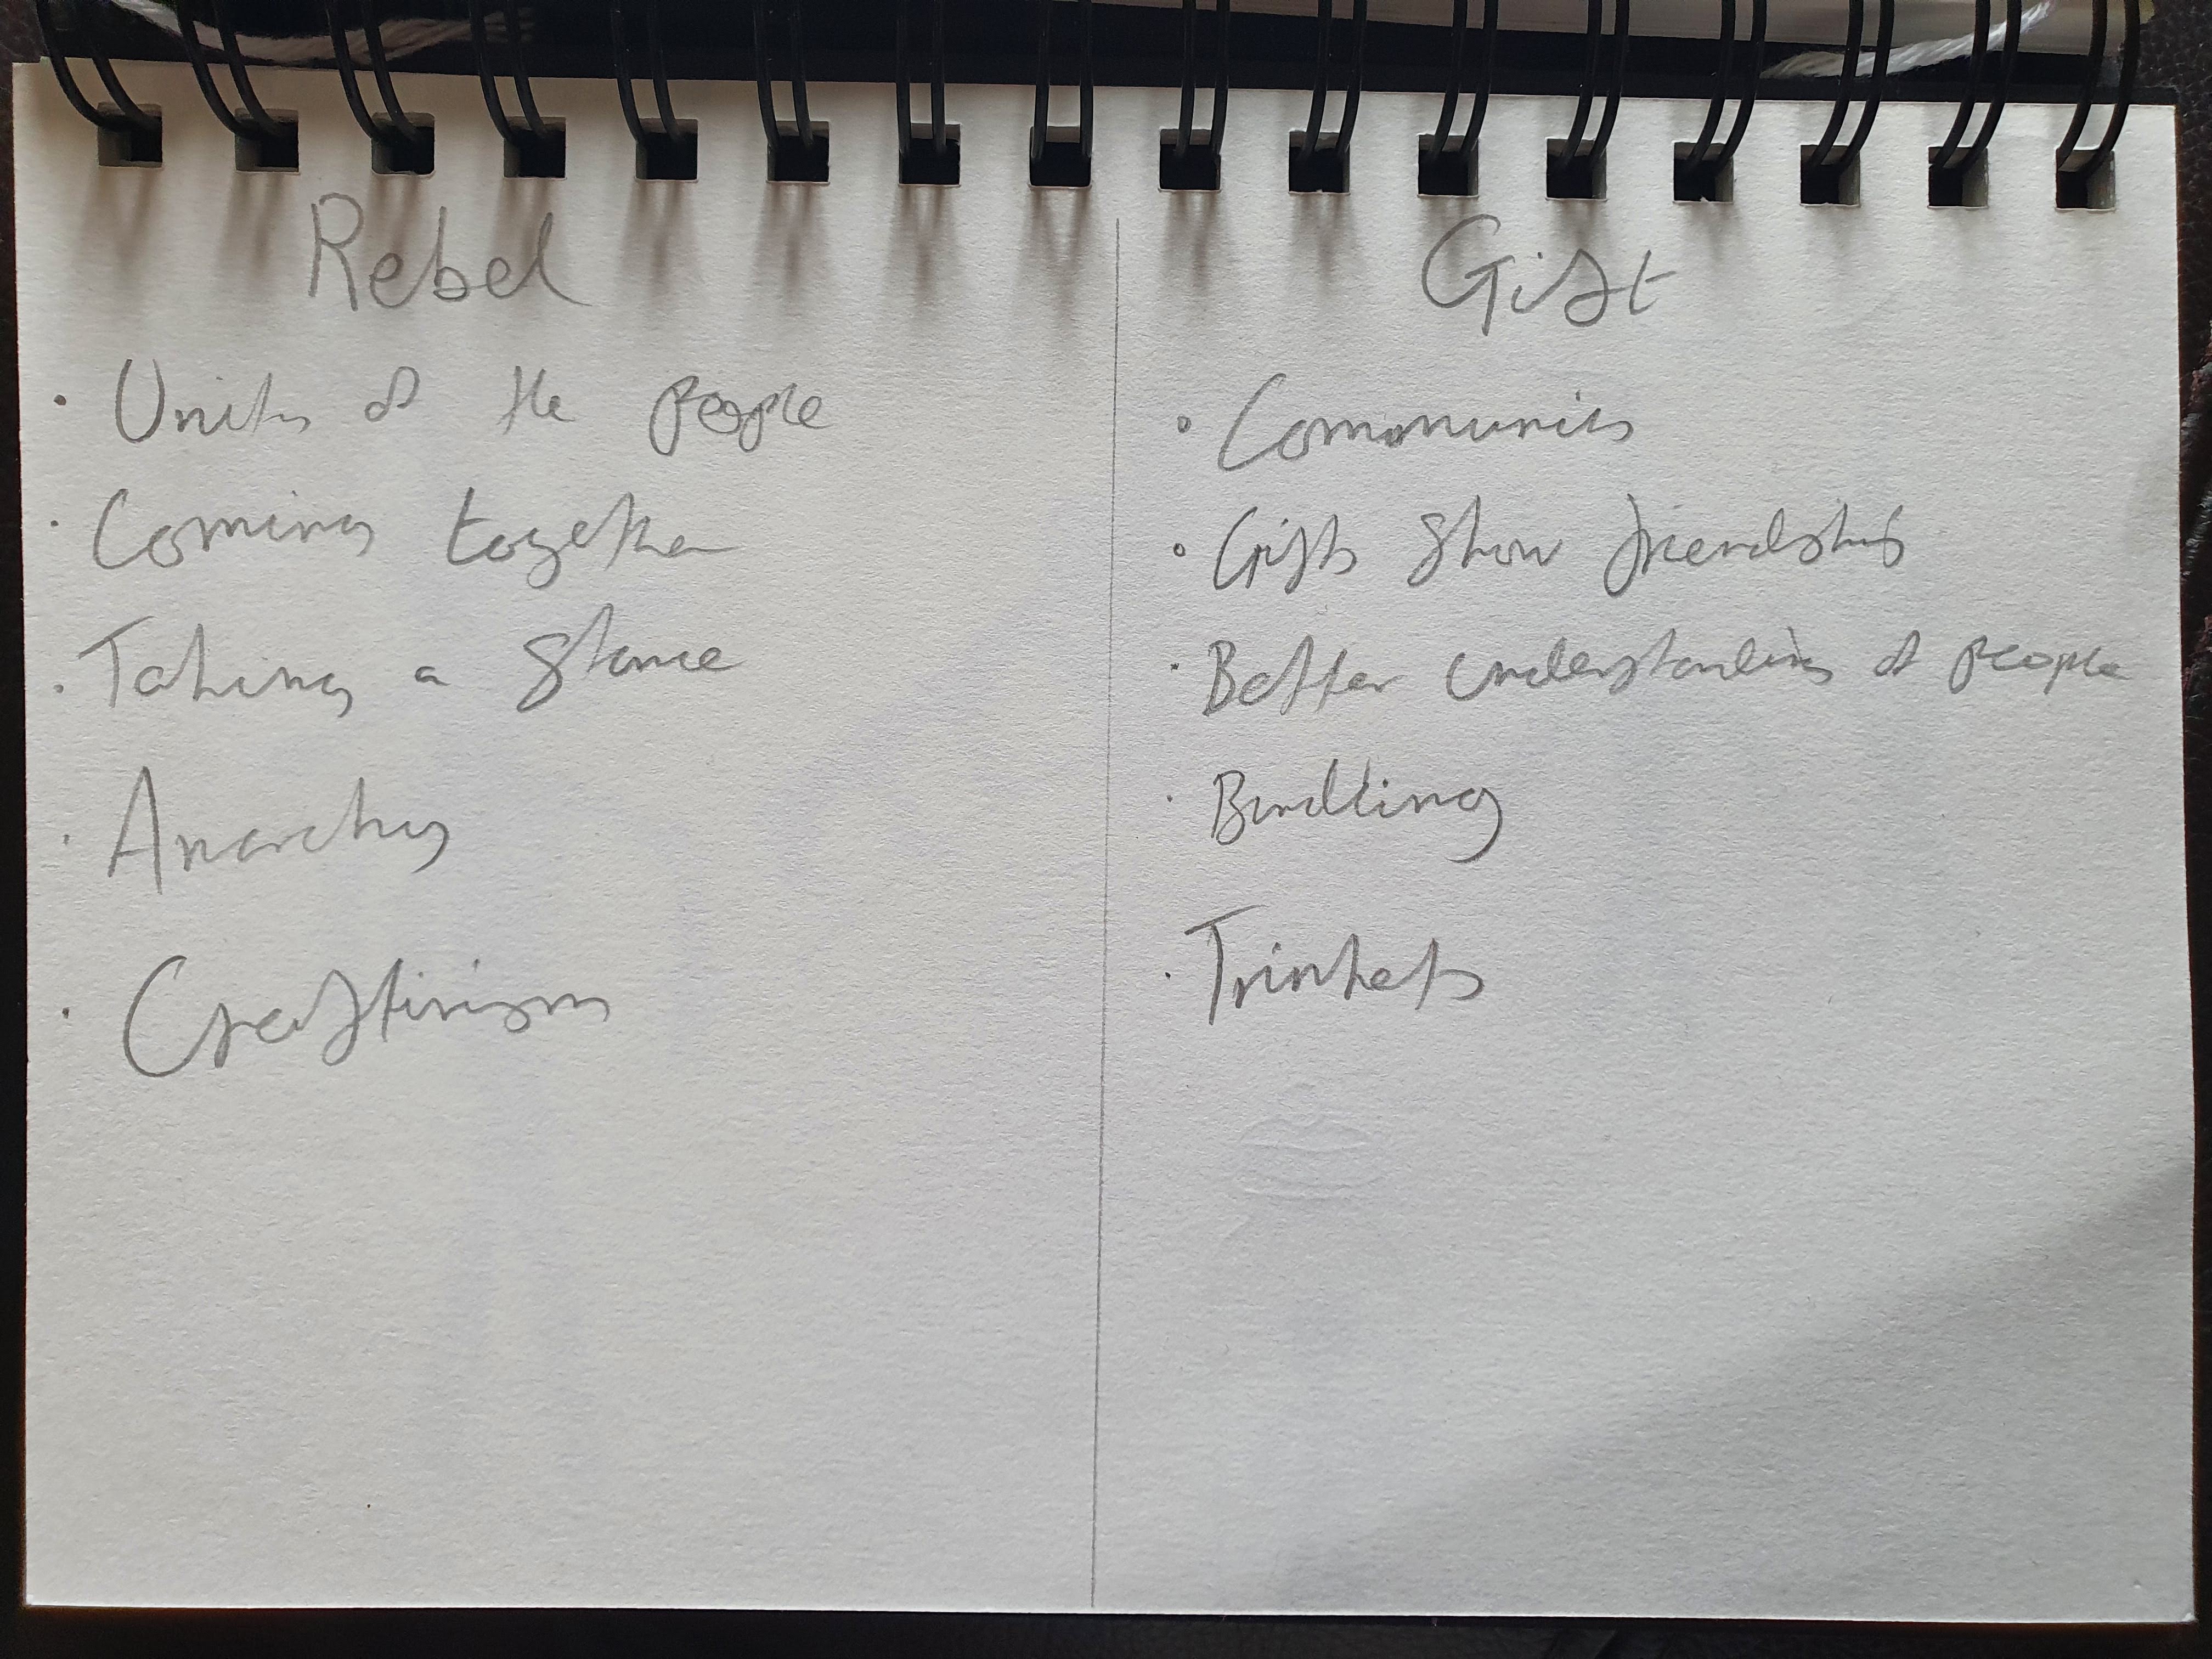
When given the brief, I wasn’t sure what pathway to take when deciding between Rebel, Gift or a whole new brief written by myself. That is why I took it upon myself to split Rebel and Gift up into columns so that I could define each word into its core aspects to better understand which properties I favoured with each word. This led me to the idea of merging the two words together and trying to create a project based on both Rebel and Gift rather than singularly sticking to one word.

Story Aspect Planning
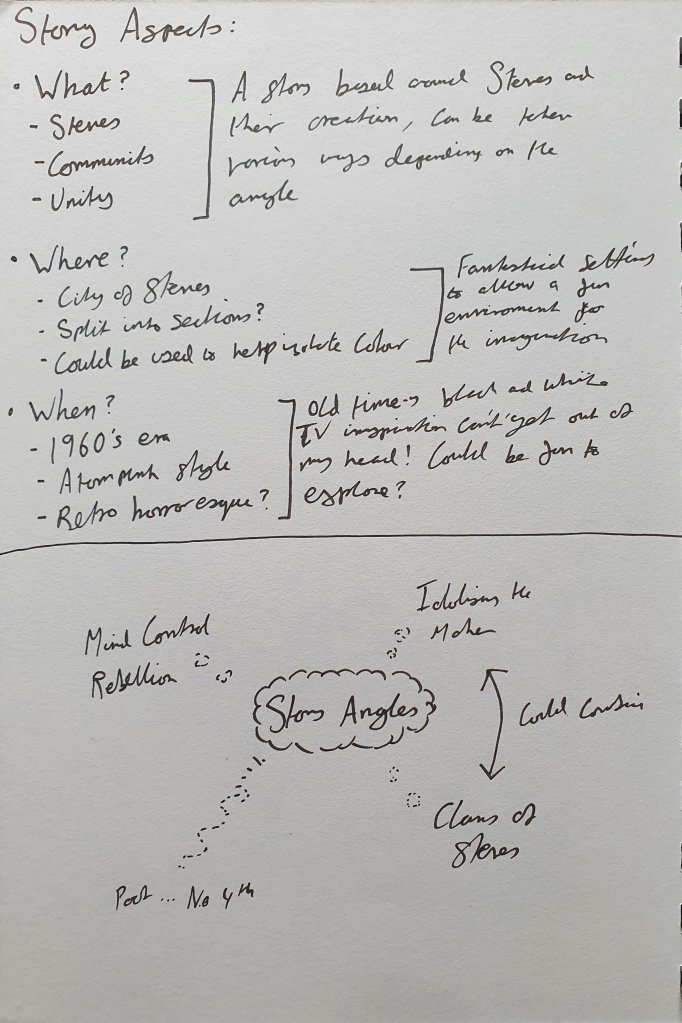
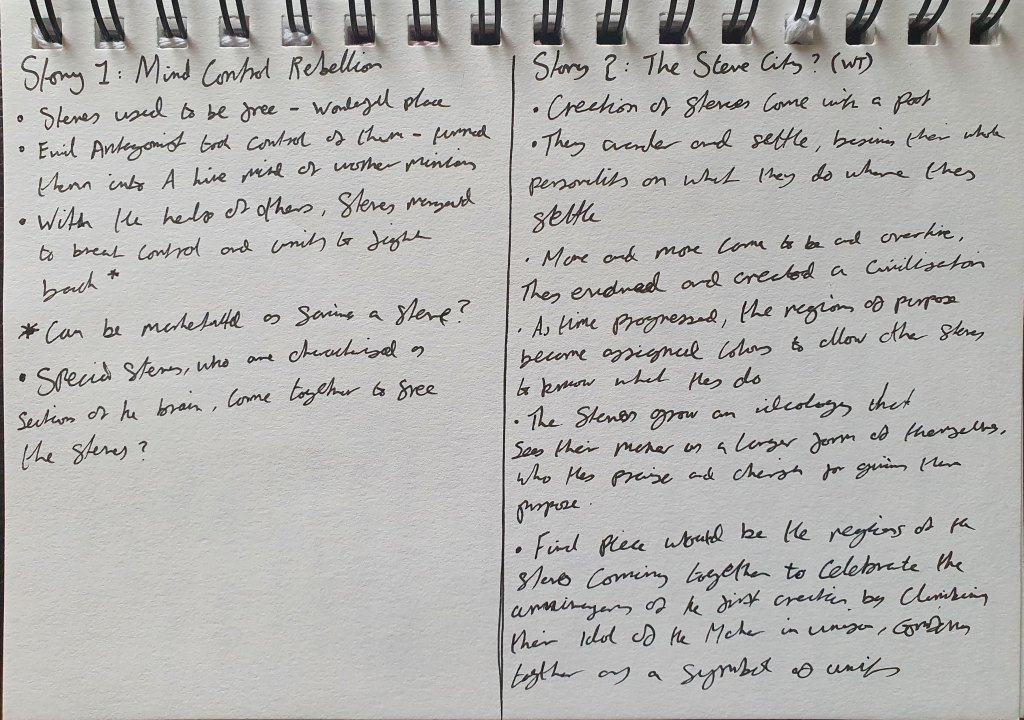
Originally when it came to the story of where I wanted the project to go, my ideas were centred around incorporating Steves’ into the body of my project as I wanted the opportunity to finally do market research and figure out where Steves could potentially go in the future. When it came to combining Rebel/Gift with that concept, two narratives stood out to me in particular that I wanted to explore. These stories included the choice of either a mind control rebellion, which had a retro horror theme behind it, whereas the other consisted of a city of Steves all united to form a community.
Mood boarding
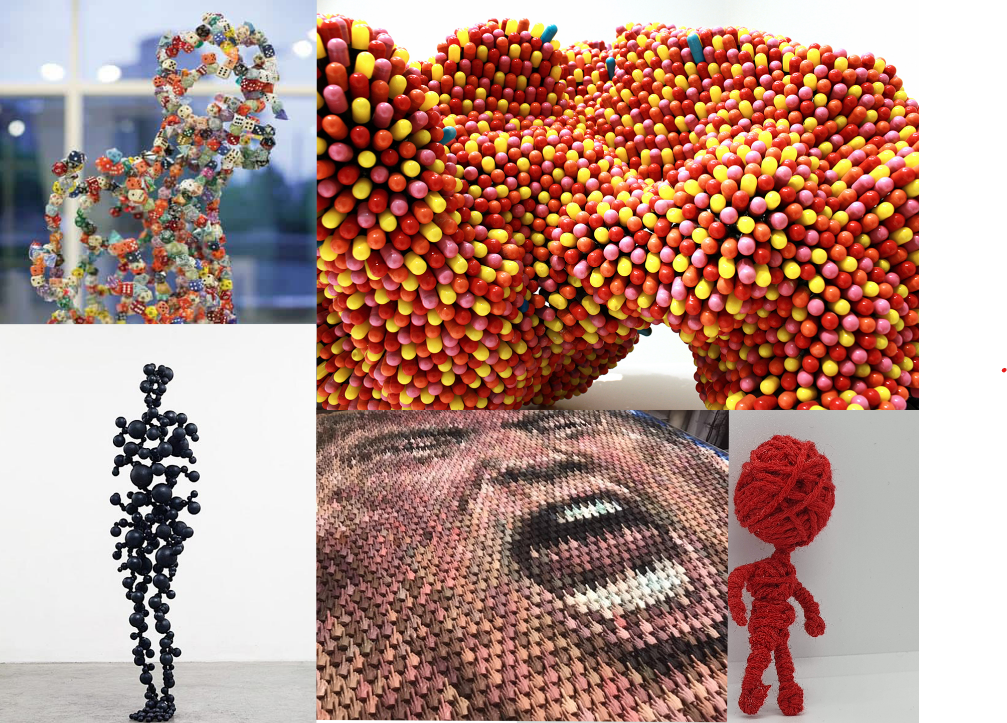
Before having a meeting with the Mission Gallery, I was tasked to mock up some mood boards before creating design boards for the presentation. These mood boards consisted of research that I was compiling over the beginning weeks of the brief, sorted in an eye-pleasing way. For this project, I was looking at the works of artists such as Antony Gormley, Noumeda Carbone and Kevin Champeny. These artists specialise in making in multiples to create fully composed pieces made up of smaller pieces.


Preliminary Sketches
Before the mood boards could be simplified and become design boards, I needed to create some sketches of what I thought the final outcome could be at the time. When it came to my one-off piece I envisioned a giant Steve made up of Steves of all shapes and sizes, whereas for the batch I wanted to showcase all the different ways I could make a Steve such as Jewellery, Keyrings and just Steves on their own, wrapping around anything they can.


Presentation Design Boards
The design boards themselves turned out okay although presenting them myself was a bit of a tricky task. However, I stood my ground and showed what I had so far which led to me receiving solid feedback that allowed me to the inevitable final outcome that I reached.


Redefining The Story
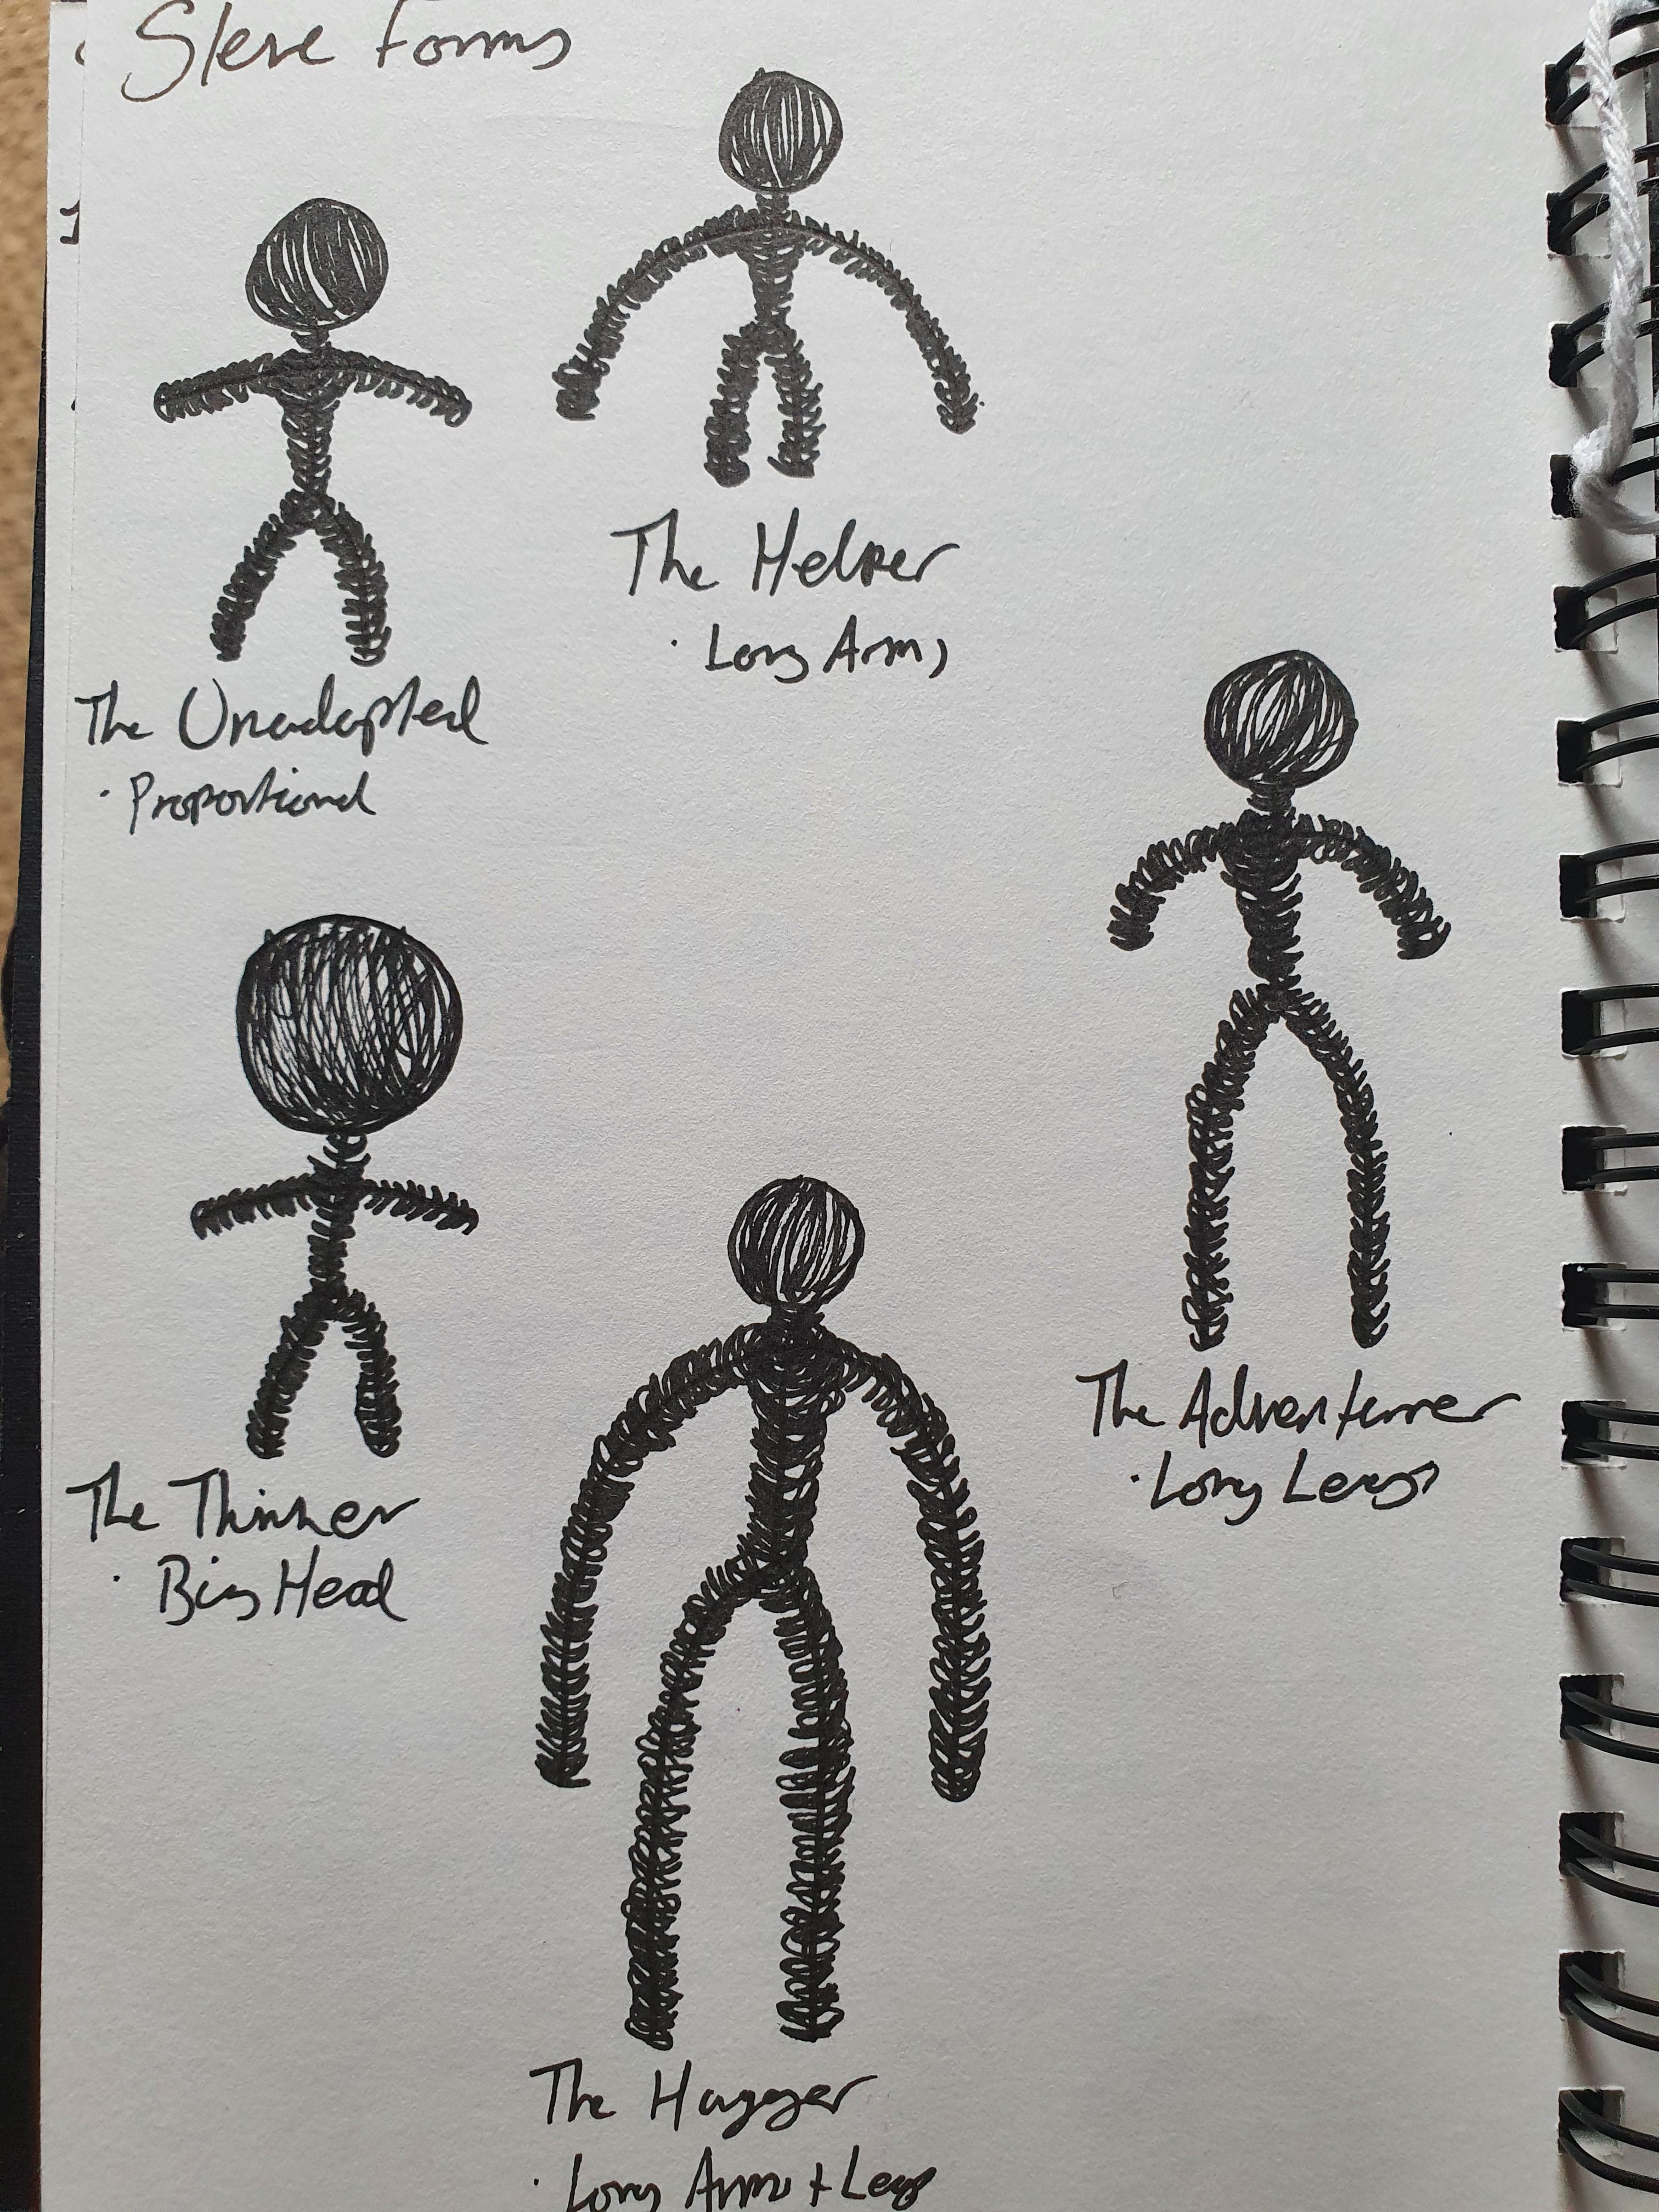
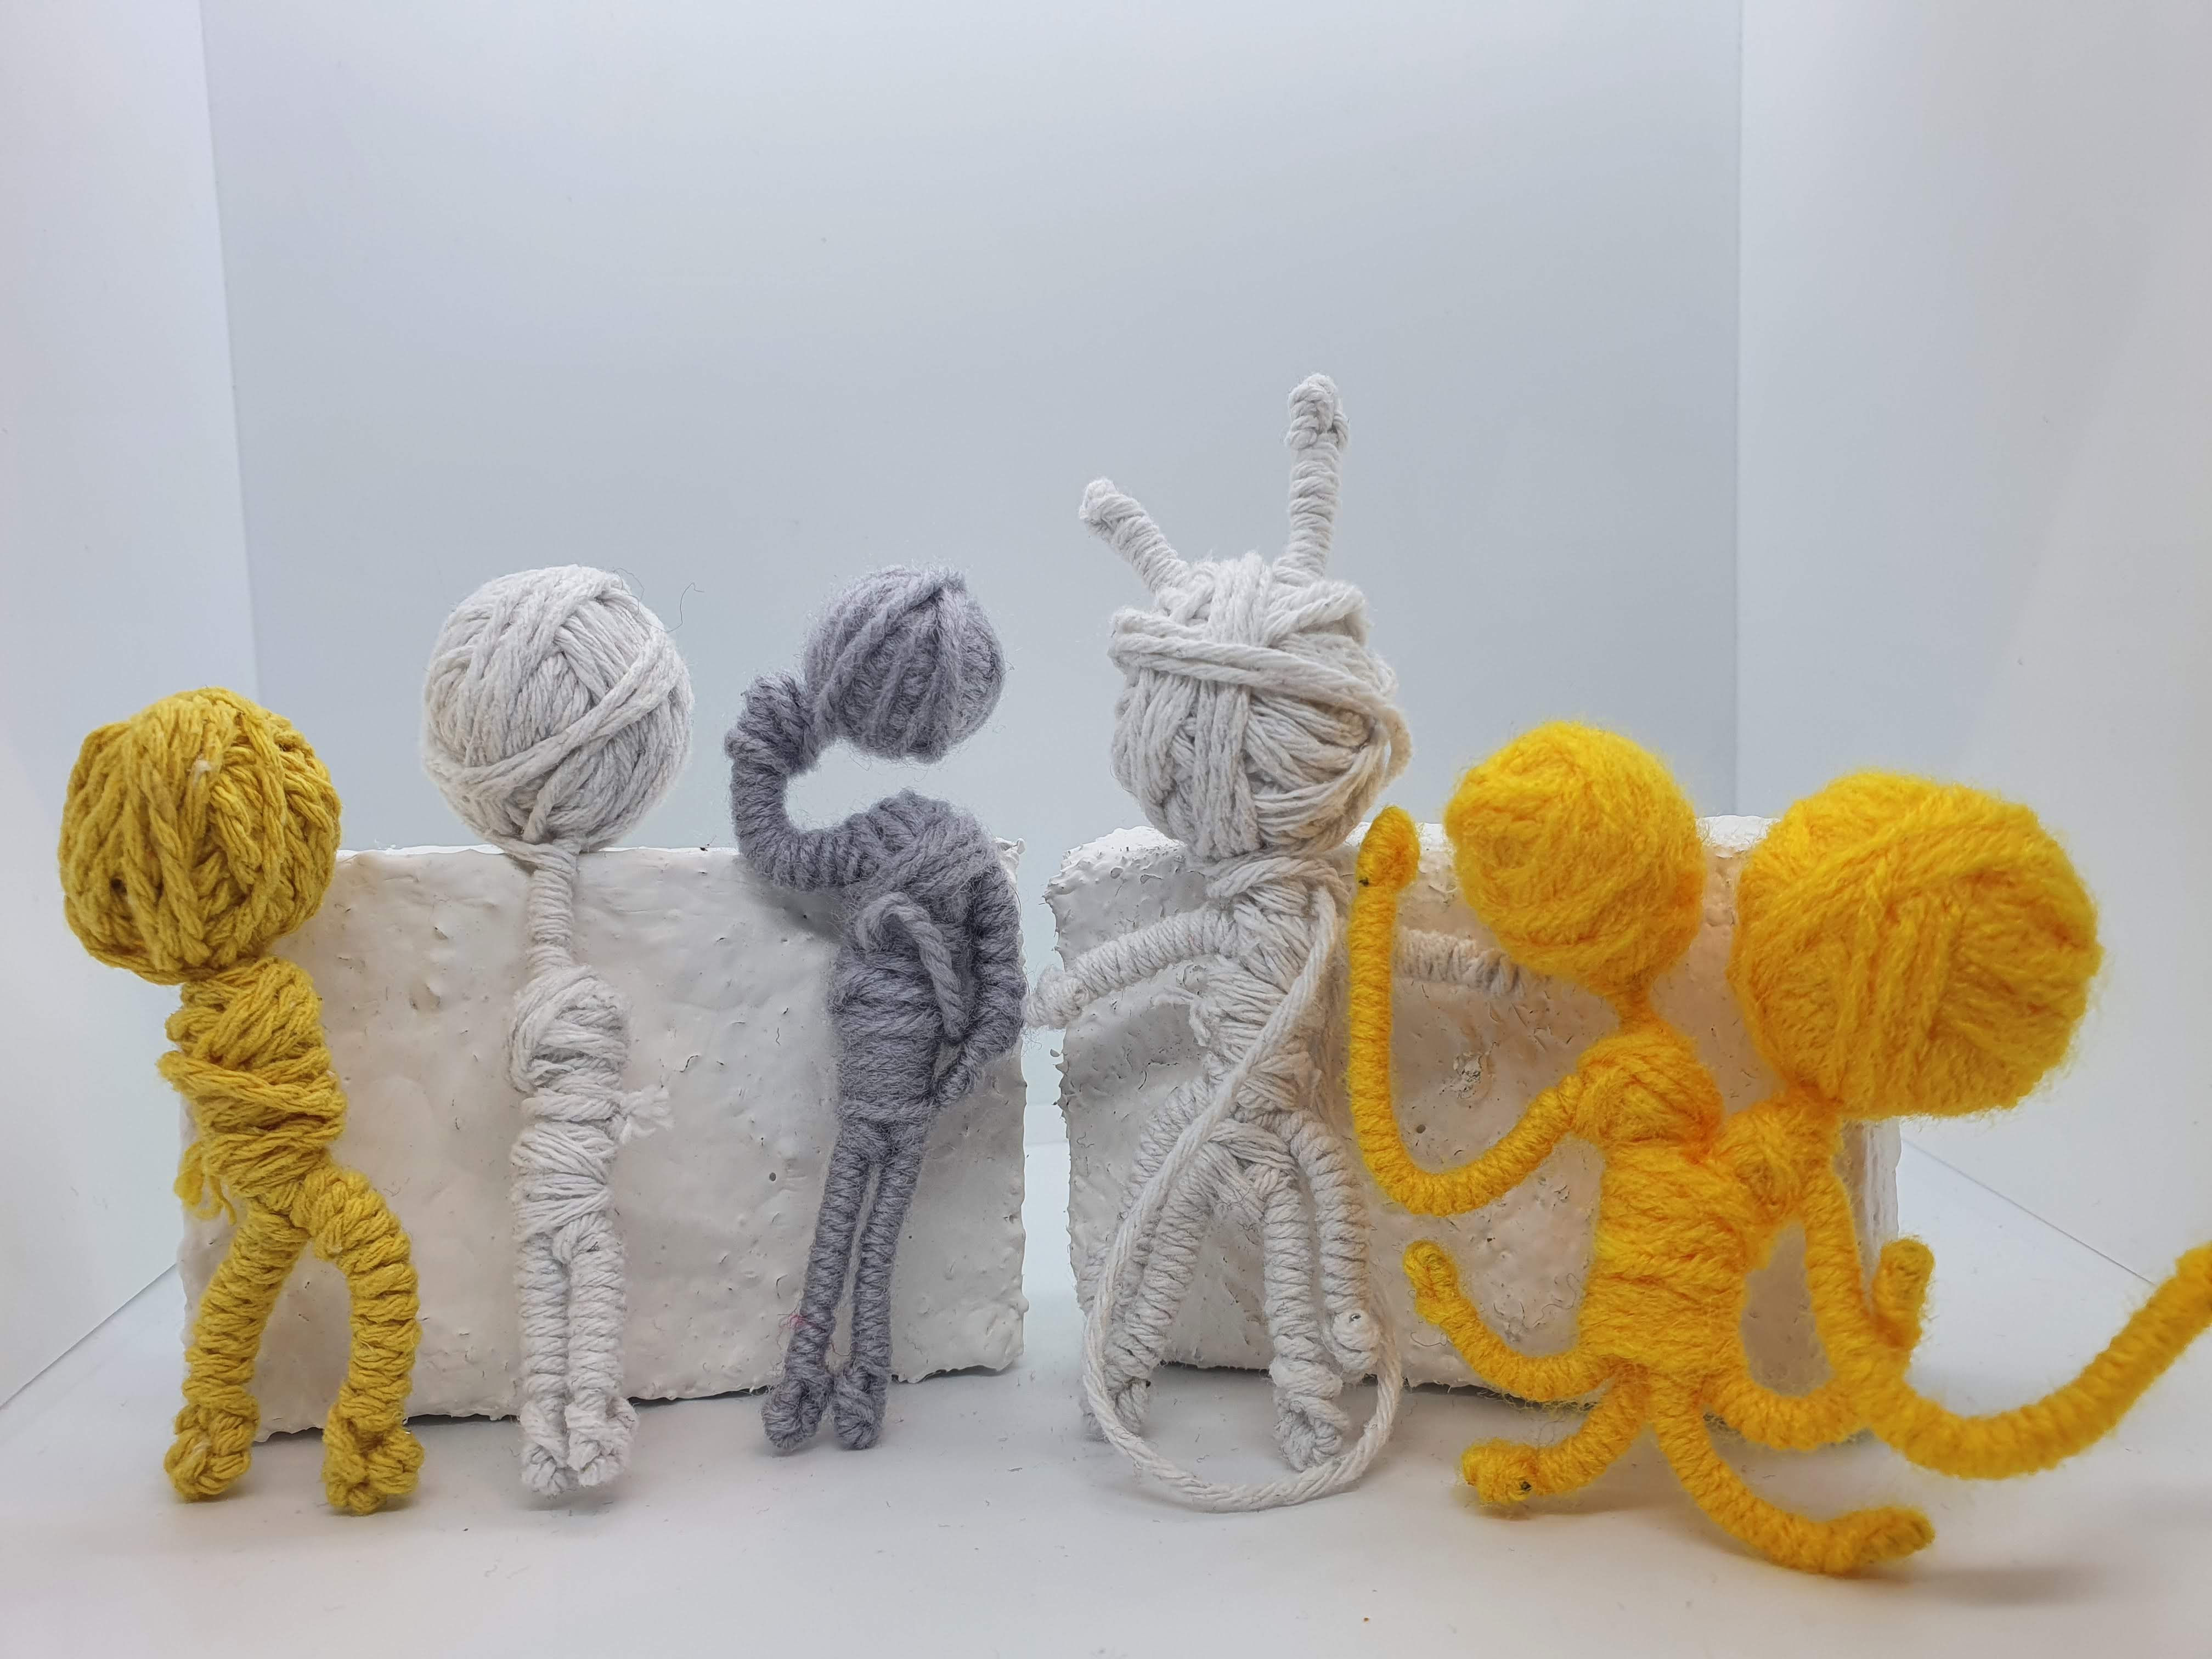
When given the feedback on having the story of Steve be more present in my work, I knew that I had to make the narrative of this project a form of origin story that was separate from Steves themselves but still made an impact in its own way. That is when I came up with the story of a community of Steves that shifts and changes when they finally find the thing they settle on. Depending on where they settle, the colour and form of the Steve changes to best suit what they adapt to in a way that celebrates that settling place. These forms are as follows:
- The Unadapted – The standard form of Steve who has yet to find their place to settle
- Proportioned – No change whatsoever
- The Thinker – Adapts around cognitive things e.g. Books, Puzzles, Newspapers
- Big Heads – Double the normal-sized head to hold the largened brain
- The Helper – Adapts around tasks filled areas e.g Desks, Workbenches, Tools
- Long Arms – To allow easier access to help hold and lift bigger things
- The Adventurer – Adapts to active tasks e.g. Hiking, Sports, Orienteering
- Long Legs – For added agility when taking part in tasks
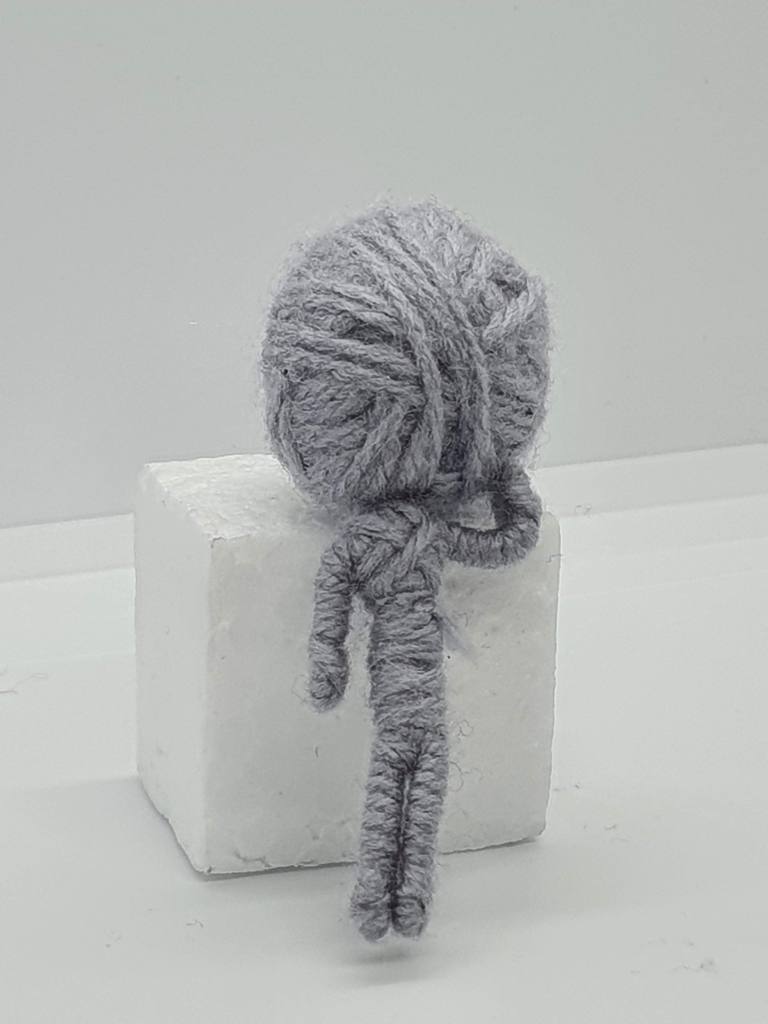
- The Hugger – Adapts to people/beings e.g. Figures, Creatures, Something Compassionate
- Long Arms and Legs – To allow easier ways to wrap around and hug things
These Steves’ live their lives for a long time, believing these types of Steves to be the only types to exist. However one day, An adventuring Steve wanders a bit too far on an exploration one day and finds a Giant Purple Steve resting like a long-lost relic of a forgotten time. After this discovery, the different forms of Steve try to figure out what this new type of Steve is.
- The Thinkers stay at the base to examine and figure out what this big Steve is.
- The Helpers manoeuvre their way around the Steve to see if they can get it moving.
- The Adventurers compete with each other to see how high they can climb.
- The Huggers wrap themselves around the Steve, hoping that their kindness and warmth will help
- The Unadapted climb all over the Steve thinking it is a normal thing, some even starting to adapt and change with it
The forms of the Steves are better shown further in the post.


Alternate Steve Forms – Sketches
When it came to changing Steves’ form, I knew that limbs were the only things I could change as, due to the batch assignment, the Steves themselves had to all be the same/similar sizes. This led to me experimenting and sketching the manipulation of the head, legs and arms of the Steves.
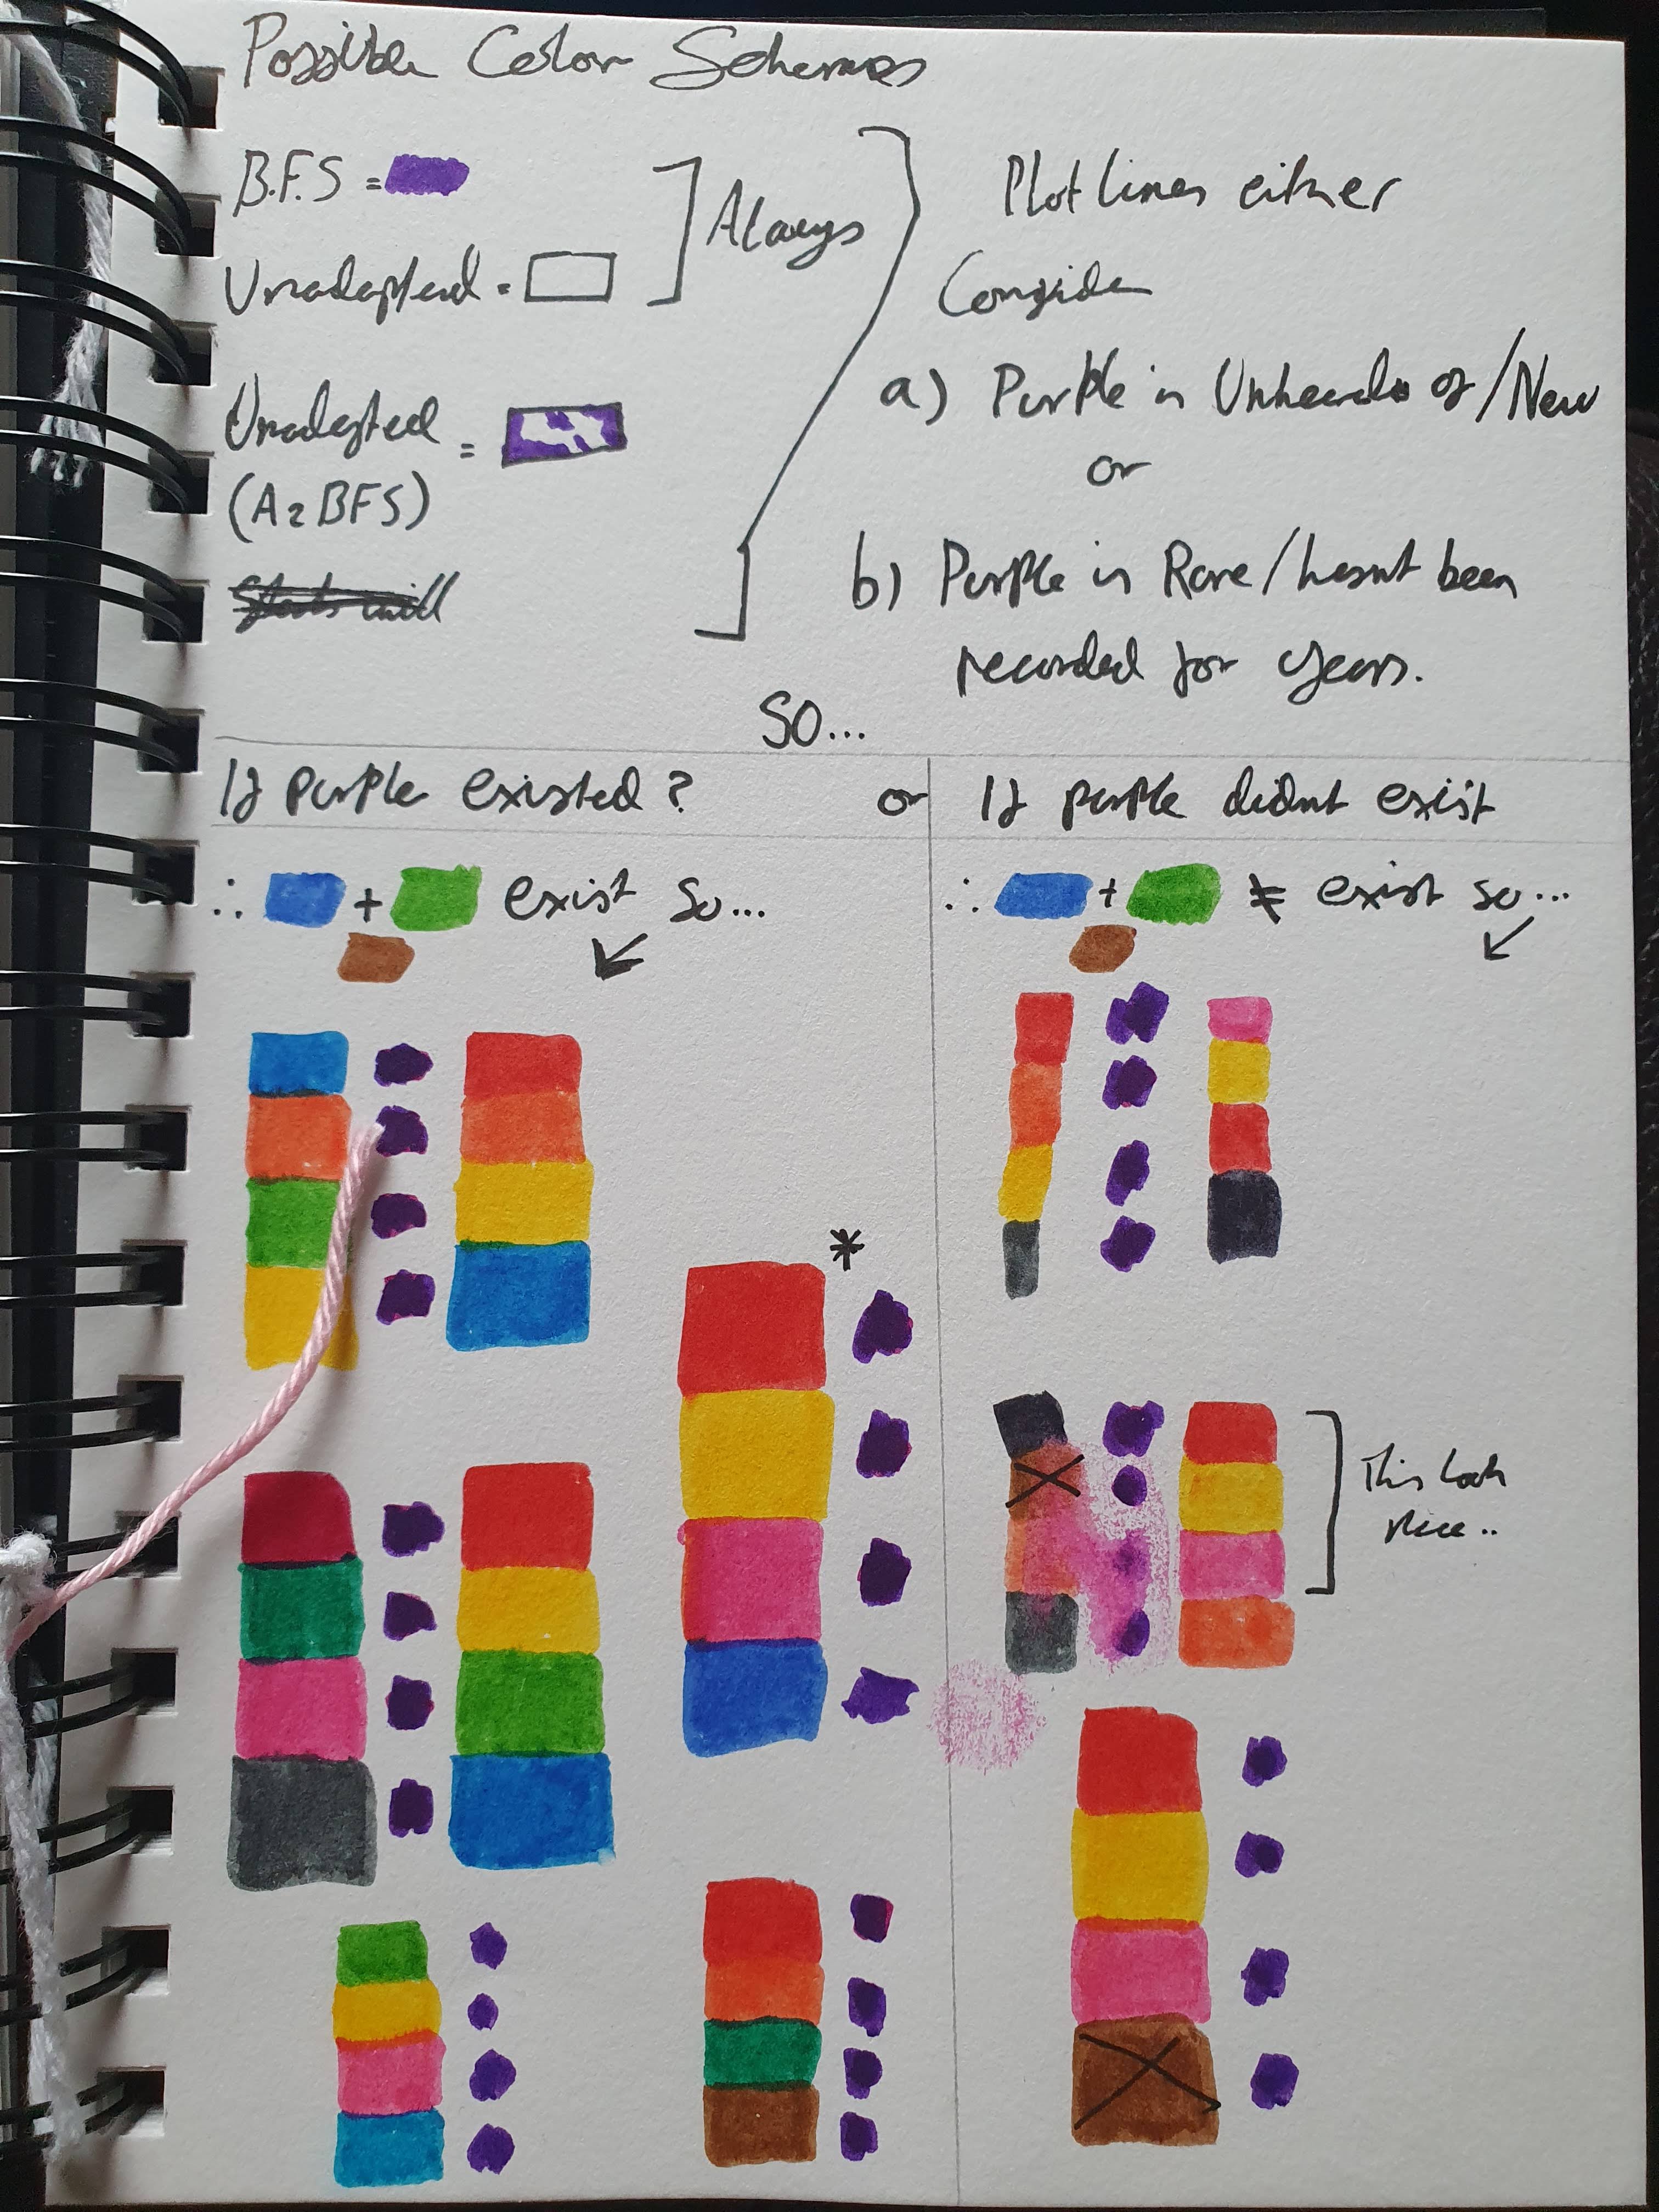
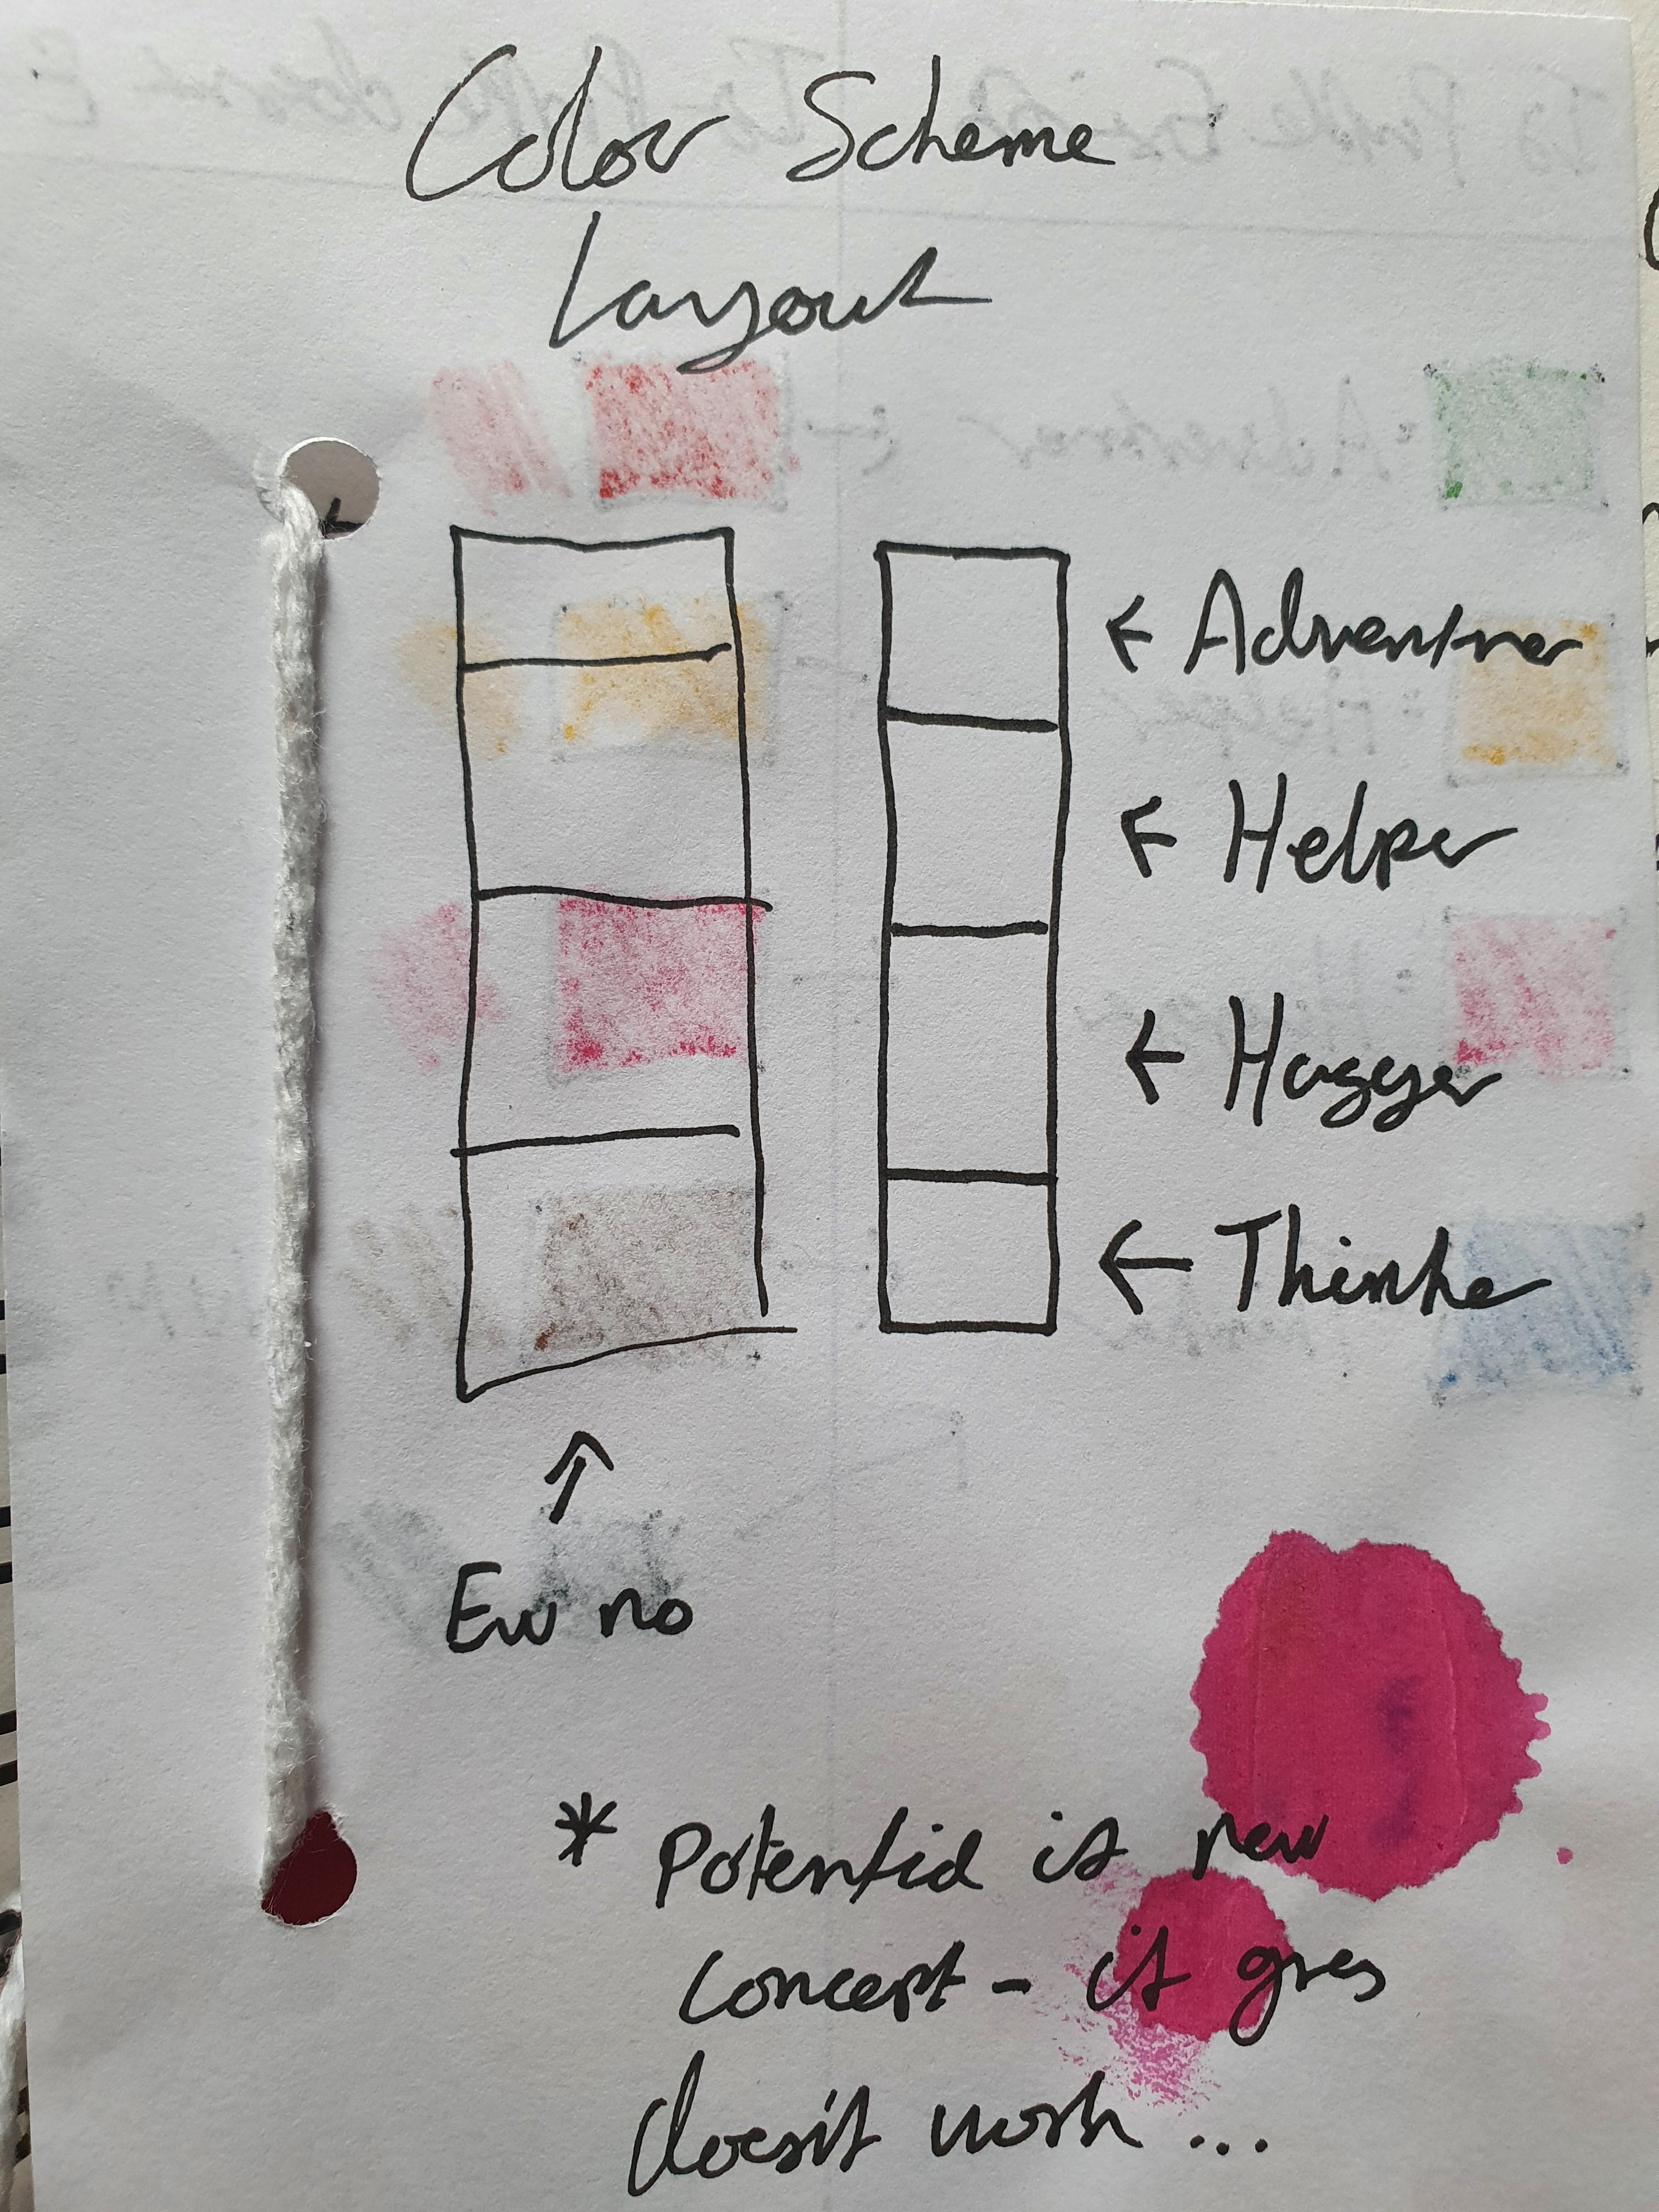
Colour Scheme Experimentation
When figuring out the colour scheme, I knew it had to be tiered in a certain way due to the elevation of certain Steve forms when exploring the Larger Steve. I experimented with various colour schemes trying to get a complimentary composition that best suited the colour of the Large Steve. I then took these colour types to compare them to wool/string samples that I had to see what the Steve forms would look like (These samples can be seen when discussing form experimentation).

Alternate Steve Forms – Material Experimentation
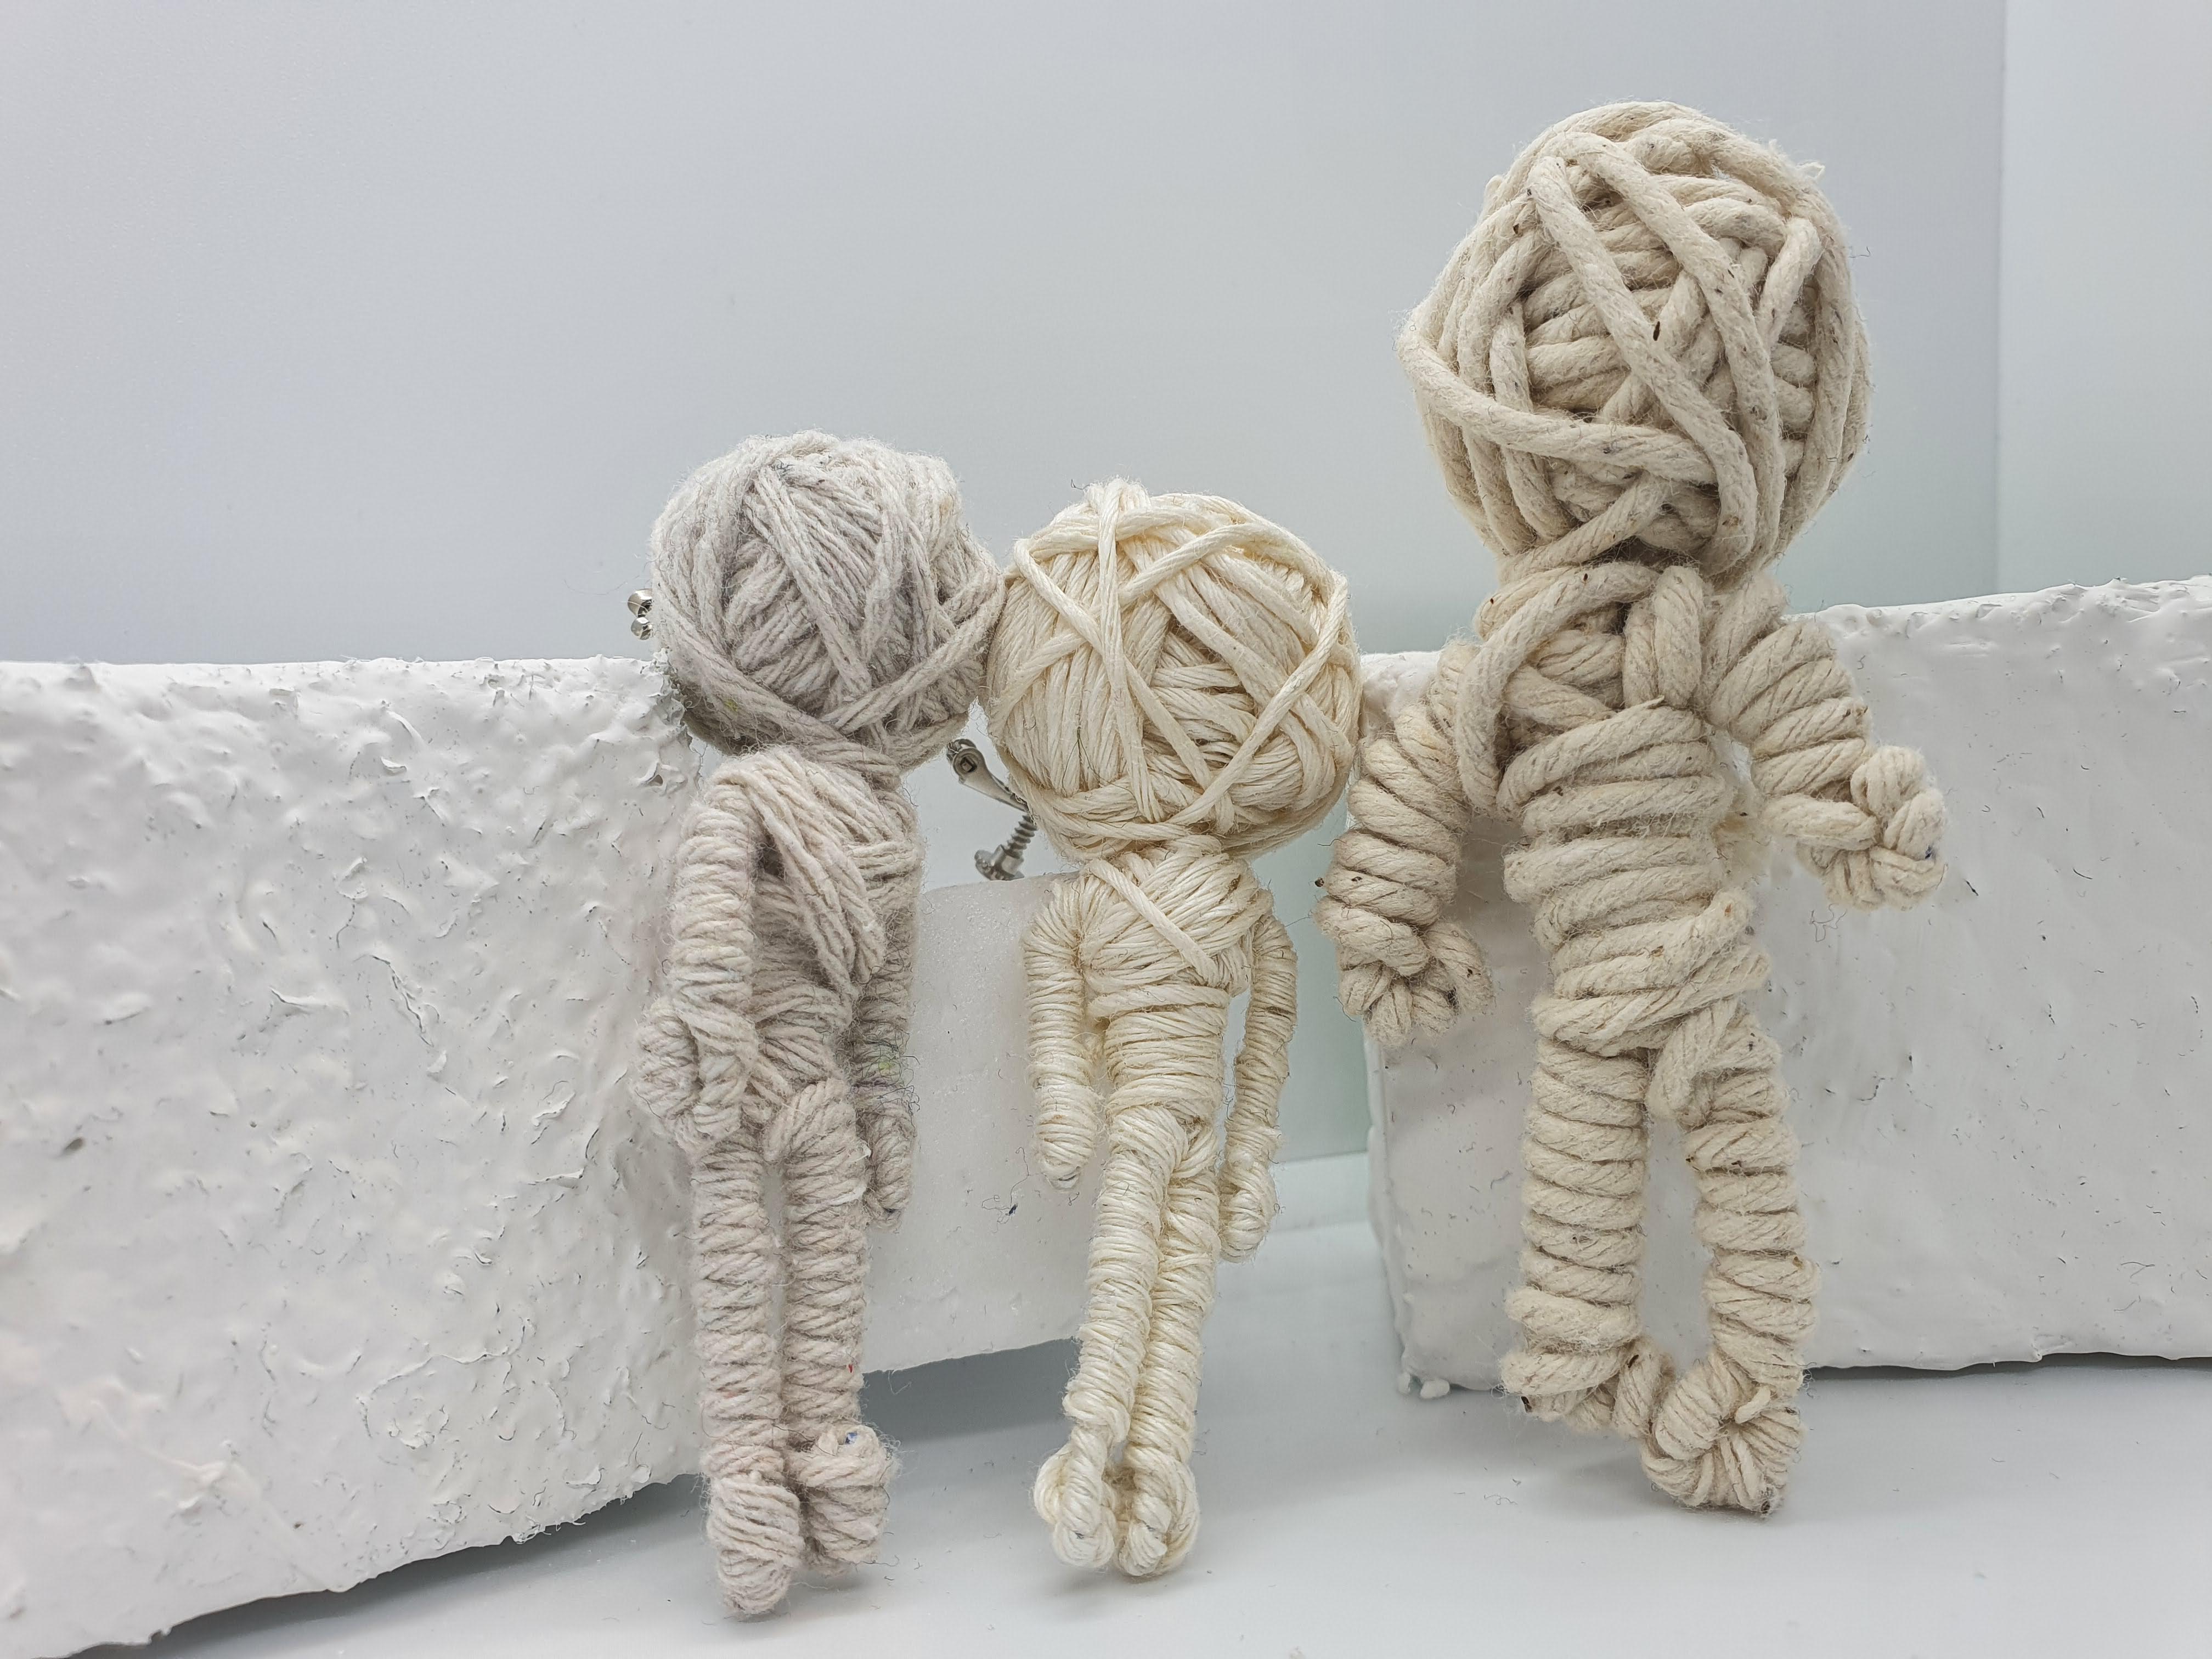
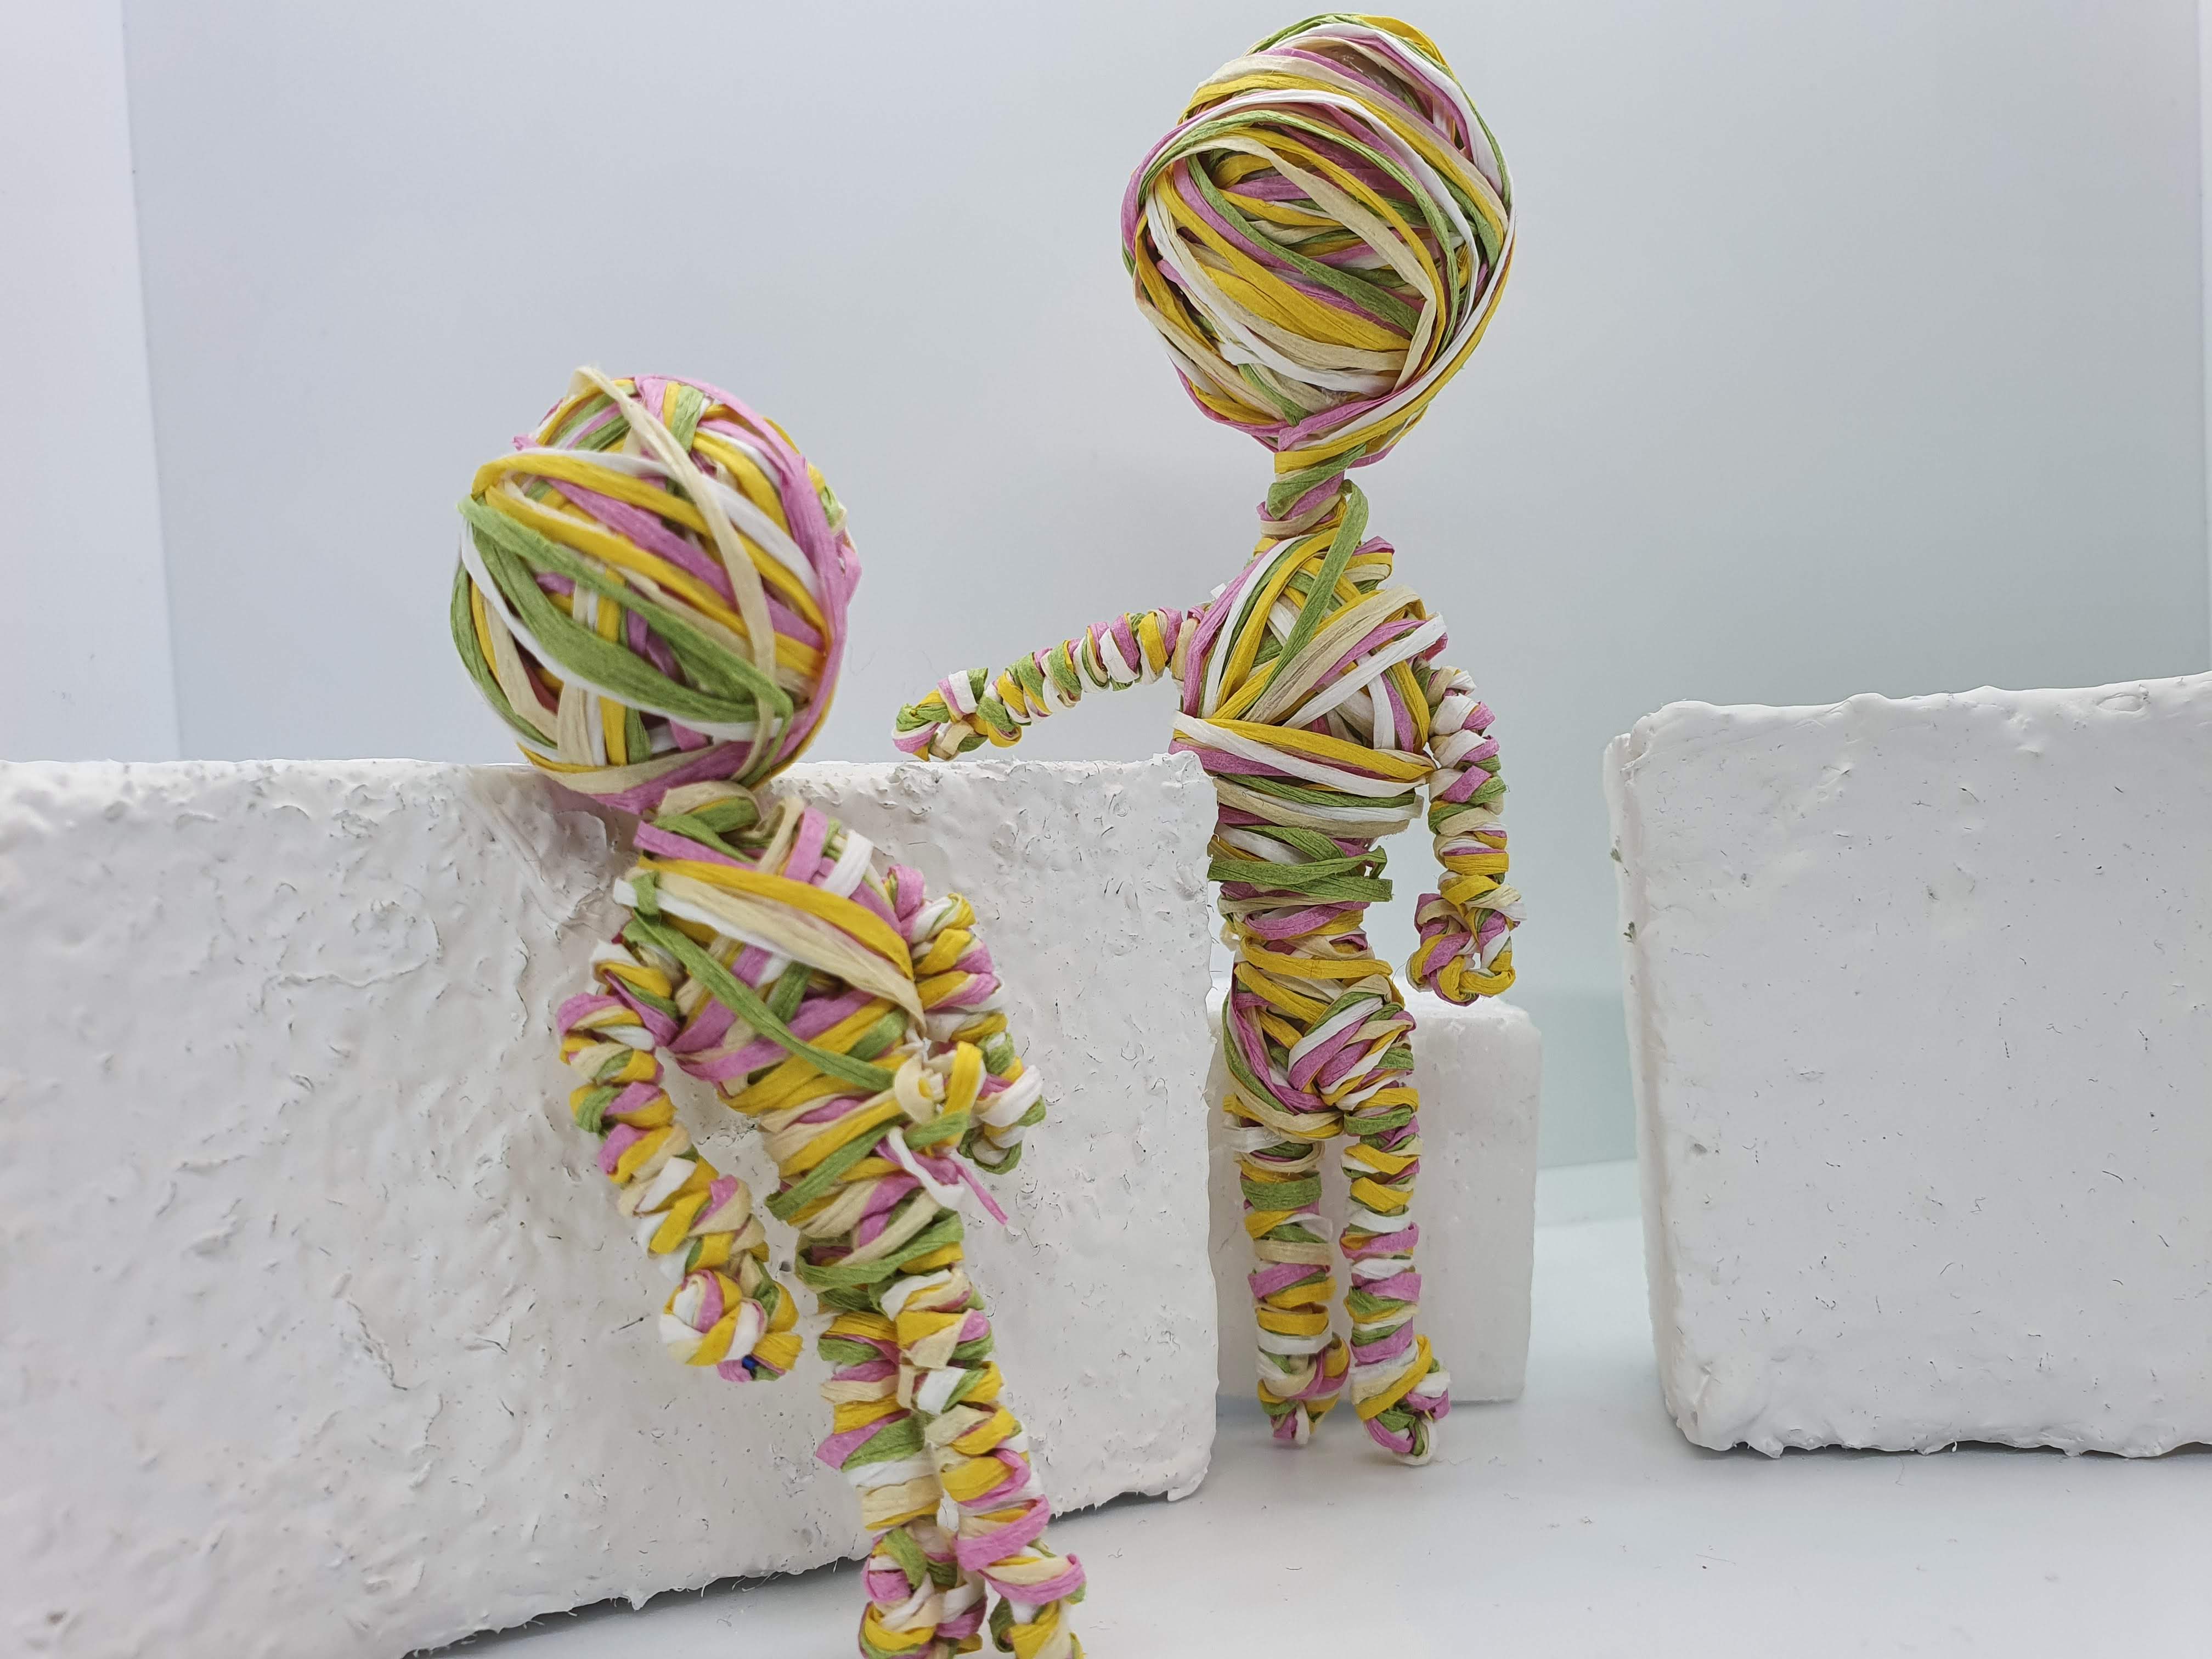
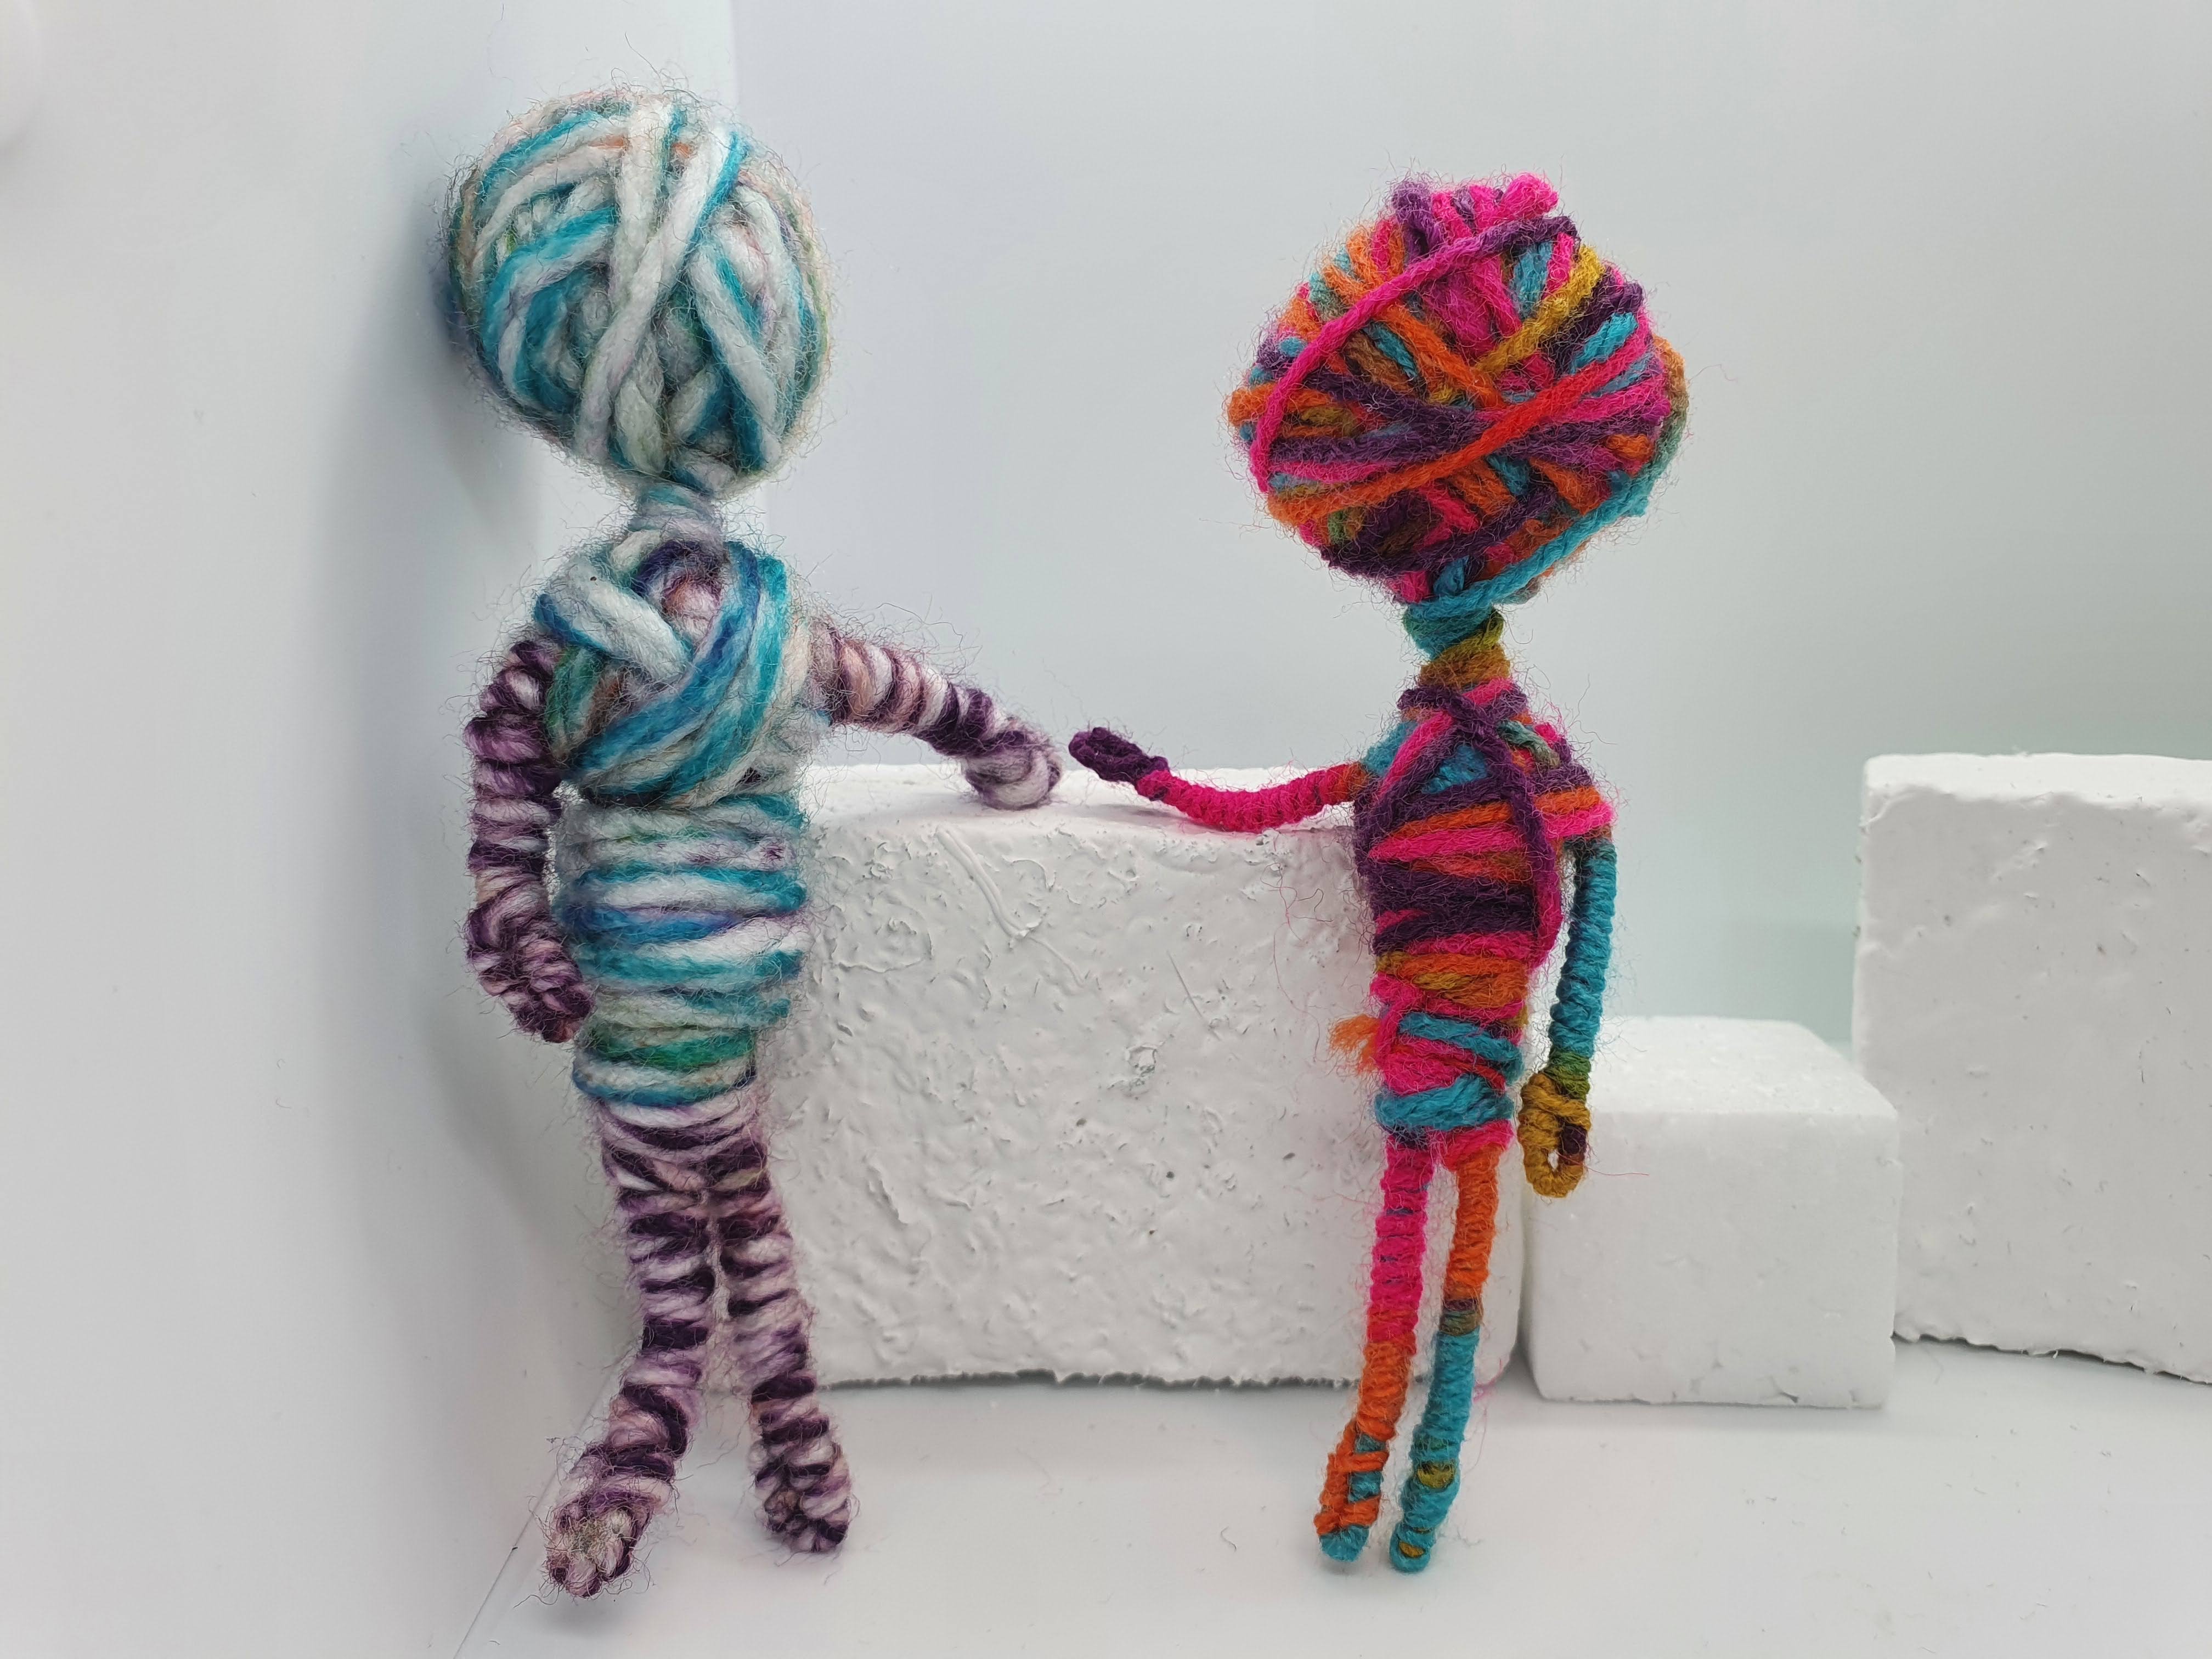
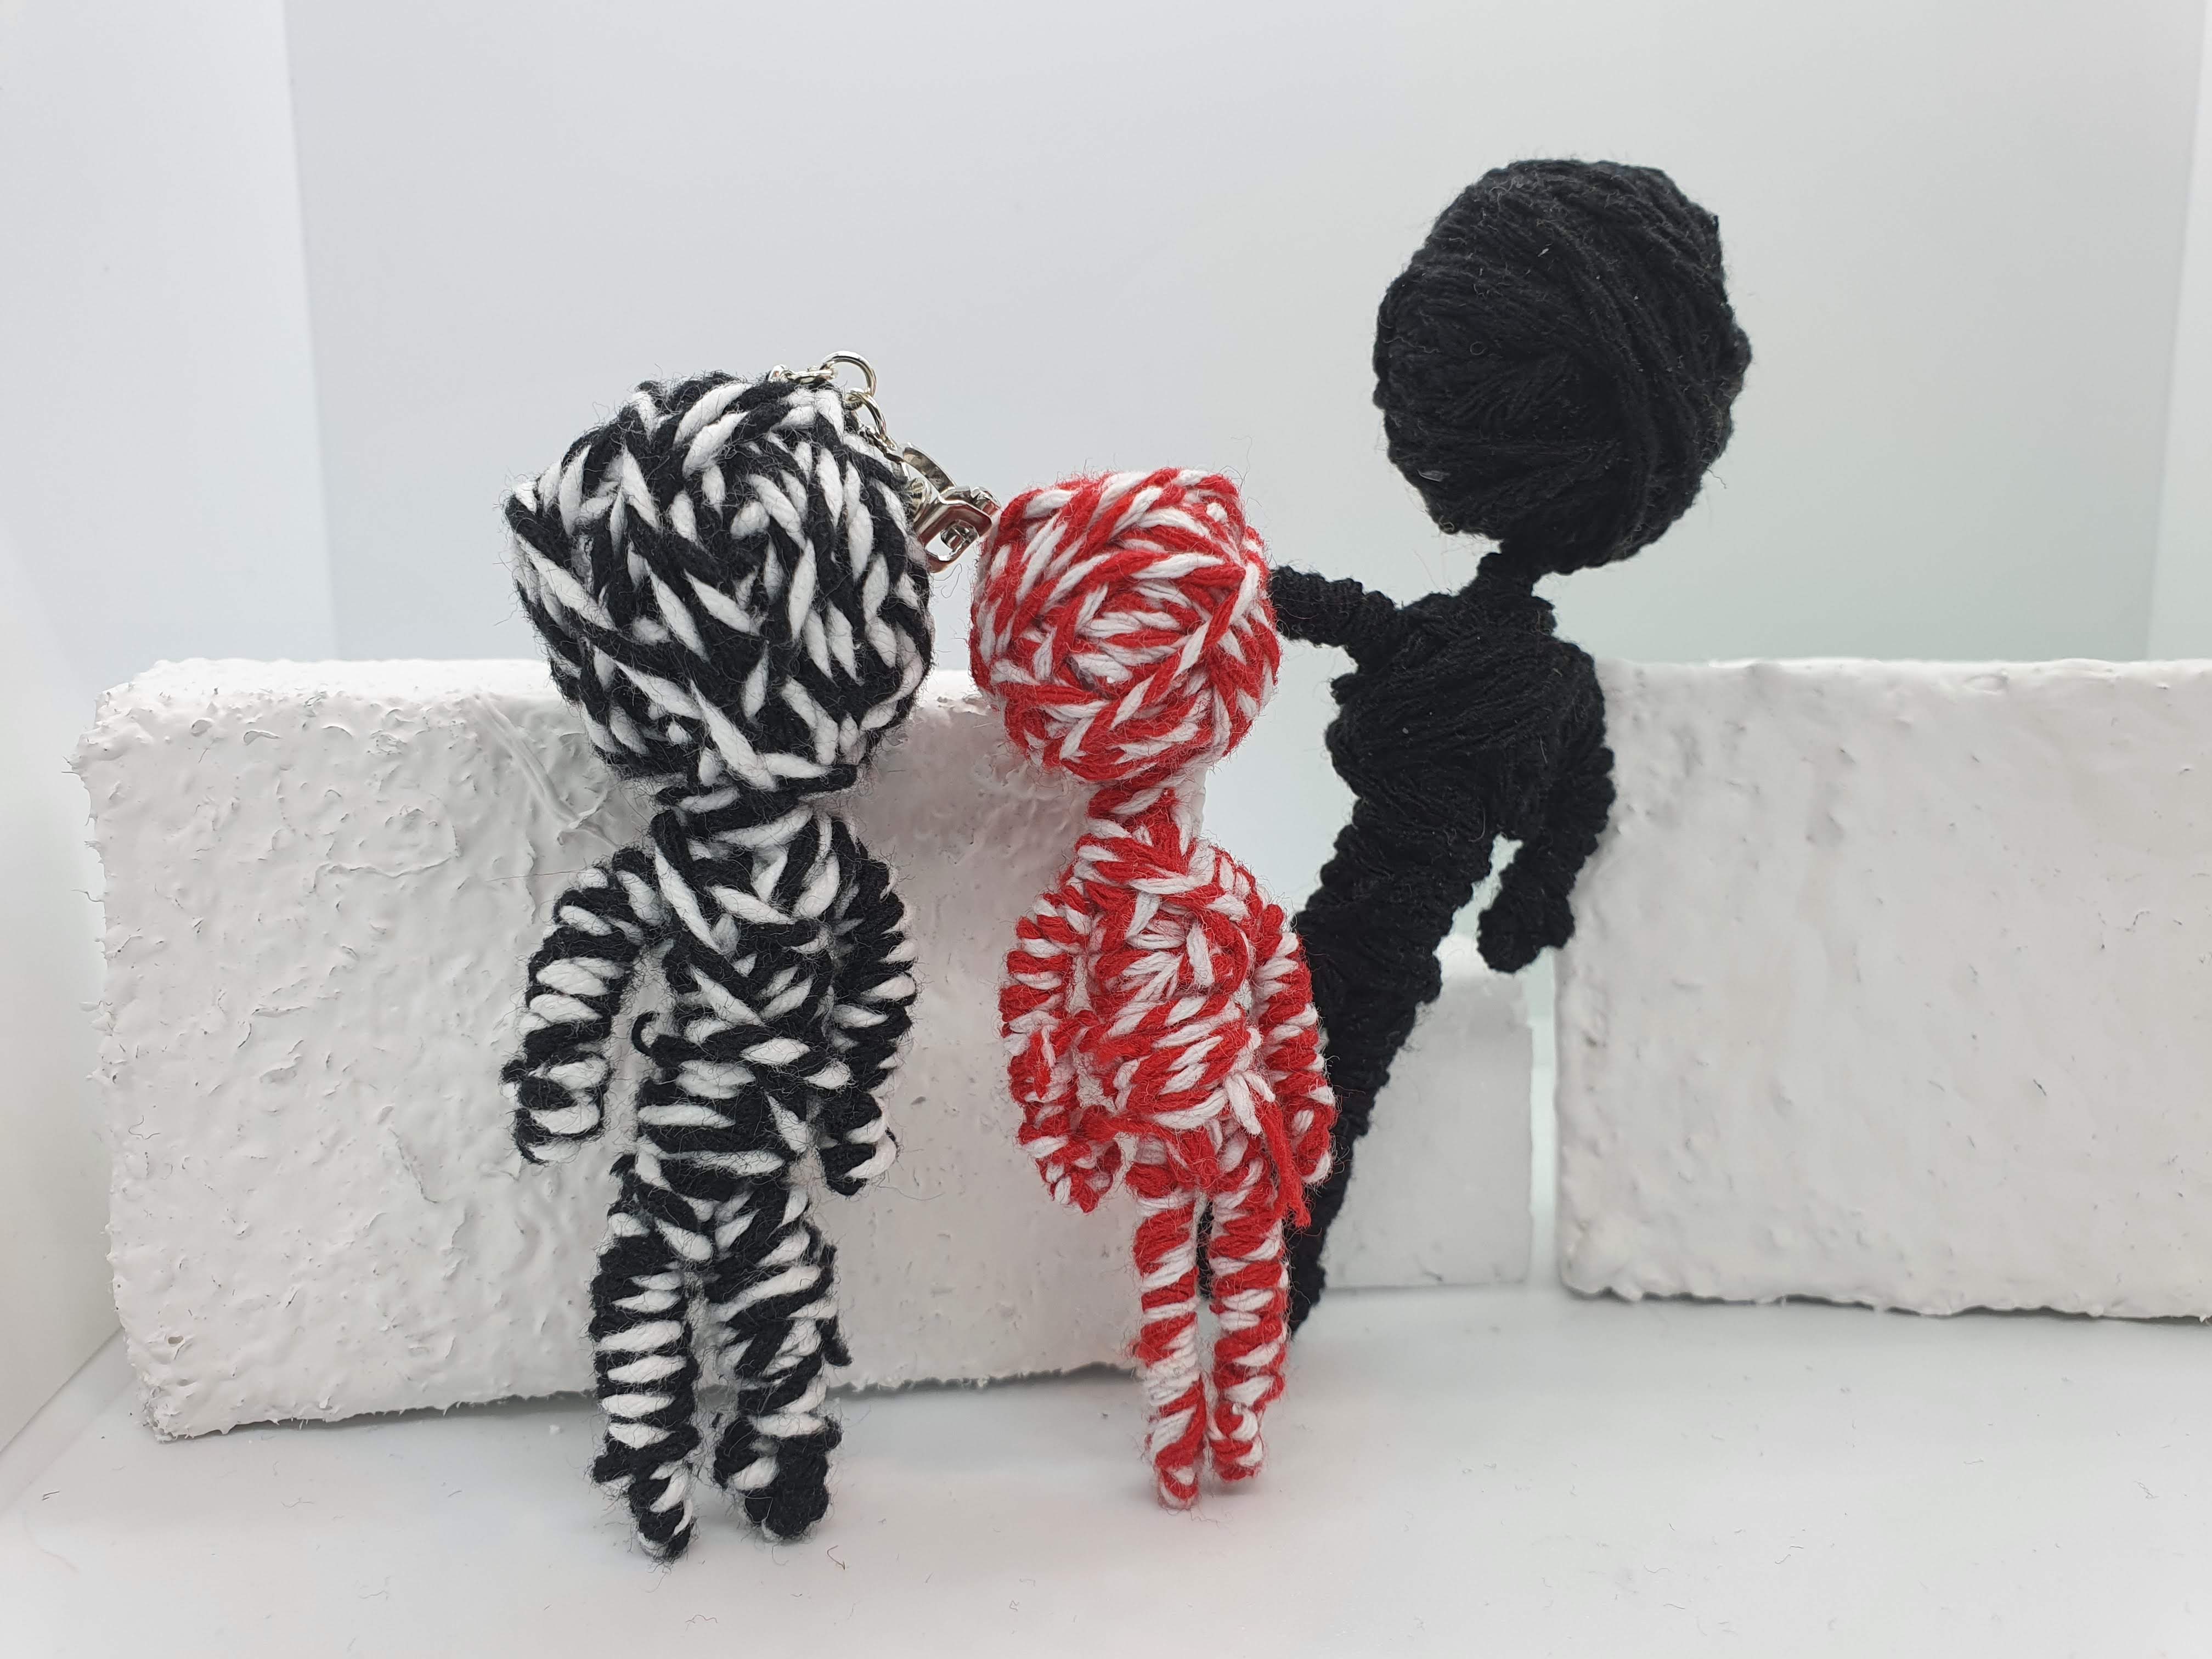
When it came to physically making the Steves myself, I was over the moon to experiment with the various types of string-based materials I had at my disposal that I have been collecting like the Magpie Artist I am. The materials that I experimented with consisted of:
- Wool – Huge variety of colours and soft to the touch
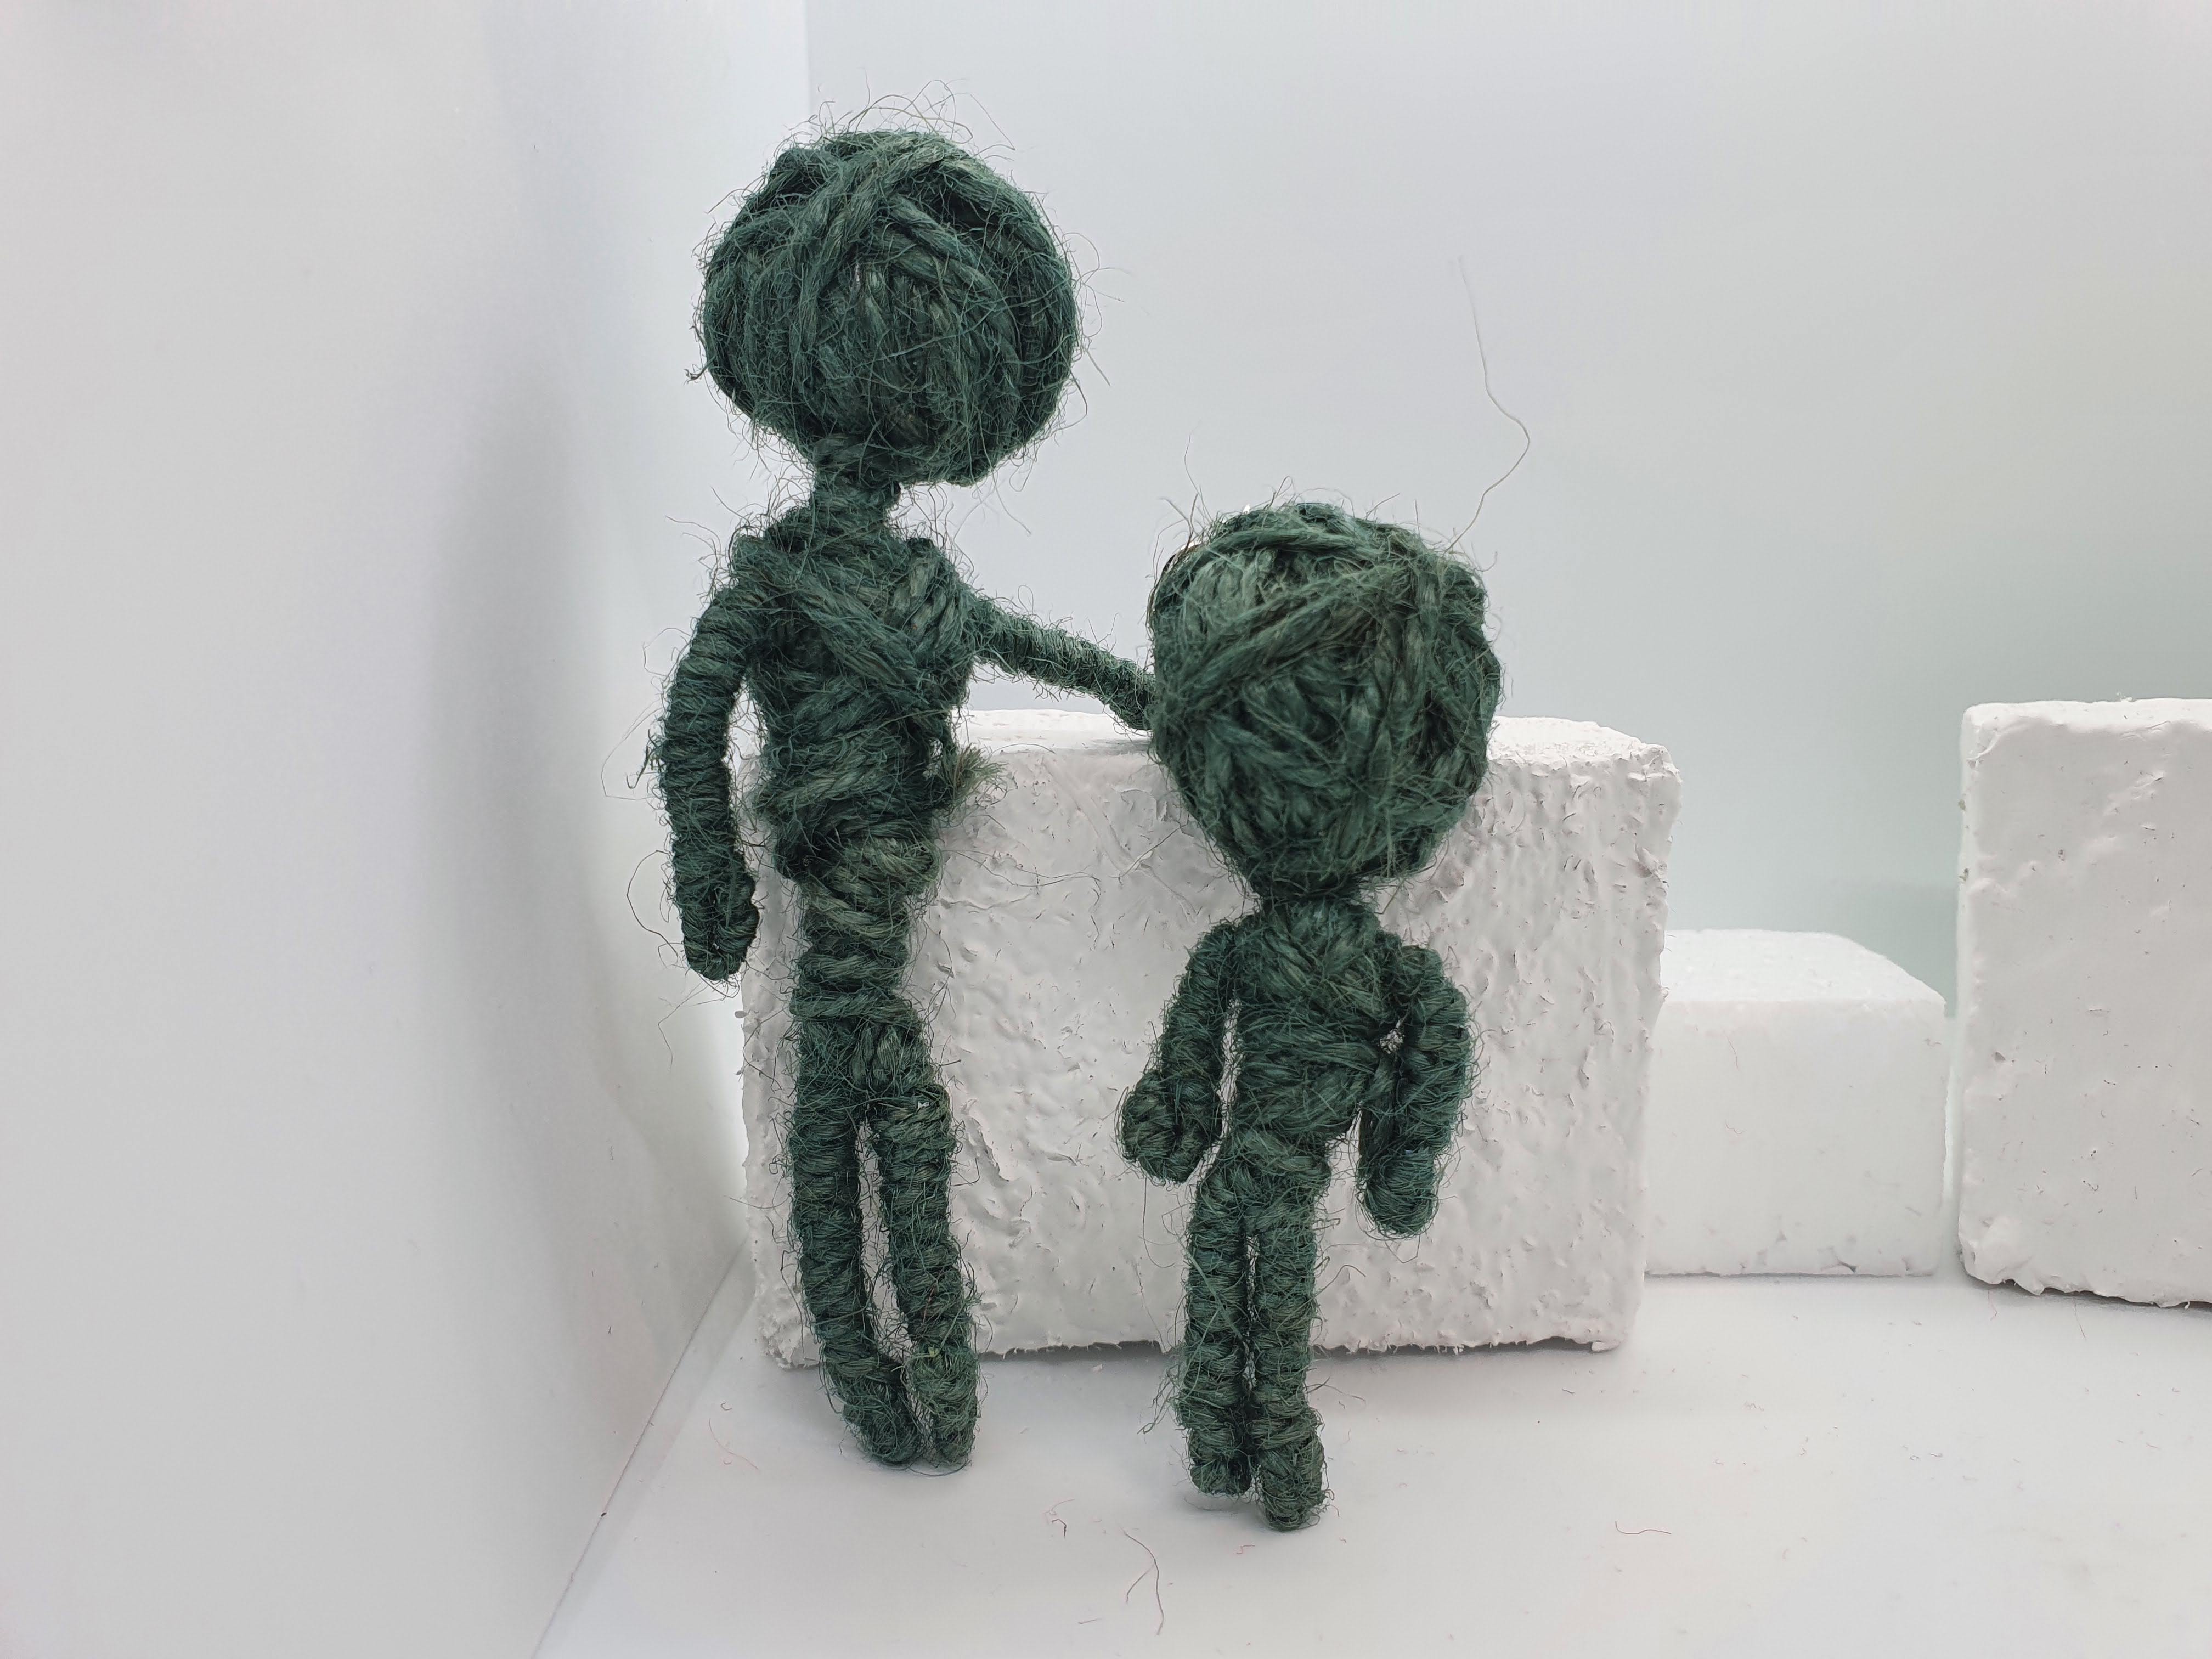
- Various types of String – Monochromatic and differing textures
- Raffia Ribbon – Paper-like texture and fun for a party!
- Multicoloured Wool – Blended colour schemes of wool to better suit a certain theme
- Coloured String – Like wool but with a more coarse texture
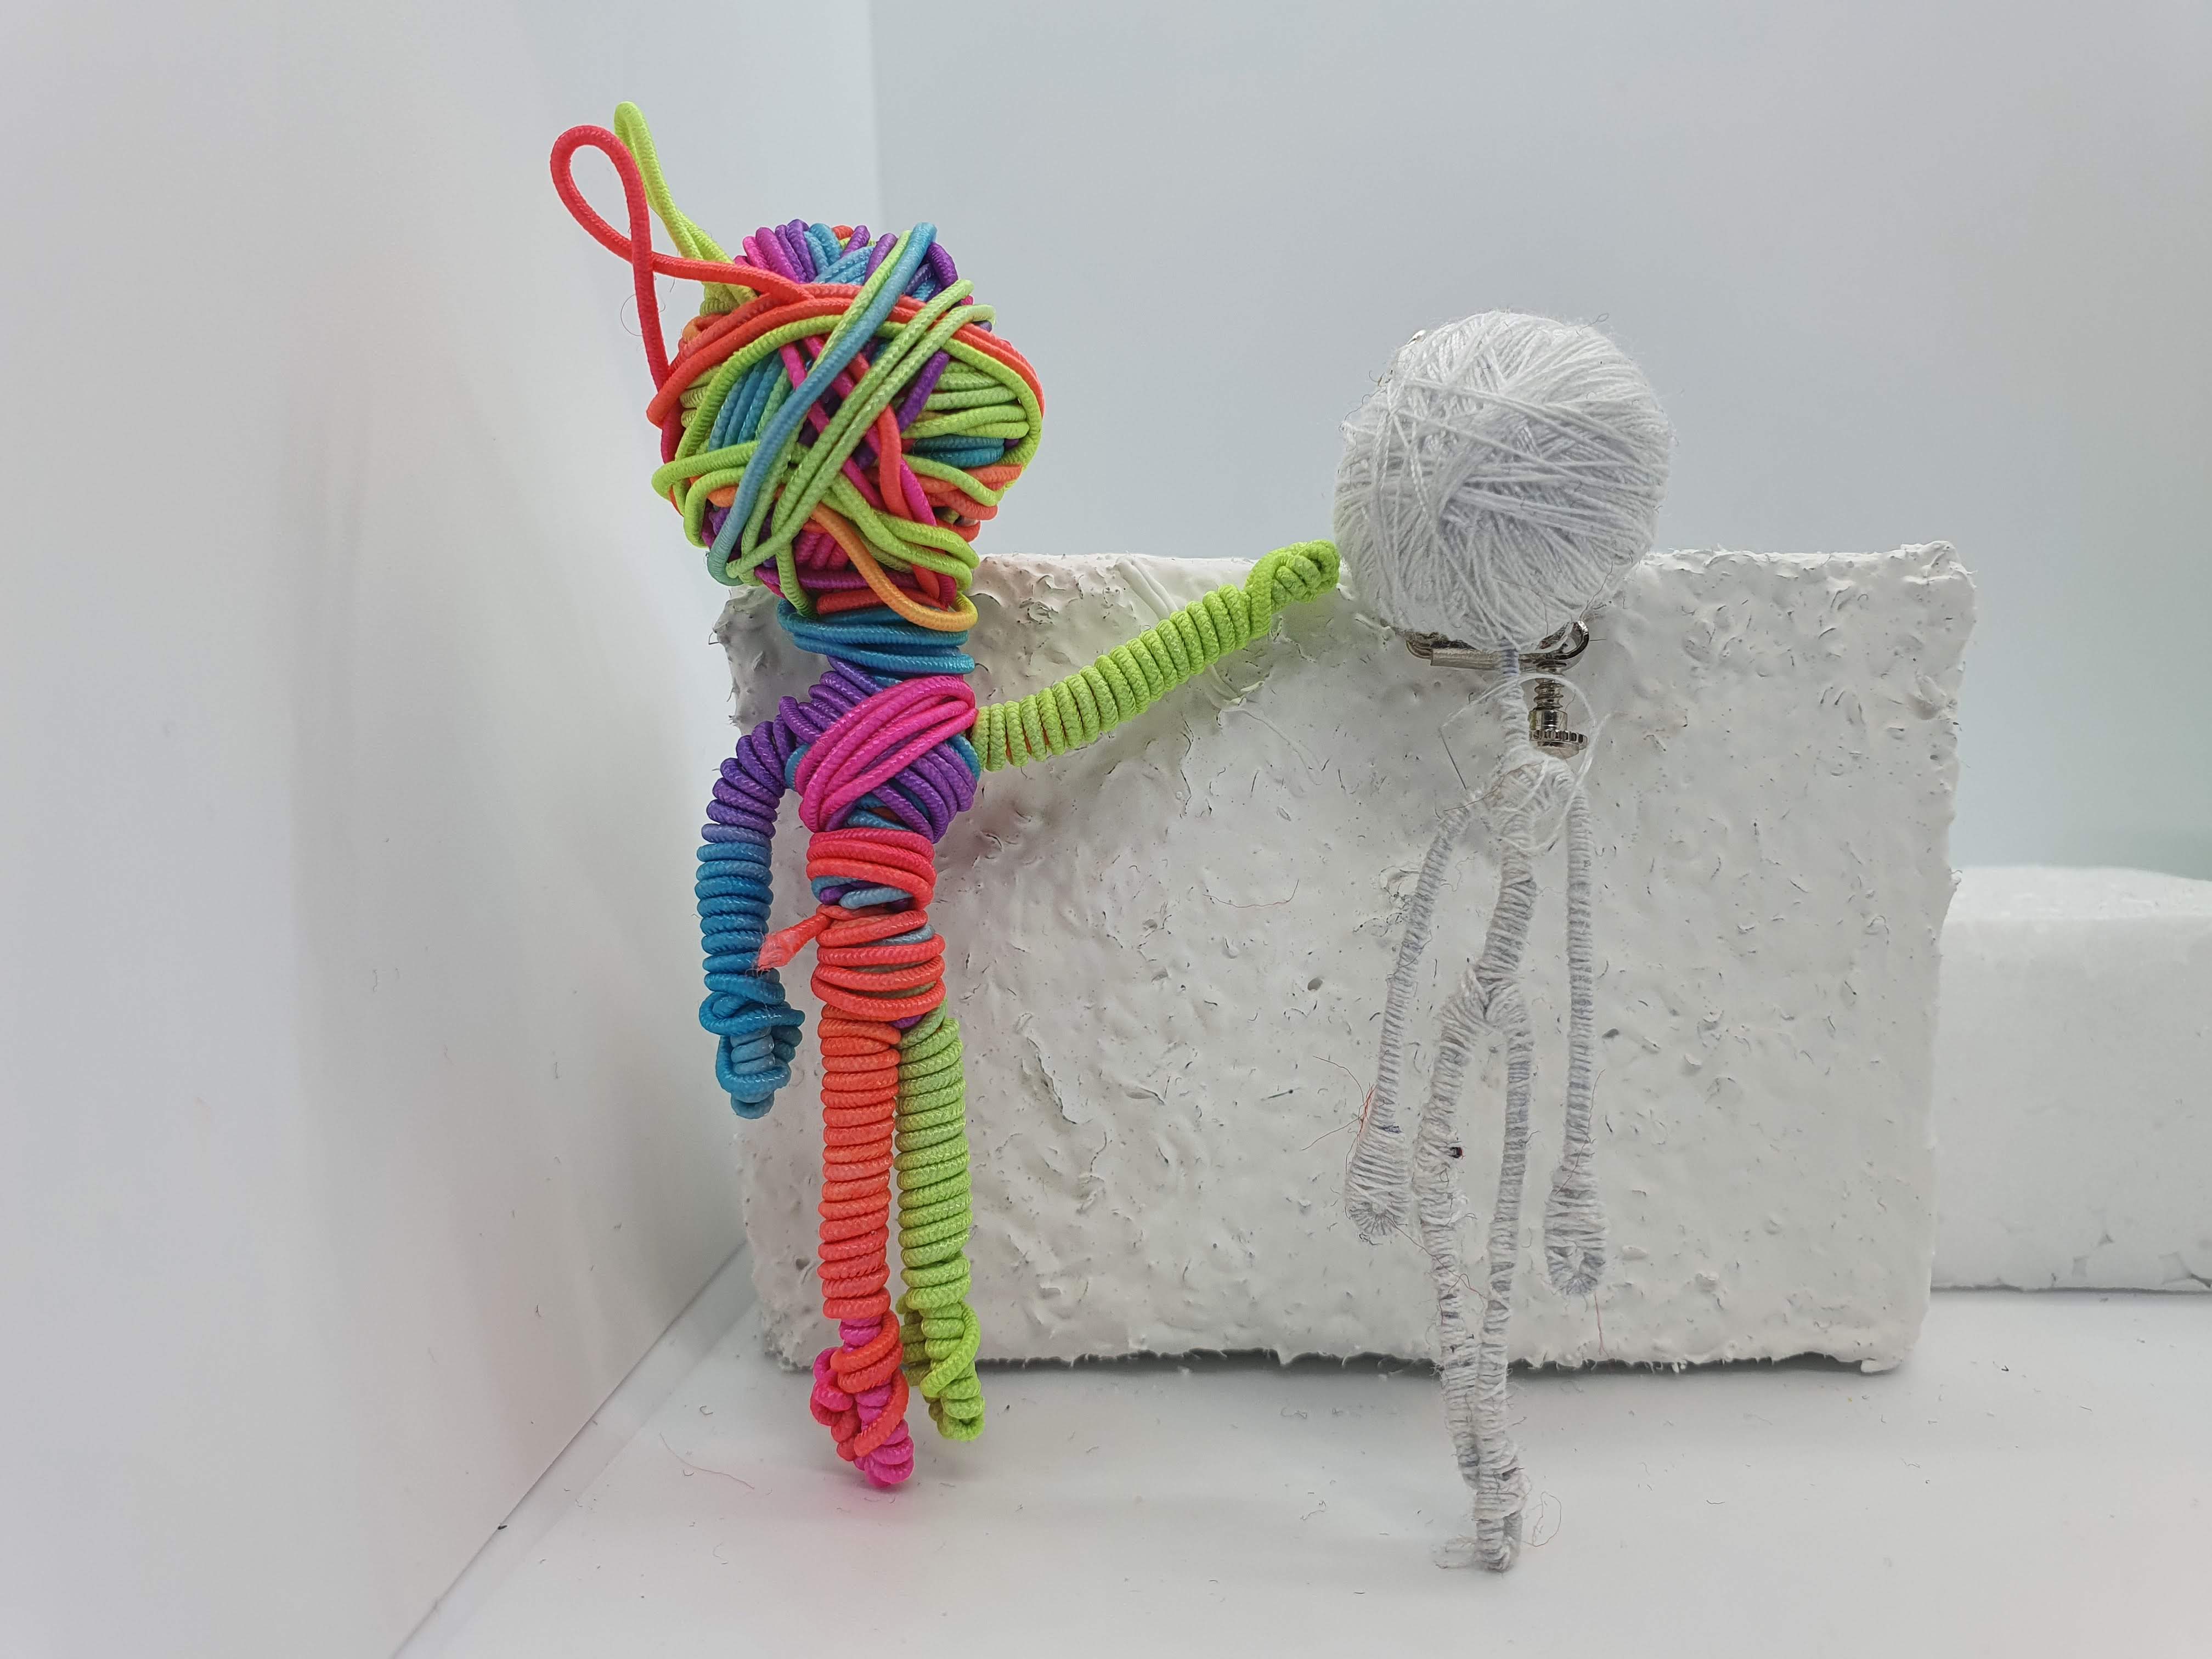
- Present String (Or what I call Present String) – Rubber-like texture with vibrant colours
- Twine – My most hated string type but love the way it can make a Spooky or Camouflage Steve
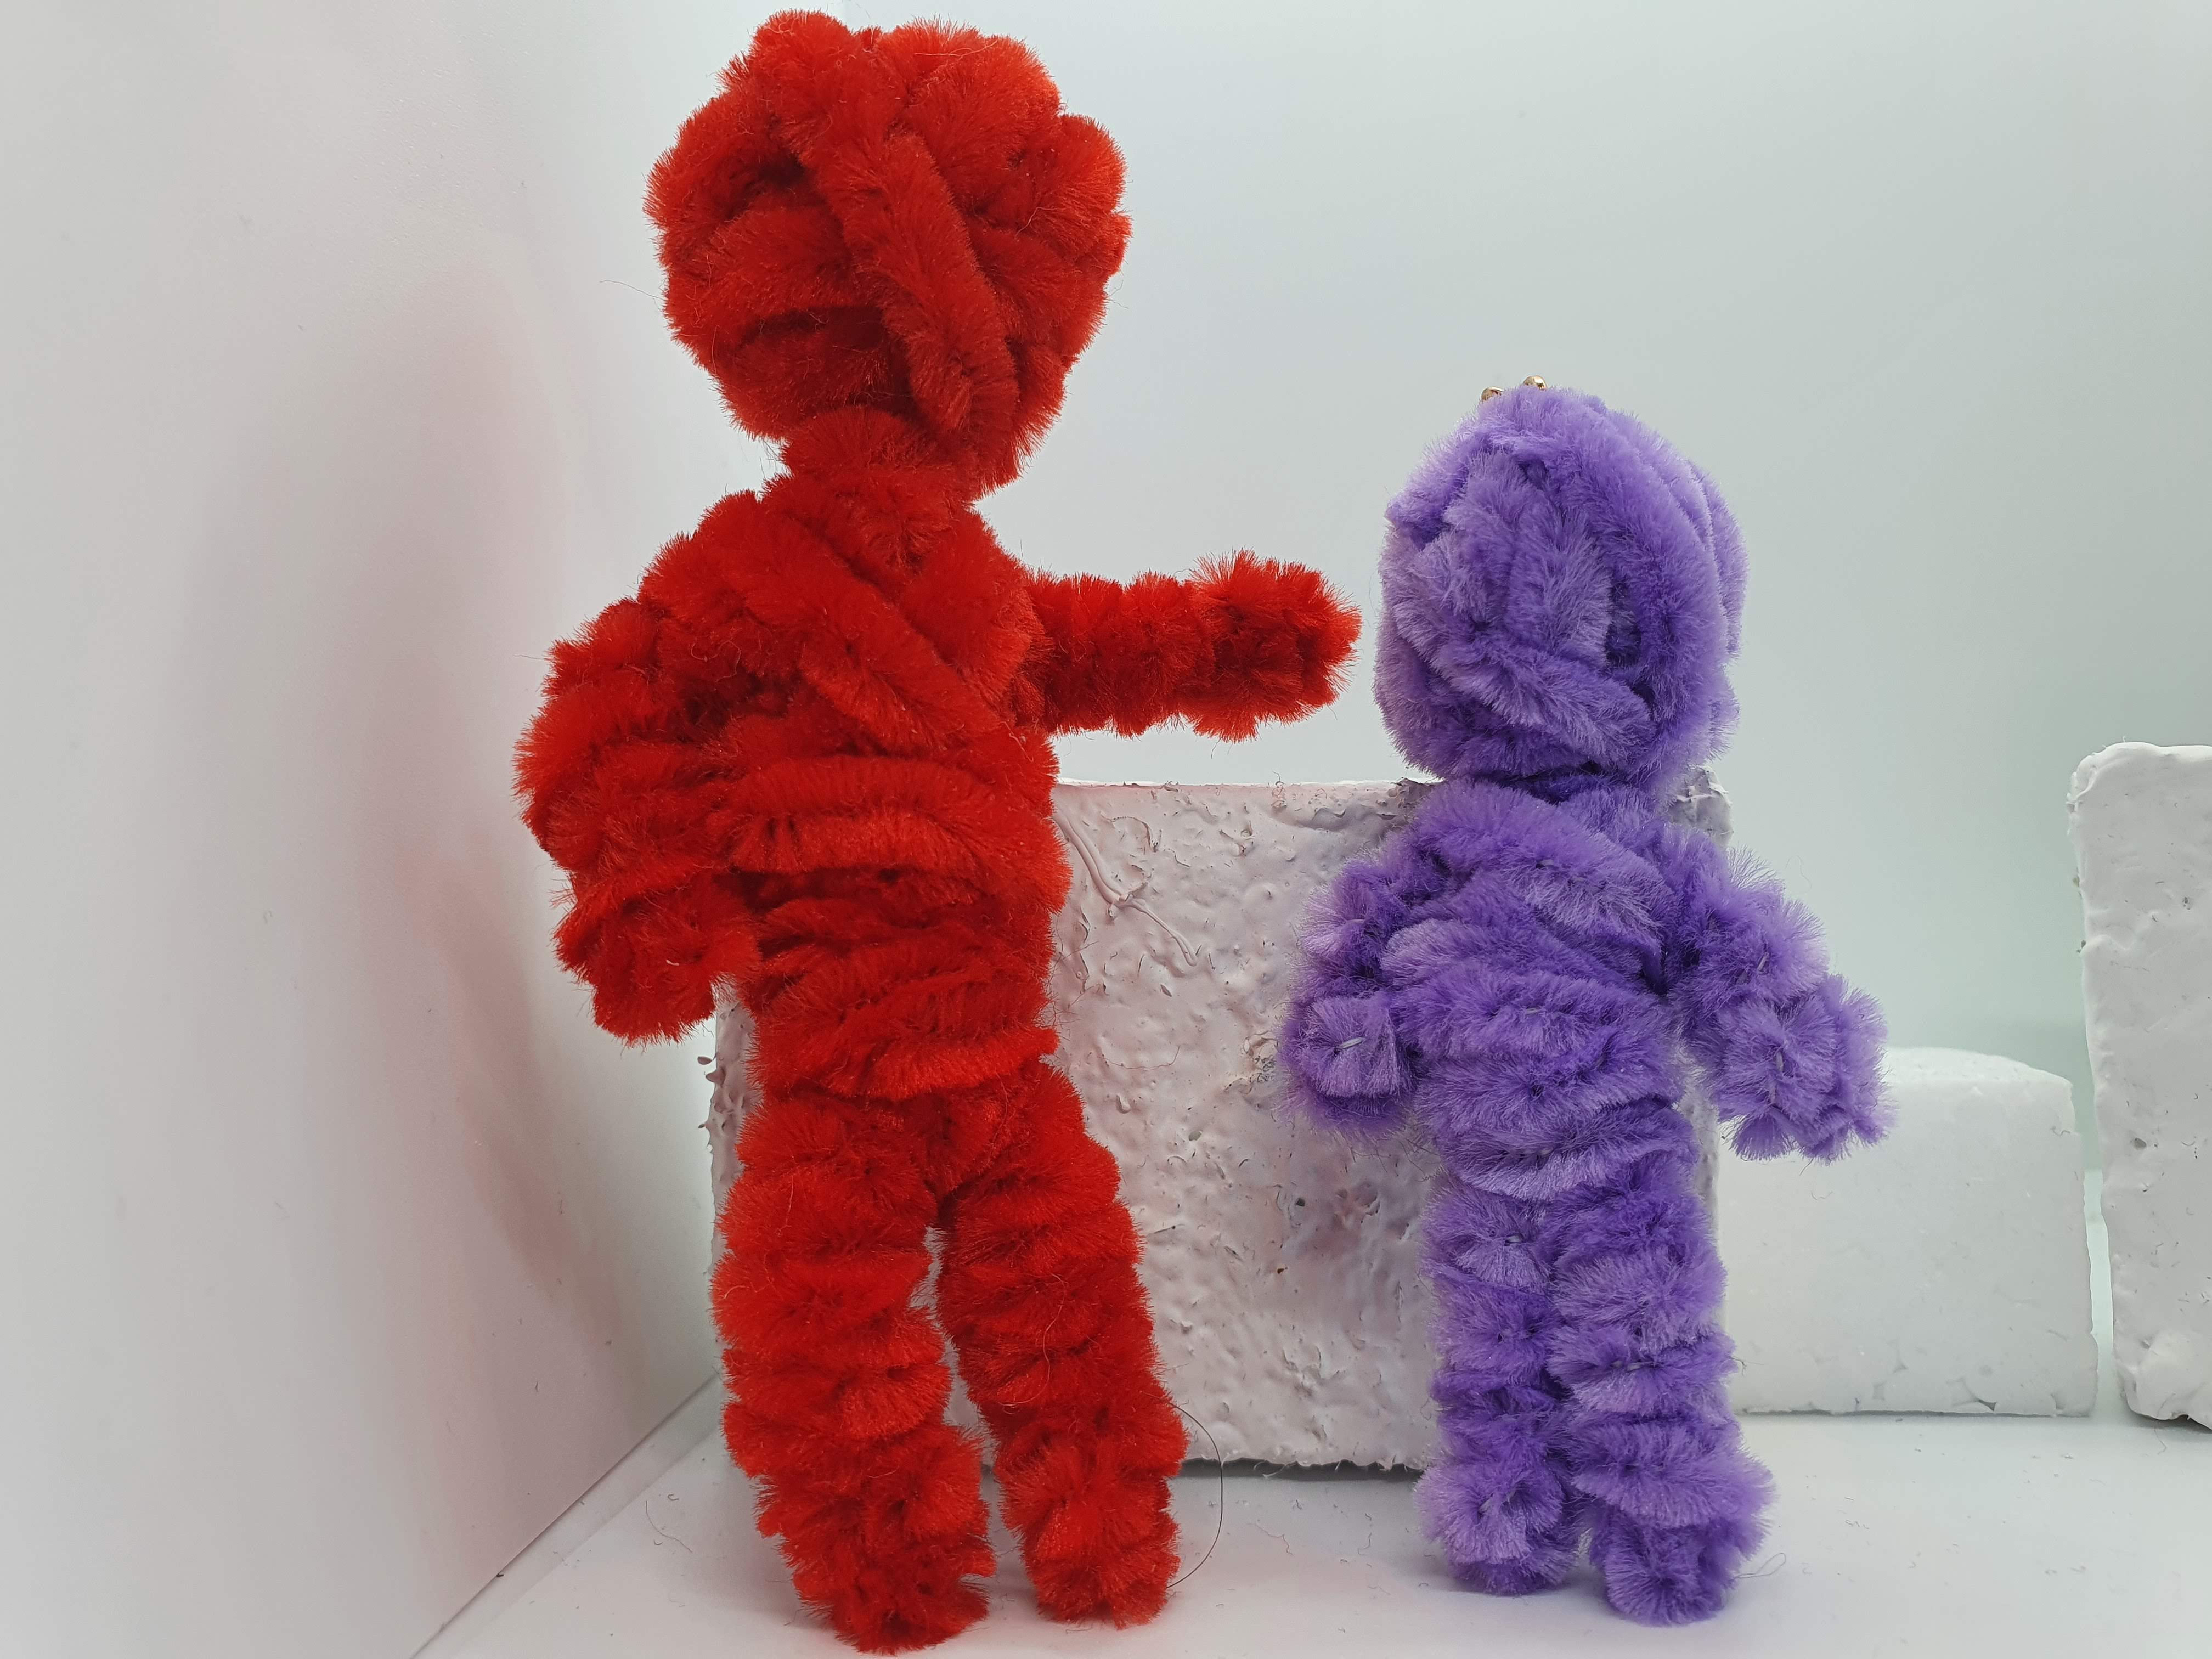
- Boneless Pipe Cleaners – Fuzzy and makes Steves look like Tiny Teddy Bears
- Miscellaneous Strings – Experimental strings that I don’t think suit Steves such as Elastic Cord and Sewing Thread.
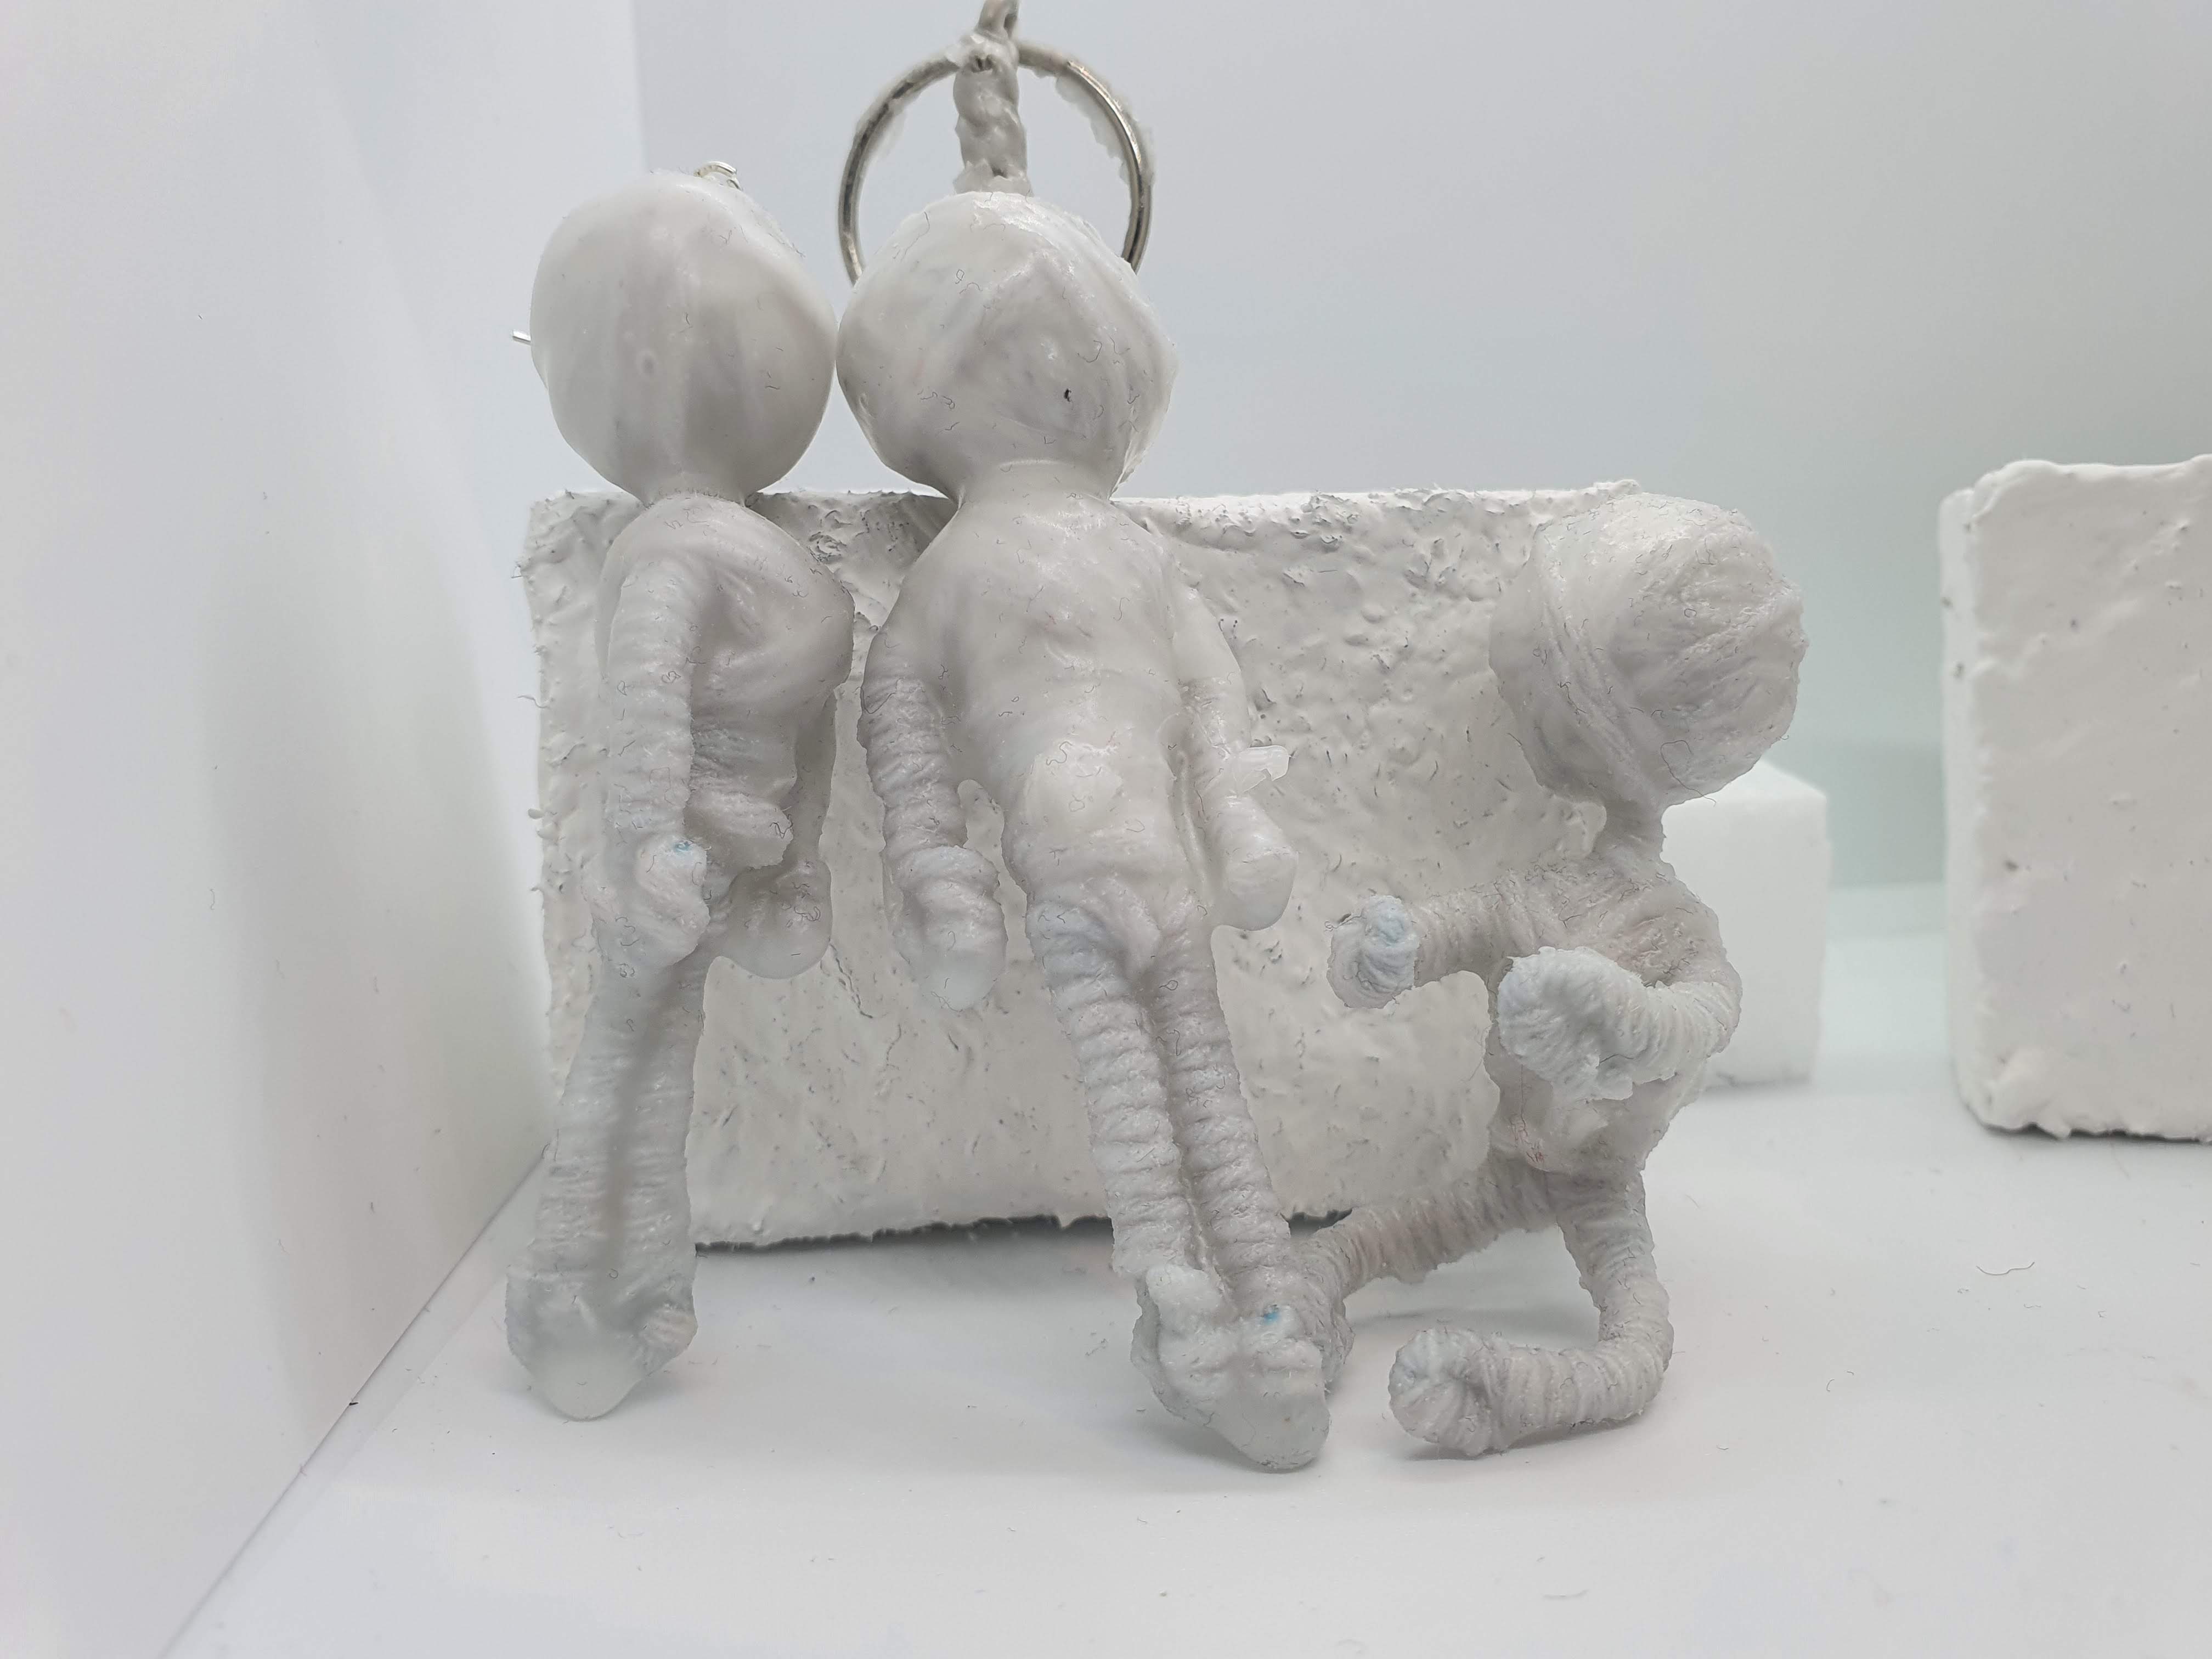
- Wax Coated String – String-made Steves dipped in wax.
Alternate Steve Forms – Colour + Form Experimentation
When I finished experimenting with different types of strings, I found which ones best suited the colour schemes I previously mentioned and made the various forms of Steves with those kinds of colours. However sometimes when making the large amounts of Steves I made, mistakes can happen which can either ruin a Steve or create an entirely different type in itself. These Steves I have deemed The Misfits, an unstable group that lurk on the outskirts of society living their best lives.
Final Alternate Steve Forms
After judging each form with its various different colours, I chose one from each type to be my final decision for what colour I want my Steves to be. So now that all the decisions for the regular Steves, It was finally time to make the Large Steve.


Steve Size Experimentation
After finalising the Steves, I started to experiment with the size of the Steves to see how large I could make them. I found a thicker gauge in my magpie collection (Gauge still unknown) as a stronger wire replacement for the more flexible wire I use for the Steves I usually make. With this new wire, I started trying to double the size of the steve with each new creation. For example, a normal Steve is approximately 7 cm in height and the Largest Steve ended up being around 3 feet tall. The largest Steve that I made also took around 16 hours spanning across 6 sessions, which is definitely the most coiling I have ever done for one piece.

Final One off Piece
When it comes to my final piece, It was difficult to assemble and make it look the way I envisioned it to look. I hope that if things were different and if I had full access to the resources I’m used to if I weren’t working from home. However, I was able to craft all the components needed for the final off to be created which includes the Giant Steve as well as 10 of each type of Steve form to go along side the One Off pieces presentation (Not included with the One Off piece)


Batch Finding Experimentation
When figuring out the batch, I wanted to try and make as many different forms of Steves so that I knew conclusive what kinds of Steves I was able to make. This allowed me insight into what kind of products I can make for the Steves to be. The findings I experimented with are as follows:
- Pendants – Silver Chains
- Dangle Hook Earrings – Gold, Silver and Stainless Steel findings
- Dangle Pole Earrings – Silver and Gold findings
- Stud Earrings/Pins – Stainless Steel findings
- Clip-on Earrings – Multi Colored Brass findings
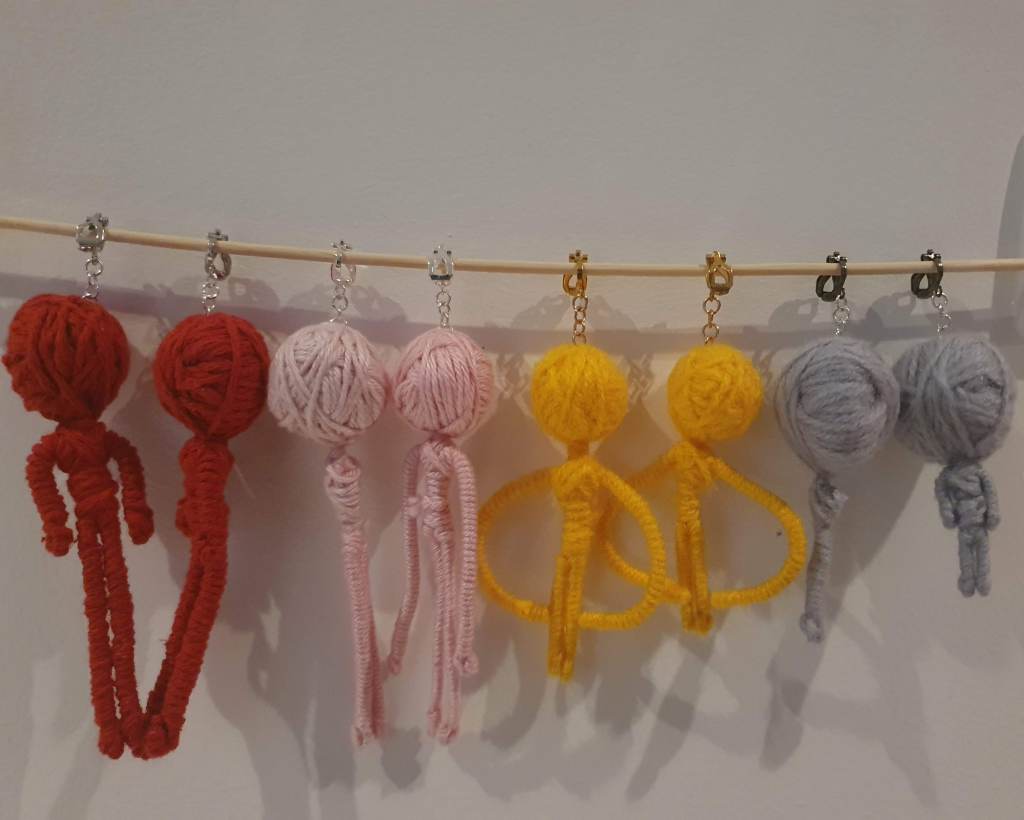
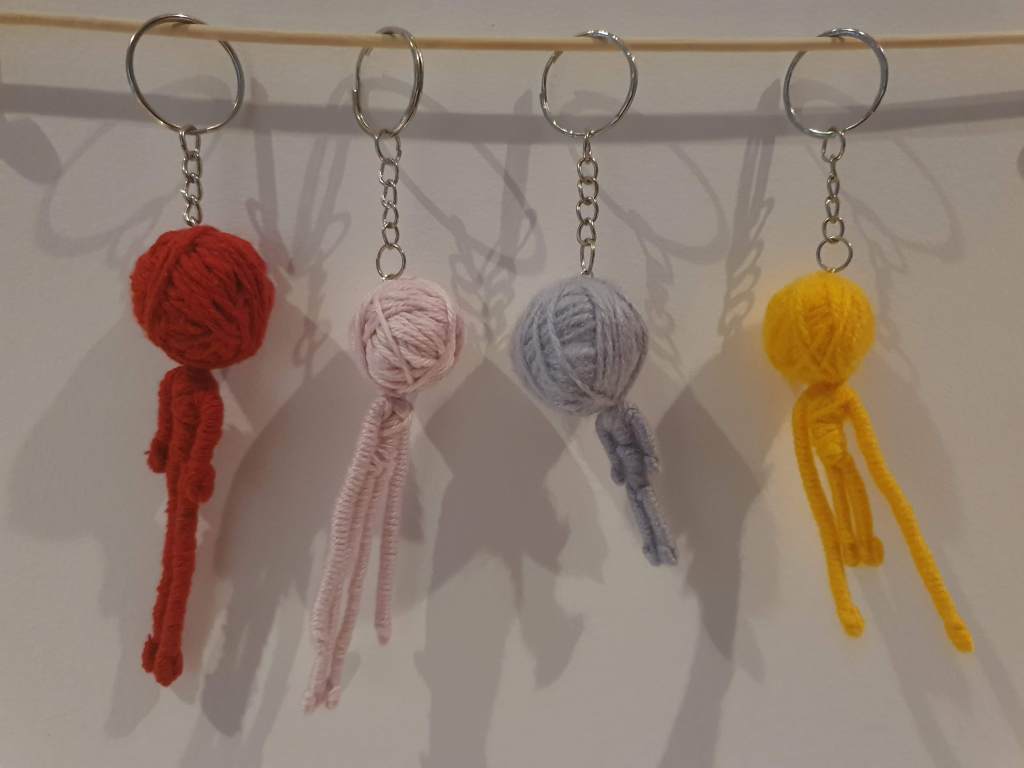
- Keyrings – Metal Alloy findings
- Jar Forms – Specimen jars that used to be filled with sequins
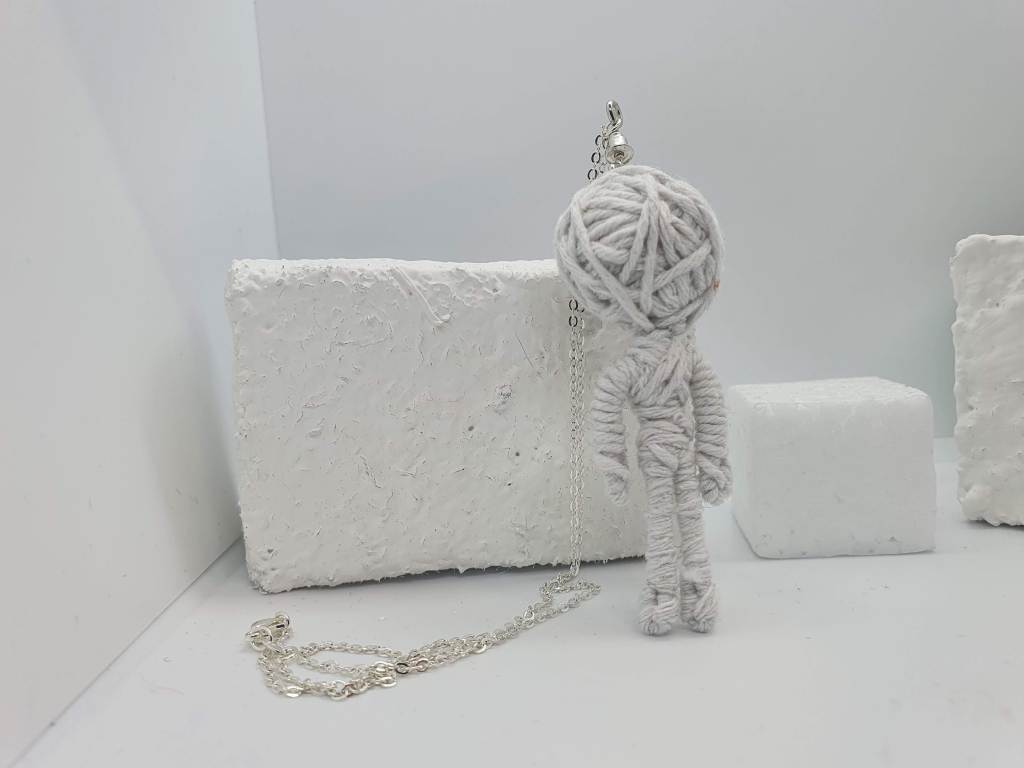


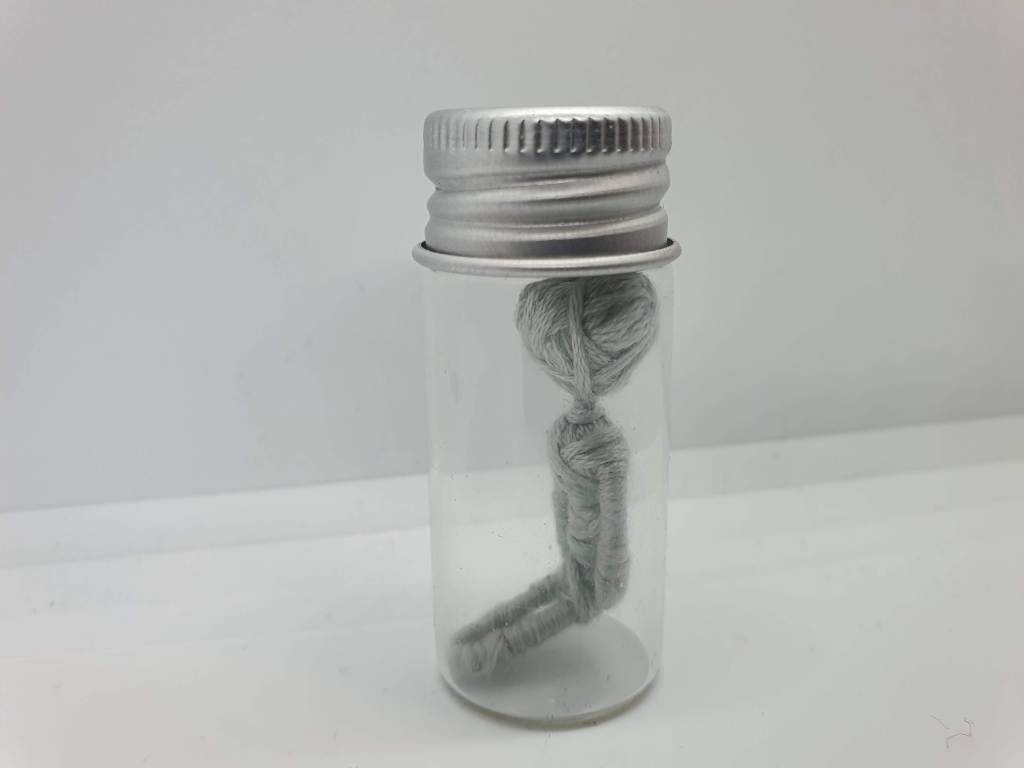
Final Finding Decision-Making
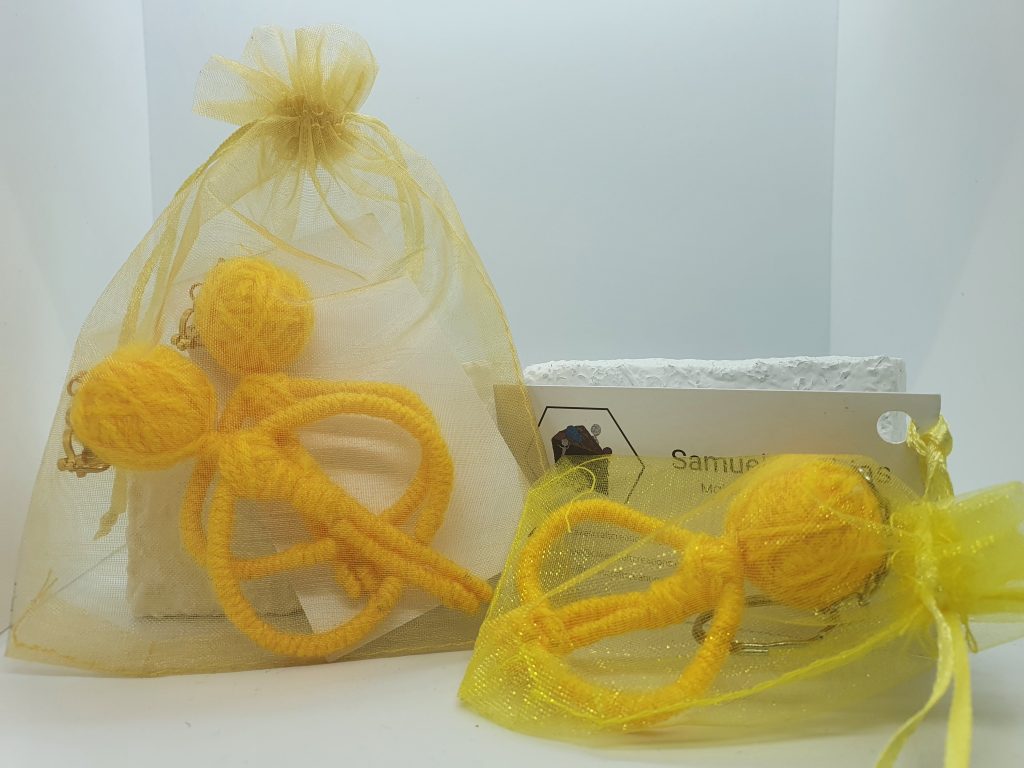
After going through all the different findings, I knew that I wanted Steves to be worn as earrings while also being showcased as keyrings. Here are some test examples of what those varying options of Steve forms would look like with those findings.
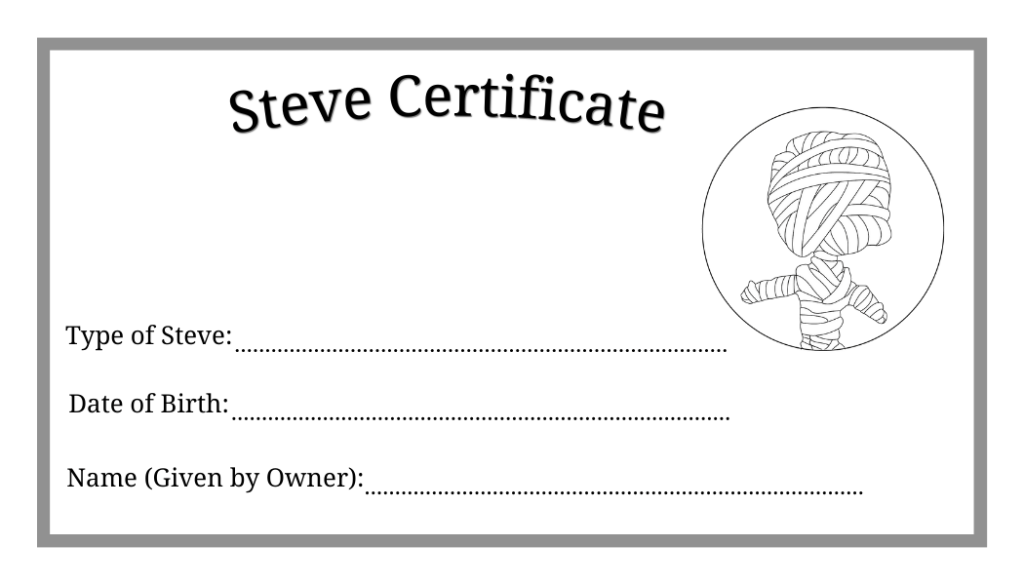
Steve Certificate Design
When thinking about packaging, I knew I wanted some fantastical form of classification to allow a Steve to be more personal as a gift. I digitally sketched up each form of the Steves for a fun illustration on the back while also making a Steve Stamp design for the front where all the information will be.

Final Batch Put Together
Here is what I would want the final batch to look like. The large bags perfectly fit everything inside conveniently while the smaller bag is a bit tighter and can’t fit everything inside so I think some product testing will have to take place before these actually go out for the exhibition.